No-Bake Cherry Cheesecake Bars
No-Bake Cherry Cheesecake Bars are a sweet whisper of summer, a creamy dream that requires no oven at all. They bring to mind lazy afternoons, the scent of cherry blossoms, and the simple joy of creating something delicious for loved ones. These bars are more than just a dessert; they are little parcels of happiness, made with love and a gentle hand, much like the recipes passed down through generations.
The magic of No-Bake Cherry Cheesecake Bars lies in their effortless elegance. They offer that irresistible tangy creaminess and a delightful crunch, all without the fuss of baking. It’s a recipe that feels like a warm embrace, perfect for those moments when you crave comfort and sweetness without complication. The bright, jewel-like cherry topping adds a touch of festivity, making them a welcome presence at any gathering or a quiet moment of indulgence.
What is No-Bake Cherry Cheesecake Bars?
No-Bake Cherry Cheesecake Bars are a simplified yet utterly satisfying take on the classic cheesecake. Instead of a traditional baked crust and a lengthy baking time, these bars feature a simple graham cracker base pressed into a pan. The filling is a luscious blend of cream cheese, sweetener, and cream, all brought together with a touch of vanilla and lemon for brightness. The entire endeavor is set in the refrigerator, creating a wonderfully creamy texture that is both decadent and light.
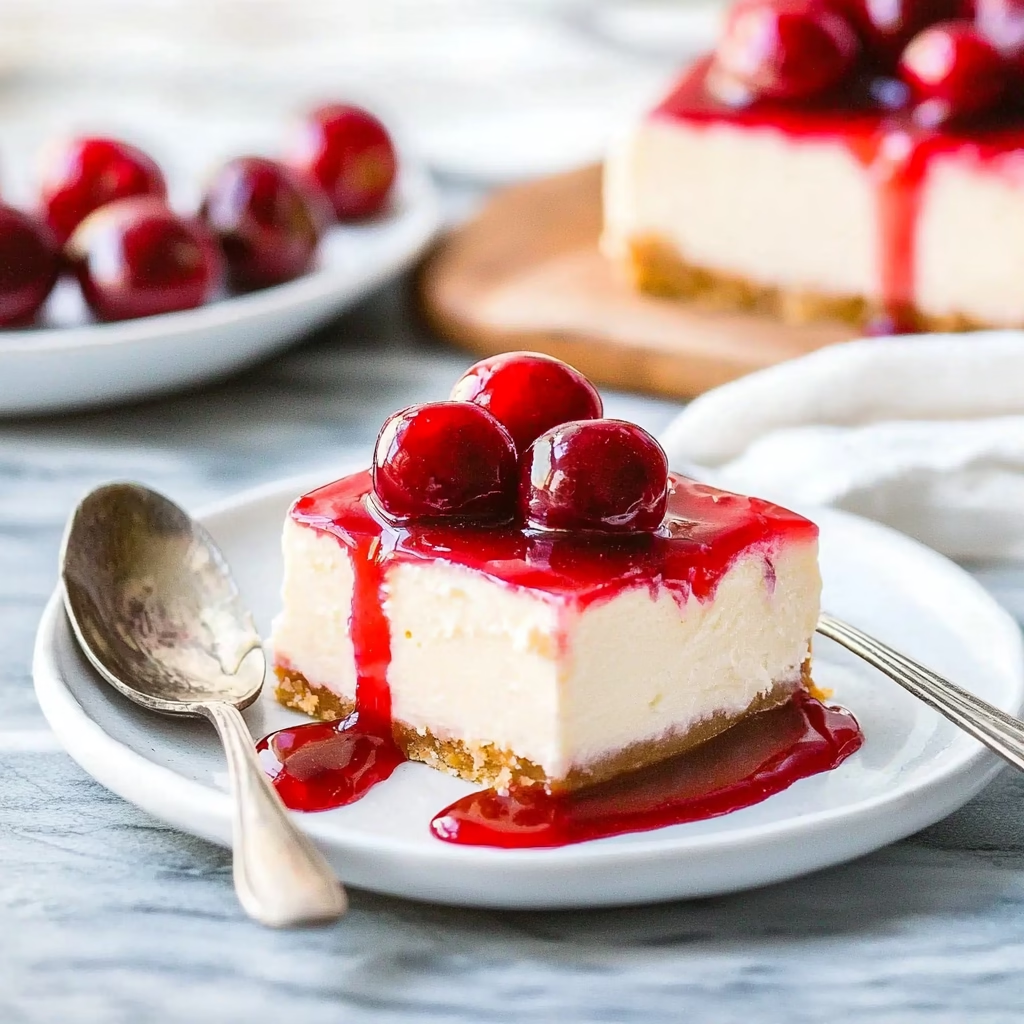
What truly sets these bars apart is the crown of sweet cherry pie filling. This vibrant topping isn’t just for looks; it provides a burst of fruity sweetness that perfectly complements the rich, tangy cheesecake. It’s a pairing that feels both classic and exciting, bringing a playful contrast to the smooth filling and crumbly crust. They embody the spirit of uncomplicated joy, allowing the fresh flavors to shine without overwhelming the palate.
Reasons to Try No-Bake Cherry Cheesecake Bars
There are so many delightful reasons to bring these No-Bake Cherry Cheesecake Bars into your kitchen. Firstly, they are incredibly forgiving and simple to make, making them a perfect project for beginner bakers or anyone looking for a quick dessert fix. The minimal active time means you can whip them up in just 15 minutes, leaving plenty of time for relaxing, connecting with family, or simply enjoying a quiet moment in your favorite armchair.
Beyond their ease, the taste and texture are simply divine. The creamy, melt-in-your-mouth filling, contrasted with the buttery graham cracker crust and the sweet burst of cherry topping, creates a delightful symphony of sensations. They are incredibly versatile, perfect for birthday parties, casual get-togethers, or even a midweek treat to lift your spirits. These bars are a testament to how simple ingredients can create profound comfort and joy.
Ingredients Needed to Make No-Bake Cherry Cheesecake Bars
To bring these delightful No-Bake Cherry Cheesecake Bars to life, gather these simple yet essential ingredients. Their straightforward nature is part of the charm, promising a smooth and enjoyable preparation process.
- 1 1/4 cups graham cracker crumbs (about 9-10 full graham crackers, crushed finely)
- 2 tablespoons granulated sugar
- 1/3 cup unsalted butter, melted
- 1 cup whipping cream (heavy cream works beautifully here)
- 16 oz brick-style cream cheese (ensure it’s full-fat and softened to room temperature)
- 3/4 cup powdered sugar (also known as confectioners’ sugar)
- 1 teaspoon vanilla extract
- 2 teaspoons lemon juice, freshly squeezed (for that essential tang)
- 1 jar cherry pie filling (for that beautiful, sweet topping)
Instructions to Make No-Bake Cherry Cheesecake Bars – Step by Step
Crafting these No-Bake Cherry Cheesecake Bars is a journey of simple pleasures. It begins with building a sturdy foundation and culminates in a creamy, dreamy topping, each step infused with the intention of creating delight.
Step 1: Begin by preparing your pan, which is essential for easy removal later. Line an 8×8-inch or 9×9-inch square baking pan with aluminum foil, making sure to leave an overhang on all sides. This overhang acts like gentle handles to lift the entire cheesecake out once it’s set. A light spray with non-stick cooking spray over the foil helps ensure nothing sticks, providing a smooth base for your creation.
Step 2: Now, let’s create the delightful graham cracker crust. In a medium bowl, combine the graham cracker crumbs and the granulated sugar. Pour in the melted butter and stir everything together until the crumbs are evenly moistened, resembling wet sand. This mixture then gets pressed firmly and evenly into the bottom of your prepared pan. This step is crucial for a stable, satisfying base for your cheesecake.
Step 3: In a large, clean bowl, pour in the cold whipping cream. Using an electric mixer, beat the cream on medium-high speed until stiff peaks form. This means when you lift the beaters, the cream holds its shape and points upwards. This airy, whipped cream will bring a wonderful lightness to our cheesecake filling, like little clouds of sweetness.
Step 4: In a separate, larger bowl, place your softened brick-style cream cheese. Beat the cream cheese with your electric mixer until it’s completely smooth and free of lumps; this usually takes a couple of minutes. You’ll want every bit to be lusciably creamy. Then, gradually beat in the powdered sugar until fully incorporated, followed by the vanilla extract and the freshly squeezed lemon juice. The lemon juice is our secret for that signature tang that balances the sweetness.
Step 5: This is where the magic truly comes together. Take your beautifully whipped cream from Step 3 and gently fold it into the cream cheese mixture from Step 4 using a rubber spatula. Use a light, folding motion, bringing the spatula down through the center and up around the sides of the bowl. Continue until the mixture is uniform in color and texture, with no streaks of cream cheese or whipped cream visible. Be careful not to overmix, as we want to keep that lovely airiness.
Step 6: Spoon this luscious, smooth filling evenly over the prepared graham cracker crust in the pan. Use your spatula to gently spread and smooth the top, creating an even surface. This pristine surface is ready for its final transformation. Now, the hardest part: patience! Cover the pan loosely and place it in the refrigerator to chill for at least 6 hours, or even better, overnight. This allows the cheesecake to set beautifully and develop its signature creamy texture.
Step 7: Once your cheesecake bars have fully chilled and set, it’s time for the grand reveal. Carefully use the foil overhang to lift the entire block of cheesecake out of the pan and place it onto a cutting board. This is such a satisfying moment, seeing your creation come to life! Slice the cheesecake into your desired number of bars, perhaps 9 or 12 squares, depending on how generous you wish to be.
Step 8: The final flourish! Spoon a generous dollop of the sweet cherry pie filling over the top of each individual bar. The vibrant red of the cherries atop the creamy white cheesecake is a visual delight and promises a burst of fruity flavor with every bite. Serve immediately and watch the smiles appear.
Chef’s Tips for a Perfect Result
- Ensure your cream cheese is truly at room temperature. This is key to achieving a perfectly smooth, lump-free filling without overmixing.
- When whipping the cream, make sure your bowl and beaters are completely clean and dry. Even a tiny bit of fat or moisture can prevent the cream from whipping properly.
- For a more intense graham cracker flavor, you can lightly toast the crumbs with the butter and sugar for a few minutes before pressing them into the pan. Let them cool completely before proceeding.
- Don’t skip the lemon juice! It adds a crucial brightness and tang that cuts through the richness of the cream cheese, making the bars perfectly balanced.
- Be gentle when folding the whipped cream into the cream cheese mixture. This preserves the airiness, ensuring a lighter, creamier texture rather than a dense one.
- Allow ample chilling time. While 6 hours is the minimum, overnight chilling allows the flavors to meld and the texture to firm up beautifully.
Variations and Substitutions
While these No-Bake Cherry Cheesecake Bars are wonderful as is, they also offer a canvas for your own creative culinary expressions. Here are a few ideas to adapt them to your liking or needs.
Vegan Option
- What to change: Use vegan cream cheese, vegan butter, vegan graham crackers, and a dairy-free whipped topping.
- Suggested substitute: Full-fat coconut cream (chilled and only the solid part used) can substitute for whipping cream, and store-bought vegan cream cheese works well.
- Impact: The flavor will be slightly different, with a subtle coconut note if using coconut cream, but the texture remains wonderfully creamy.
Gluten-Free Alternative
- What to change: Swap the graham cracker crumbs for gluten-free cookie crumbs or an almond flour-based crust.
- Suggested substitute: Use your favorite gluten-free vanilla wafer crumbs or a blend of almond flour, a touch of sugar, and melted butter.
- Impact: The base texture might be slightly different depending on the crumbs used, but the overall cheesecake experience remains intact.
Berry Twist
- What to change: Instead of cherry pie filling, use another fruit topping.
- Suggested substitute: Strawberry, blueberry, or mixed berry pie filling works beautifully. You can also use a homemade berry compote.
- Impact: Offers a delightful change in fruit flavor and color, allowing you to tailor the bars to seasonal availability or personal preference.
Low-Carb Version
- What to change: Use a sugar-free graham cracker alternative or an almond flour base, and a sugar substitute in the filling.
- Suggested substitute: An almond flour and sugar-free sweetener crust, and erythritol or stevia in place of powdered sugar.
- Impact: Significantly reduces sugar content while maintaining a delicious cheesecake profile, suitable for those watching their sugar intake.
Crust Swap
- What to change: Experiment with different cookie bases.
- Suggested substitute: Golden Oreos (creatively, removing the filling), vanilla wafers, or even shortbread cookies can be crushed for a unique crust flavor.
- Impact: Each cookie type will impart its own distinct flavor to the base, offering a fun twist on the classic.
How to Serve and Pair
These No-Bake Cherry Cheesecake Bars are a star on their own, but a few thoughtful touches can elevate them further. For a beautiful presentation, ensure each bar is topped with a generous spoonful of the glossy cherry filling. You can even add a tiny sprig of fresh mint or a sliver of candied cherry for an extra pop of color and elegance. They are perfect for potlucks, family gatherings, summer barbecues, or simply as a delightful end to a home-cooked meal.
Pairing these bars is wonderfully simple. Their sweet and tangy profile makes them a natural companion to a refreshing glass of iced tea or a light, crisp lemonade. For a truly decadent experience, consider a small scoop of vanilla bean ice cream served alongside, or a drizzle of caramel sauce. They are also lovely with a warm cup of coffee or a soothing herbal tea, especially shared with good company where stories flow as freely as laughter.
Storage and Reheating
Refrigerator
Store any leftover No-Bake Cherry Cheesecake Bars in an airtight container in the refrigerator. They will maintain their delightful creamy texture and fresh flavor for up to 4 days. It’s best to keep them in a single layer if possible to prevent them from sticking together, or use parchment paper between layers.
Freezer
These bars are best enjoyed fresh and do not freeze particularly well. The high moisture content in the cream cheese filling can lead to a grainy texture upon thawing. For the best quality, it is recommended to consume them within a few days of preparation.
Room Temperature
It is not recommended to leave No-Bake Cherry Cheesecake Bars at room temperature for extended periods, especially in warmer weather, due to the dairy content. They should be kept chilled to maintain their texture and prevent spoilage. If serving, bring them out just before you plan to enjoy them and return leftovers to the refrigerator promptly.
Reheating
Reheating is not necessary for No-Bake Cherry Cheesecake Bars, as they are designed to be served cold and chilled. Their creamy texture is at its best when cold, allowing the flavors to be crisp and refreshing. If the bars have become too firm from over-chilling, simply allow them to sit at room temperature for about 10-15 minutes before serving to soften slightly.
Frequently Asked Questions (FAQ)
Can I substitute the cherry pie filling with fresh cherries?
Yes, you can use fresh cherries, but they will need to be cooked down into a compote with sugar until slightly thickened. Fresh cherries alone will add too much moisture and may not provide the concentrated sweetness you get from pie filling.
How do I know when the cheesecake bars are properly set?
The bars are properly set when the filling is firm to the touch and doesn’t jiggle when the pan is gently shaken. It should slice cleanly without the filling oozing out excessively.
My cheesecake filling is lumpy. What went wrong?
Lumpiness usually occurs if the cream cheese wasn’t softened enough or if it was not beaten sufficiently until smooth before adding other ingredients. Ensure your cream cheese is at true room temperature for the creamiest result.
Can I make these bars a day in advance?
Absolutely, these No-Bake Cherry Cheesecake Bars are perfect for making ahead. They actually benefit from an overnight chill, which allows the flavors to meld beautifully and the texture to set perfectly.
What is the best way to serve these bars and customize them?
Serve them chilled, topped with cherry pie filling. You can customize them by adding a dollop of whipped cream, a sprinkle of toasted nuts, or even a thin chocolate drizzle for added flair.
CONCLUSION
No-Bake Cherry Cheesecake Bars are a delightful testament to simple elegance, offering a creamy, tangy, and utterly satisfying dessert experience. Their ease of preparation and irresistible combination of flavors make them a cherished recipe for any home cook. Dive into the joy of creating these bars, and let the sweet burst of cherry and smooth cream cheese enchant your senses.
Print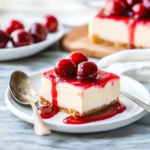
No-Bake Cherry Cheesecake Bars
- Prep Time: 15 minutes
- Cook Time: 0 minutes
- Total Time: 6 hours 15 minutes
- Yield: 12 slices 1x
- Category: Dessert
- Method: No-Bake
- Cuisine: American
- Diet: Vegetarian
Description
These No-Bake Cherry Cheesecake Bars are creamy, rich, and easy to make with a crunchy graham cracker crust and sweet cherry topping. Perfect for summer desserts and make-ahead entertaining.
Ingredients
For the Graham Cracker Crust
- 1 1/4 cup graham cracker crumbs
- 2 tablespoons granulated sugar
- 1/3 cup unsalted butter, melted
For the Cheesecake Filling
- 1 cup whipping cream
- 16 oz brick-style cream cheese, room temperature
- 3/4 cup powdered sugar
- 1 teaspoon vanilla
- 2 teaspoons freshly squeezed lemon juice
- 1 jar cherry pie filling
Instructions
1. Line an 8×8 or 9×9 inch square pan with aluminum foil leaving an overhang on each side. Lightly spray with non-stick cooking spray.
2. In a medium bowl stir together the graham cracker crumbs, sugar, and melted butter. Press firmly into the bottom of the prepared pan.
3. In a large bowl beat the whipping cream until stiff peaks form.
4. In a separate bowl beat the cream cheese until soft and smooth. Beat in the powdered sugar, vanilla, and lemon juice until fully combined.
5. Gently fold the whipped cream into the cream cheese mixture using a rubber spatula until smooth and no streaks remain.
6. Spread the cheesecake filling evenly over the crust and smooth the top.
7. Chill in the refrigerator for at least 6 hours or overnight until set.
8. Lift the bars out of the pan using the foil overhang and slice into bars.
9. Top each cheesecake bar with cherry pie filling before serving.
Notes
Whipping cream can be substituted with 1 1/2 cups thawed Cool Whip. Skip whipping the cream and fold in the Cool Whip instead.
Use full-fat brick-style cream cheese for the best texture and flavor.
The recipe can be doubled and baked in a 9×13 inch pan.
Store leftovers covered in the refrigerator for up to 4 days.
Do not freeze the cheesecake bars.
Nutrition
- Serving Size: 1 slice
- Calories: 318
- Sugar: 13g
- Sodium: 187mg
- Fat: 26g
- Saturated Fat: 15g
- Unsaturated Fat: 9g
- Trans Fat: 0g
- Carbohydrates: 18g
- Fiber: 1g
- Protein: 3g
- Cholesterol: 82mg