No-bake cherry cheesecake is more than just a dessert; it’s a feeling. It’s the gentle hum of the refrigerator in a quiet kitchen late at night, the anticipation of a sweet treat that requires no fiery oven, only patience and a little bit of love. This particular recipe, a no-bake cherry cheesecake bursting with vibrant fruit and creamy cheesecake bliss, holds a special place in my heart. It reminds me of simpler times, of summer evenings spent with family, where the simple act of sharing a dessert became a cherished memory.
The magic of a no-bake cherry cheesecake lies in its effortless elegance. It doesn’t demand hours slaving over a hot stove or the anxiety of a cracked crust. Instead, it offers a smooth, luscious texture that melts in your mouth, crowned with a jewel-toned cherry topping. It’s the kind of dessert that comforts the soul, bringing a touch of sweetness to everyday moments and making any occasion feel a little more special. This recipe is my invitation for you to create your own sweet memories.
What is No-Bake Cherry Cheesecake?
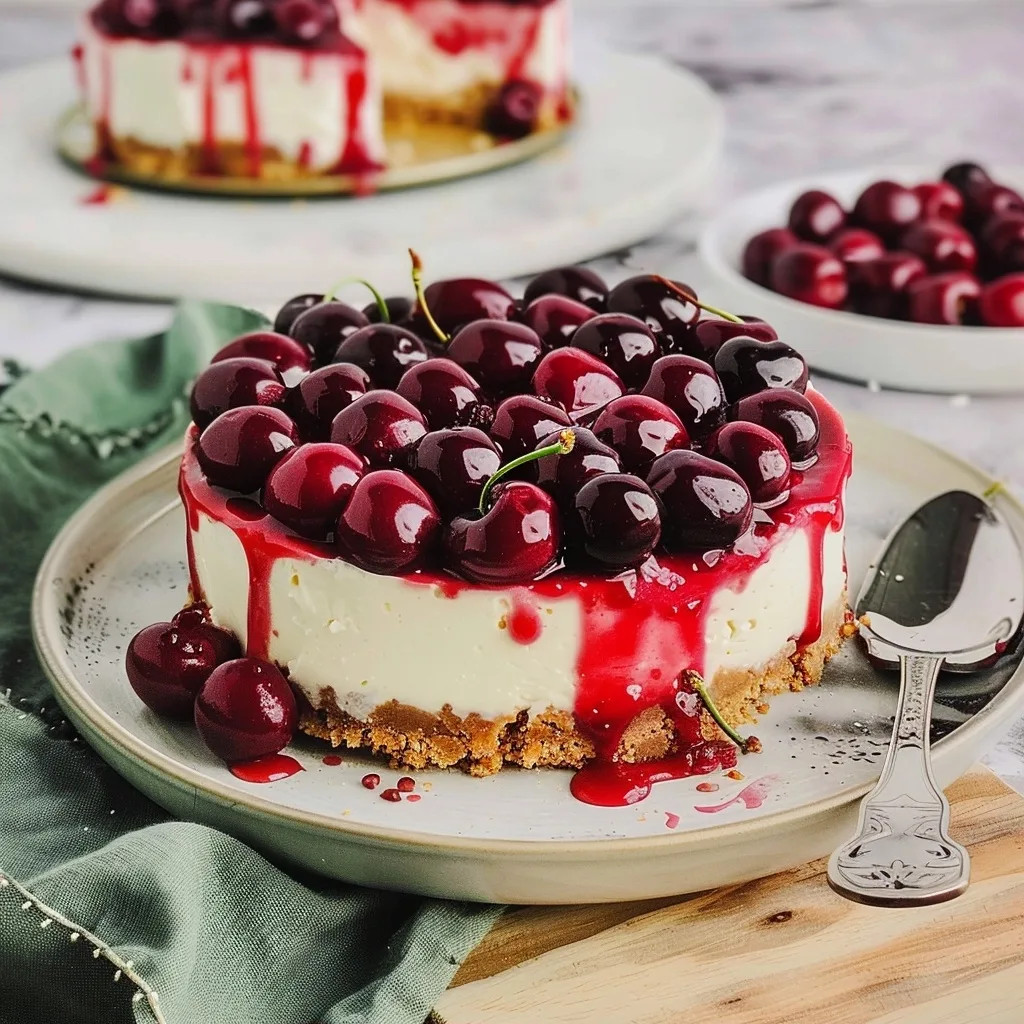
No-bake cherry cheesecake is a delightful dessert that captures the essence of classic New York cheesecake without the need for baking. It features a buttery, crumbly crust, typically made from crushed graham crackers or cookies, pressed into a springform pan. The filling is a dreamy blend of cream cheese, sugar, and flavoring, whipped until smooth and airy, then chilled until firm. What elevates this version is the vibrant, naturally sweet cherry topping, which adds a burst of fruity flavor and a beautiful visual contrast.
This dessert finds its roots in the American love for quick, satisfying treats. The ‘no-bake’ aspect emerged as a brilliant adaptation for warmer climates or for those seeking simpler dessert solutions, especially in times when ovens might be otherwise occupied or when a desire for immediate gratification calls. The addition of cherries, often a summer bounty, brings a seasonal joy and a classic pairing that has delighted palates for generations. It’s a harmonious blend of textures and flavors, offering a sophisticated yet incredibly approachable dessert experience.
Reasons to Try No-Bake Cherry Cheesecake
The sheer simplicity of this no-bake cherry cheesecake is its most compelling charm. It’s a dessert that invites everyone, from seasoned bakers to those just dipping their toes into the culinary waters, to create something truly impressive. The absence of baking removes a layer of complexity, stress, and time, making it perfect for busy weeknights, impromptu gatherings, or those moments when a sweet craving strikes and needs a swift, delicious answer. It’s a testament to how easily comfort and elegance can coexist in the kitchen.
Beyond its ease, the taste and texture are simply divine. The creamy, cool filling is a perfect counterpoint to the crisp, sweet crust, and the burst of tangy-sweet cherries on top cuts through the richness beautifully. It’s incredibly versatile, fitting seamlessly into potluck spreads, family dinners, or as a special treat for dessert lovers. This recipe is a wonderful way to bring joy and a touch of homemade magic to any table, proving that sometimes, the most comforting creations are the ones that come together with the least fuss.
This recipe is ideal for beginners who might be intimidated by traditional cheesecakes. It’s also a lifesaver for busy home cooks who want to prepare a show-stopping dessert ahead of time. Families will love the collaborative aspect of helping to press the crust or prepare the topping, and it’s a fantastic option for summer entertaining when you want to keep the kitchen cool. It’s a guaranteed crowd-pleaser that offers delightful flavor and a creamy texture with minimal effort.
Ingredients Needed to Make No-Bake Cherry Cheesecake
For the cheesecake base:
-
2 & ⅓ cups (250gms) Graham cracker crumbs
-
1 stick (½ cup/ 115gms) unsalted butter, melted
For the cheesecake filling:
-
2 x 8 ounce tubs (450gms total) full fat cream cheese, softened to room temperature
-
½ cup (110gms) granulated white sugar
-
1 & ½ teaspoons vanilla essence
-
1 tablespoon fresh lemon juice
-
1 cup (250mls) heavy cream (also called thickened cream)
For the cherry topping:
-
1 teaspoon tapioca starch
-
1 & ½ tablespoons granulated white sugar
-
2 teaspoons fresh lemon juice
-
2 tablespoons water
-
4 cups (approx. 1.3 lbs/600gms) fresh cherries, pitted (or frozen, thawed)
Instructions to Make No-Bake Cherry Cheesecake – Step by Step
Step 1: Preparing the Springform Pan and Crust
Begin by preparing your springform cheesecake tin. It’s a good idea to line the bottom and sides with parchment paper or food-safe acetate. This makes removing the cheesecake a much smoother, worry-free process later on. Next, take your graham crackers and, if they aren’t already, break them into smaller pieces before blitzing them briefly in a food processor until you have fine crumbs. If you don’t have a food processor, you can place the crackers in a sturdy zip-top bag and crush them with a rolling pin – it’s a satisfying way to start, almost like pounding away any worries.
Step 2: Creating the Flavorful Base
Gently melt your unsalted butter. You can do this in a microwave-safe bowl, zapping it in 30-second intervals until fully liquid, or place it in a small saucepan over low heat on the stove. Once melted, pour this liquid gold into the graham cracker crumbs. Mix them together thoroughly with a fork or spatula until all the crumbs are moistened and the mixture resembles fine, damp sand. This ensures your crust will hold together beautifully without becoming too hard.
Step 3: Forming and Chilling the Crust
Pour this buttery crumb mixture into your prepared springform tin. Using the bottom of a glass or a flat-bottomed measuring cup, gently but firmly press the crumbs down to form an even base. Be sure not to press too hard, as this can result in a tough crust. Once your base is beautifully formed, place the tin in the refrigerator to chill for at least one hour, or even up to overnight if you’re planning ahead. This chilling time allows the butter to solidify, creating a firm foundation for your luscious filling.
Step 4: Crafting the Creamy Cheesecake Filling
Now, for the heart of our cheesecake: the filling. It’s crucial that your cream cheese is at room temperature for a perfectly smooth texture. This is a tip my grandmother always emphasized, saying it’s the secret to avoiding lumps and ensuring a velvety finish. Beat the softened cream cheese briefly in a large bowl with an electric mixer until it’s smooth and creamy. Add the granulated sugar, vanilla essence, and fresh lemon juice. Beat again on low speed until everything is just combined and the sugar has fully dissolved. You want the mixture to be homogeneous and inviting.
Step 5: Whipping and Folding the Cream
In a separate, clean bowl, whip the heavy cream using your electric mixer until firm peaks form. This means when you lift the beaters, the cream holds its shape. Be careful not to over-whip, or you might end up with butter! Gently, using a spatula, fold the whipped cream into the cream cheese mixture. The technique here is crucial: fold gently to incorporate air and maintain that light, airy texture that defines a perfect no-bake cheesecake. Continue folding until the mixture is evenly combined and has a beautiful, smooth consistency.
Step 6: Assembling the Cheesecake
Once your crust is nicely chilled and firm, lovingly spoon the cream cheese filling over the base. Gently spread it evenly using your spatula, creating a smooth, inviting surface. Back into the refrigerator it goes! This time, it needs to chill for at least four hours, though I always recommend chilling it overnight if possible. This extended chill time is what allows the filling to set properly, achieving that signature firm yet creamy texture that makes this dessert so irresistible.
Step 7: Preparing the Vibrant Cherry Topping
While the cheesecake is chilling, let’s turn our attention to the dazzling cherry topping. Place a small, shallow bowl in the freezer to chill – this will help us test the topping’s thickness later. If using fresh cherries, wash them and carefully remove the pits. You can leave them whole for a prettier presentation, or halve them for easier eating. In a small saucepan, whisk together the tapioca starch, granulated sugar, fresh lemon juice, and water until thoroughly combined. This blend forms the base of our glossy sauce.
Step 8: Cooking the Fruity Cherry Sauce
Add the prepared cherries to the saucepan with the liquid mixture. Stir gently to coat them evenly. Place the saucepan over medium heat and cook for about five minutes, stirring frequently. As it heats, you’ll notice the sauce transform. Initially it might look milky, but as it thickens and the cherries release their juices, it will become a beautiful, glossy, dark red. To test if it’s thick enough, take a small spoonful and carefully tip it onto the chilled bowl from the freezer. It should cool and thicken enough to hold its shape, dripping slowly. If it’s still too thin, continue to cook it down for a few more minutes, stirring well, then test again.
Step 9: Cooling and Chilling the Topping
Once your cherry topping has reached the perfect consistency, remove the saucepan from the heat. Allow the sauce to cool completely. You can speed this up by stirring it occasionally as it cools. Once it’s at room temperature, transfer the cherry topping to a container and chill it in the refrigerator until you are ready to assemble and serve your beautiful cheesecake. Keeping it chilled ensures it’s the perfect temperature to pour over your set cheesecake.
Step 10: Assembling and Serving
This is the moment we’ve all been waiting for! Just before serving, carefully remove the springform ring from your beautifully chilled cheesecake. Gently peel away the parchment paper or acetate from the sides. You can use a spatula to smooth the sides of the cheesecake if needed, giving it a polished look. With a large, sharp knife, you can carefully separate the base of the cake from the parchment paper at the bottom. Then, transfer your magnificent creation to a serving plate or board. Finally, artfully pour the glossy, chilled cherry sauce over the top, letting it cascade down the sides. Slice, serve, and savor the creamy, dreamy perfection!
Chef’s Tips for a Perfect Result
-
Ensure your cream cheese is truly at room temperature; this is key to a silky smooth filling without lumps.
-
Don’t over-process the graham crackers; a few slightly larger crumbs add a pleasant texture to the crust.
-
When folding the whipped cream into the cream cheese mixture, use a gentle lifting motion to keep the filling light and airy.
-
Chill the cherry sauce in a bowl from the freezer to accurately test its thickness; it should hold its shape slightly when cooled.
-
For the cleanest slices, dip a sharp knife in hot water and wipe it dry between each cut.
-
Adding the cherry topping just before serving prevents the crust from becoming soggy and keeps the presentation pristine.
Variations and Substitutions
Vegan Option
-
What to change: Replace cream cheese with vegan cream cheese, butter with vegan butter, and heavy cream with full-fat coconut milk (chilled, using only the thick cream) or a vegan whipping cream alternative. Use vegan graham crackers for the base.
-
Suggested substitute: For the base, consider digestive biscuits or cookies that are certified vegan. For the filling, a blend of soaked cashews pulsed until smooth can also work, though it will alter the texture slightly.
-
How it impacts flavor or texture: Vegan versions might have a slightly different tang or creaminess depending on the substitutes used. Coconut milk can impart a subtle coconut flavor.
Gluten-Free Alternative
-
What to change: Use gluten-free graham crackers or cookies for the base. Ensure all other ingredients are naturally gluten-free (most are).
-
Suggested substitute: Almond flour or a mix of almond and coconut flour combined with melted butter and a touch of sweetener can create a delicious gluten-free crust.
-
How it impacts flavor or texture: A nut-based crust will have a richer, nuttier flavor and a slightly different texture, potentially more crumbly than a traditional graham cracker base.
Low-Carb Version
-
What to change: Substitute granulated sugar with a keto-friendly sweetener like erythritol or xylitol (ensure xylitol is safe for pets if you have them). Use low-carb graham cracker alternatives or a nut crust.
-
Suggested substitute: A base made from almond flour, melted butter, and a sugar substitute is ideal. For the cherries, consider a keto-friendly cherry syrup or use them sparingly, as they contain natural sugars.
-
How it impacts flavor or texture: The sweetness will be adjusted, and the crust texture will change with nut flours. Cherries may need a sweetener in their topping to compensate for the lack of sugar.
Budget Swap for Crust
-
What to change: Instead of graham crackers, use vanilla wafers, digestive biscuits, or even plain shortbread cookies.
-
Suggested substitute: Vanilla wafers offer a lovely sweetness, while shortbread provides a richer, buttery flavor.
-
How it impacts flavor or texture: The flavor profile of the crust will change depending on the cookie used, potentially making it sweeter or more buttery. The texture will remain similar as long as they are crushed well.
How to Serve and Pair
This No-Bake Cherry Cheesecake is a star on its own, but a few thoughtful touches can elevate its presentation. Serve chilled slices on elegant dessert plates. A small dollop of unsweetened or lightly sweetened whipped cream on the side provides a lovely contrast in texture and tempers the sweetness. A few fresh mint leaves or a sprinkle of toasted slivered almonds can add a pop of color and a hint of crunch. This dessert is perfect for celebrations like birthdays, anniversaries, or as a delightful end to a summer barbecue. It pairs beautifully with a light, crisp sparkling cider or a refreshing herbal tea, like chamomile or peppermint, to complement the fruity and creamy notes without overwhelming them.
Storage and Reheating
Refrigerator
Store the cheesecake, ideally without the cherry topping, in an airtight container in the refrigerator. It will keep well for up to 3 days. If you’ve already added the cherry topping, it’s best to consume it within 1-2 days, as the sauce can begin to affect the crust’s texture over time. For longer storage of leftovers, it’s best to add the cherry sauce just before serving individual slices.
Freezer
This no-bake cheesecake freezes remarkably well. Wrap the un-topped cheesecake tightly in plastic wrap, followed by a layer of aluminum foil, or place it in a freezer-safe container. It can be stored in the freezer for up to 2 months, though it’s best enjoyed within 1 month for optimal taste and texture. The cherry topping can be frozen separately in an airtight container or even in ice cube trays for single-serving portions. Thaw frozen components in the refrigerator overnight.
Room Temperature
It is not recommended to store this no-bake cheesecake at room temperature for extended periods, especially after it has been prepared. Due to the dairy content in the filling, it should remain refrigerated to prevent spoilage and maintain its best texture. Aim to serve it shortly after topping if it has been out of the fridge for a while.
Reheating
Reheating is generally not necessary or desirable for a no-bake cheesecake, as its appeal lies in its cool, creamy texture. If you are serving a slice that has been refrigerated, allow it to sit at room temperature for about 10-15 minutes before serving to soften slightly. If you are reheating a slice that was frozen and you want to gently warm it (which is unusual for this type of dessert), the best method would be extremely low heat in an oven for a very short period, or perhaps gently warming individual cherry portions in a saucepan. However, it is best enjoyed chilled.
Frequently Asked Questions (FAQ)
Can I substitute the graham crackers in the crust?
Yes, you can substitute graham crackers with vanilla wafers, digestive biscuits, or even crushed shortbread cookies for a different flavor profile. Ensure you adjust any added sugar in the crust if the cookies are already very sweet.
How do I know when my no-bake cheesecake filling is set?
The cheesecake filling is set when it is firm to the touch and can be easily sliced without crumbling or oozing. It should hold its shape when a knife is inserted and then removed. Proper chilling time is essential for it to reach this consistency.
My cheesecake filling is lumpy, what went wrong?
Lumpy filling usually occurs when the cream cheese is not softened enough or if it was beaten too vigorously after adding liquids. Ensure cream cheese is at true room temperature and beat it until smooth before adding other ingredients, mixing only until just combined.
Can I make this no-bake cherry cheesecake a day in advance?
Absolutely! This no-bake cherry cheesecake is ideal for making ahead. Chilling it overnight allows the filling to fully set and the flavors to meld beautifully, ensuring the best texture and taste.
What’s the best way to customize my no-bake cherry cheesecake?
You can customize your cheesecake by changing the fruit topping to berries, peaches, or even a chocolate ganache. Adding a swirl of raspberry coulis into the filling before setting or incorporating lemon zest into the crust offers further delicious variations.
Conclusion
This No-Bake Cherry Cheesecake is a creamy, dreamy delight that embodies comfort and simplicity. It’s a dessert that speaks of gentle kitchen moments and the pure joy of sharing something delicious. The moment you taste that cool, smooth filling paired with a bright, tangy cherry topping, you’ll understand why it’s so irresistible. It’s a little slice of happiness, crafted with love, ready to grace your table and warm your heart.
Print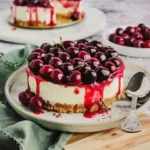
No-Bake Cherry Cheesecake
- Prep Time: 15
- Total Time: 15
- Yield: 8 servings 1x
- Category: desserts
- Method: No-Bake
- Cuisine: American
- Diet: Gluten-Free (with gluten-free crust)
Description
A creamy, dreamy cheesecake with a buttery crust and vivid cherry topping, chilled to perfection. No baking required—just mix, press, chill, and enjoy this elegant, no-fuss dessert that feels like a summer memory in every bite.
Ingredients
1 1/2 cups crushed graham crackers or digestive biscuits
1/4 cup melted butter
2 tablespoons granulated sugar
400g cream cheese (softened)
1 cup granulated sugar
1/2 cup heavy cream or milk
2 tablespoons cornstarch
1 teaspoon pure vanilla extract
2 cups pitted cherries (fresh or canned in juice)
1/4 cup cherry juice (from can or fresh)
1/4 cup granulated sugar for topping
1 tablespoon cornstarch
Instructions
Spray a 9-inch springform pan with cooking oil.
Combine crushed graham crackers, melted butter, and 2 tablespoons sugar. Press the mixture into the pan to form a crust.
Chill the crust for 30 minutes.
Beat cream cheese and 1 cup sugar until smooth. Add heavy cream/milk, cornstarch, and vanilla. Keep beating until fluffy.
Pour the filling over the chilled crust. Smooth the surface and chill for 2-4 hours until firm.
For the cherry topping, mix cherries, cherry juice, 1/4 cup sugar, and cornstarch in a saucepan. Simmer 10 minutes if using fresh cherries; mix until thickened if using canned. Cool completely.
Spread cherry topping over the chilled cheesecake. Return to the fridge for 1 hour to set before slicing.
Notes
Use digestive biscuits if unavailable for graham crackers.
Adjust sugar in the topping to balance tart cherries.
Chill for at least 2 hours for a firm texture.
Can substitute heavy cream with milk for a lighter filling.
Store refrigerated in an airtight container for up to 3 days.
Nutrition
- Serving Size: 1 slice
- Calories: 420
- Sugar: 32g
- Sodium: 280mg
- Fat: 24g
- Saturated Fat: 12g
- Carbohydrates: 40g
- Fiber: 2g
- Protein: 8g
- Cholesterol: 50mg