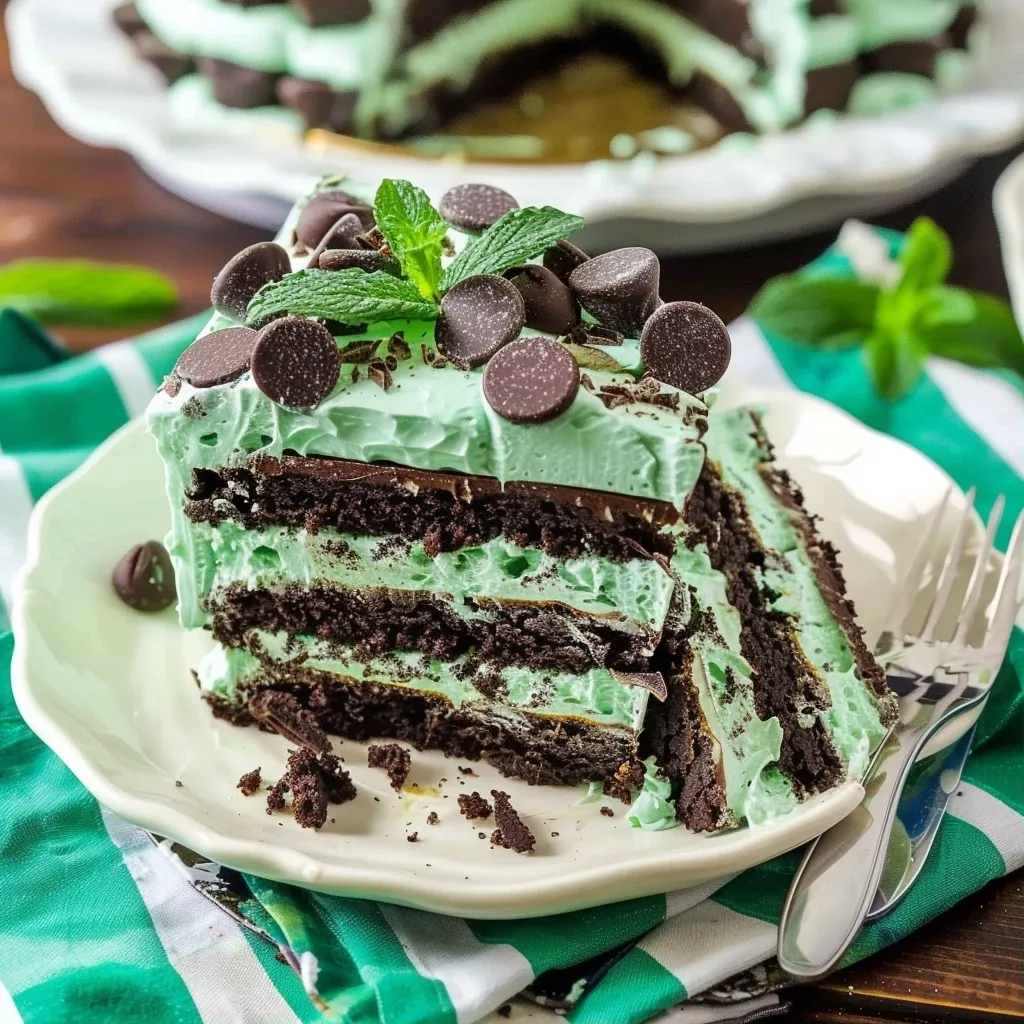
Chocolate Mint Icebox Cake: A No-Bake Dream of Cool Comfort
Chocolate Mint Icebox Cake is more than just a dessert; it’s a whispered secret of cool, creamy delight on a warm day, a perfectly balanced bite that speaks of thoughtful preparation and pure joy. It’s the kind of treat that feels both simple and utterly special, reminding me of lazy summer afternoons and the gentle art of making moments sweeter. This no-bake marvel brings together familiar flavors in a way that feels brand new, creating a texture that’s both tender and decadent, melting away with every spoonful.
My grandmother used to say that some of the best desserts are the ones that let time do the heavy lifting, and a chocolate mint icebox cake is a testament to that wisdom. It’s a testament to patience, a gentle reminder to slow down and let the magic unfold in the quiet coolness of the refrigerator. This recipe is born from those cherished memories, a desire to capture that perfect harmony of rich chocolate and bright mint, all wrapped up in a wonderfully easy, no-bake package.
What is Chocolate Mint Icebox Cake?
A Chocolate Mint Icebox Cake is a wonderfully effortless dessert that earns its name by requiring no baking whatsoever. Instead, it relies on chilling time to meld its distinct layers into a cohesive, cake-like texture. At its heart, it’s a symphony of crisp chocolate sandwich cookies, often a beloved brand that softens beautifully in the refrigerator, layered with a luscious, whipped cream filling infused with both vanilla and a refreshing hint of mint.
The magic of this icebox cake lies in its transformation. Those initial crisp cookies, when allowed to rest over several hours in the creamy mixture, absorb moisture and soften into a tender, cake-like consistency. The addition of mint extract and often a touch of green food coloring elevates the classic chocolate cookie and cream combination, offering a cool, invigorating contrast that makes the whole experience feel like a special occasion. It’s a dessert that whispers, rather than shouts, its elegance.
Reasons to Try Chocolate Mint Icebox Cake
There are countless reasons to fall in love with this Chocolate Mint Icebox Cake, but perhaps the most compelling is its sheer simplicity combined with spectacular results. Imagine a dessert that looks impressive and tastes divine, yet requires no oven time and minimal fuss. This makes it an absolute lifesaver for busy weekdays or when you’re entertaining and want to spend more time with your guests than in the kitchen. The stress-free nature of this recipe allows for a more relaxed experience, truly embodying the joy of sharing good food.
This cake is also incredibly versatile and forgiving, making it perfect for both novice bakers and seasoned cooks seeking a quick, delightful option. It’s a wonderful way to introduce younger helpers to the joy of dessert making, allowing them to participate in layering and spreading. The bold, refreshing flavor profile of chocolate and mint is universally loved, making it a guaranteed crowd-pleaser for any gathering, from casual summer barbecues to more formal celebrations. It’s an accessible path to pure dessert happiness.
Ingredients Needed to Make Chocolate Mint Icebox Cake
- 2 (18.71 ounce) packages chocolate sandwich cookies (like Oreos)
- 4 cups heavy whipping cream, very cold
- 4 tablespoons powdered sugar (also called confectioners’ sugar or icing sugar)
- 1 teaspoon pure vanilla extract
- 1 teaspoon mint extract
- A few drops of green food coloring (optional, for a pale mint hue)
- 10-12 chocolate mint candies (like Andes), finely chopped, for topping
Instructions to Make Chocolate Mint Icebox Cake – Step by Step
Step 1: Begin by preparing your luscious mint whipped cream. In a large, chilled bowl, combine the very cold heavy whipping cream, the powdered sugar, the pure vanilla extract, and the mint extract. If you desire a subtle green tint reminiscent of fresh mint leaves, add just a few drops of green food coloring at this stage. Using an electric mixer, start on a low speed and gradually increase to high. Beat the mixture until stiff peaks form, meaning that when you lift the beaters, the cream holds its shape firmly. Be careful not to overbeat, as this can turn whipped cream into butter; look for glossy, firm peaks.
Step 2: Now, it’s time to build the foundation of your icebox cake. Take a 9×13 inch baking dish and arrange the chocolate sandwich cookies in a single, even layer across the bottom. You might find that some cookies need to be broken in half to fill in any gaps, especially along the edges, ensuring a solid cookie base. The goal here is to create a continuous layer that will soak up the cream and develop that signature cake-like texture.
Step 3: Gently spread about one-third of the prepared mint whipped cream evenly over the layer of cookies. Use a spatula to coax the cream into every corner, creating a smooth surface for the next layer. This creamy layer is where the transformation truly begins, softening the cookies beneath and promising delightful bites to come.
Step 4: Create your second cookie layer by arranging another single layer of chocolate sandwich cookies over the whipped cream. Again, break cookies as needed to ensure complete coverage. This repetition of cookie and cream layers is what gives the icebox cake its beautiful structure and incredibly satisfying texture once it has chilled.
Step 5: Crown your creation with the remaining mint whipped cream, spreading it evenly over the second cookie layer. Ensure the top is smooth and covers all the cookies completely. This creates a beautiful, pristine white canvas, ready for its final touch of garnish. Take a moment to appreciate the layers you’ve built; they are the promise of the delightful dessert to come.
Step 6: For a final flourish, sprinkle the finely chopped chocolate mint candies evenly over the top of the whipped cream. This not only adds a beautiful visual appeal but also provides delightful little bursts of minty chocolate flavor with every serving. It’s a small detail that adds a wonderful textural contrast and a delightful finishing note.
Step 7: The most crucial step for this icebox cake is patience. Cover the baking dish tightly with plastic wrap or foil, and place it in the refrigerator to chill for at least 8 hours, or preferably overnight. This essential chilling period allows the cookies to soften completely, absorbing the moisture from the cream and transforming into a tender, cake-like consistency. It’s this slow melding that turns simple ingredients into something truly magical.
Step 8: Once the chilling time is complete, your Chocolate Mint Icebox Cake is ready to be enjoyed. Carefully slice the cake into portions using a sharp knife, wiping the blade clean between cuts for neat servings. Serve immediately and savor the cool, creamy, minty chocolate goodness. It’s a dessert that’s worth the wait, offering pure, unadulterated refreshment.
Chef’s Tips for a Perfect Result
- Ensure your heavy whipping cream and your mixing bowl are thoroughly chilled before you begin whipping. This helps the cream achieve stiff peaks more easily and prevents it from separating.
- For the creamiest texture, use a high-quality vanilla extract and a good mint extract; their flavors truly shine through in this simple dessert.
- When layering the cookies, don’t obsess over perfect placement; the beauty of an icebox cake is its slightly rustic charm, and any gaps will be filled by the soft cream.
- Don’t rush the chilling time. Overnight is truly the ideal period for the cookies to absorb moisture and develop their cake-like texture, making all the difference.
- If you are using a lighter color chocolate sandwich cookie, a touch of green food coloring will help create that iconic minty visual that fans of the flavor will appreciate.
- To achieve nice, clean slices, use a long, sharp knife that has been dipped in hot water and dried before each cut.
Variations and Substitutions
- Chocolate Lover’s Dream: Swap half of the chocolate sandwich cookies for plain chocolate wafers or even thin chocolate brownie slices for an intensified chocolate experience.
- Mint Intensity Adjustment: If you prefer a more subtle mint flavor, reduce the mint extract to 1/2 teaspoon and increase the vanilla extract to 1 1/2 teaspoons.
- Crunchy Topping Swap: Instead of chopped Andes mints, try crushed chocolate-covered mint candies, shaved chocolate curls, or even a sprinkle of mini chocolate chips for topping.
- Dairy-Free Delight: Use a dairy-free whipped topping alternative (ensure it’s one that whips well) and dairy-free chocolate sandwich cookies. The texture might be slightly different but still delicious.
- Flavor Boost: For an extra layer of sophistication, consider folding a tablespoon or two of finely grated dark chocolate into the whipped cream mixture before spreading.
How to Serve and Pair
This Chocolate Mint Icebox Cake is a spectacular dessert that shines on its own, needing little accompaniment. For a truly decadent experience, serve a generous slice with a small dollop of extra whipped cream or a few fresh mint leaves. It pairs wonderfully with a hot cup of coffee or a glass of cold milk, the two complementing the cake’s flavors beautifully. This cake is perfect for any summer gathering, backyard barbecue, or as a refreshing end to a special meal.
Presentation is simple yet elegant. A dusting of cocoa powder or a few extra chocolate mint candies can elevate its appearance. Consider serving it in individual portions by layering the ingredients in small glasses or jars for an elegant, single-serving treat. This icebox cake is also a delightful option for birthdays, anniversaries, or any occasion where a cool, comforting, and crowd-pleasing dessert is needed.
Storage and Reheating
Refrigerator
Leftovers of your Chocolate Mint Icebox Cake can be stored in the refrigerator for up to 3 days. Keep it covered tightly with plastic wrap or aluminum foil to prevent it from absorbing odors from other foods and to maintain its moisture. While it will remain delicious, the cookie layers may continue to soften slightly over time.
Freezer
For longer storage, the cake can be frozen. Wrap it very securely in plastic wrap, followed by a layer of aluminum foil or place it in an airtight freezer-safe container. It can be stored in the freezer for up to 1 month. Thaw it in the refrigerator for several hours or at room temperature for about an hour before serving, as it needs to soften somewhat.
Room Temperature
Due to the whipped cream and the softened cookie texture, this icebox cake is best kept chilled. It should not be left at room temperature for more than 1-2 hours before serving. Extended periods at room temperature can compromise both the texture and food safety of the dessert.
Reheating
This icebox cake is designed to be served chilled and does not require reheating. If you have frozen it, allow it to thaw properly in the refrigerator or at room temperature until it reaches a soft, sliceable consistency. Reheating would alter the intended texture and melt the creamy layers, so it is not recommended.
Frequently Asked Questions (FAQ)
Can I substitute the chocolate sandwich cookies with graham crackers?
Yes, you can substitute graham crackers for the chocolate sandwich cookies, but know that it will change the flavor profile significantly from chocolatey to a more neutral base. The cookies will soften similarly, but the end taste will be less rich and more akin to a traditional icebox or no-bake cheesecake base.
How do I know when the icebox cake is ready to serve?
The icebox cake is ready to serve when the cookie layers have softened considerably and have a cake-like texture. You can test this by gently pressing the side of the cake; it should feel yielding rather than crisp, and slicing should be easy.
My whipped cream isn’t stiff, what went wrong?
If your whipped cream isn’t reaching stiff peaks, it’s likely that your cream wasn’t cold enough, your bowl wasn’t chilled, or you haven’t beaten it for long enough. Ensure all components are very cold and continue beating; sometimes it just needs a bit more time.
Can I make this icebox cake a day ahead of time?
Absolutely. In fact, making this Chocolate Mint Icebox Cake a day ahead of time is highly recommended. The extended chilling period is crucial for allowing the cookies to soften into that delightful cake-like texture and for the flavors to meld beautifully.
What are the best ways to customize this cake?
You can customize this cake by adding a thin layer of chocolate ganache between the whipped cream and cookie layers for extra richness, or by folding in chocolate chips or mini mint candies into the whipped cream itself. Another idea is to top it with fresh berries or a drizzle of chocolate sauce.
CONCLUSION
This Chocolate Mint Icebox Cake is a wonderfully simple yet elegant no-bake dessert, offering a perfect balance of cool mint and rich chocolate. It’s a testament to how a few simple ingredients, with a little patience, can create something truly magical. Dive into this refreshing treat and discover the irresistible allure of its signature minty chocolate flavor that graces every creamy, tender bite.
Print
Chocolate Mint Icebox Cake
- Prep Time: 20
- Total Time: 380
- Yield: 8 servings 1x
- Category: desserts
- Method: No-Bake
- Cuisine: American
- Diet: Vegetarian
Description
A no-bake, refrigerator-set dessert layers of crisp dark chocolate cookies and velvety cream. This cool comfort treat combines rich chocolate with a refreshing mint swirl, perfect for warm days or lazy summer afternoons. Let the fridge work its magic for a decadent, easy-to-assemble cake.
Ingredients
24 chocolate sandwich cookies (e.g., dark chocolate Oreo-style)
8 oz cream cheese, room temperature
1/2 cup whole milk or non-dairy milk
1/2 cup powdered sugar
1 tbsp pure vanilla extract
1.5 tbsp pure mint extract
Optional: 10 drops natural green food coloring
Instructions
Line a 9×5-inch loaf pan with parchment paper
Crush 12 cookies for the bottom layer
Beat cream cheese until smooth
Whisk in milk, powdered sugar, vanilla, and mint extracts
Add green food coloring if desired
Spread half the cream mixture over the crushed cookies
Layer remaining cookies
Top with remaining cream mixture
Chill for 6-8 hours until set
Unmold and slice into 8 servings
Notes
Cookies soften significantly after refrigeration
Can be prepared up to 24 hours in advance
For halal/non-dairy version: use halal-certified cream cheese and non-dairy milk
Mint extract can be substituted with 1/4 cup finely chopped fresh mint leaves (strain cream mix first)
Cover and refrigerate for best results
Nutrition
- Serving Size: 1 serving
- Calories: 300
- Sugar: 20g
- Sodium: 80mg
- Fat: 18g
- Saturated Fat: 10g
- Carbohydrates: 33g
- Fiber: 2g
- Protein: 5g
- Cholesterol: 45mg


