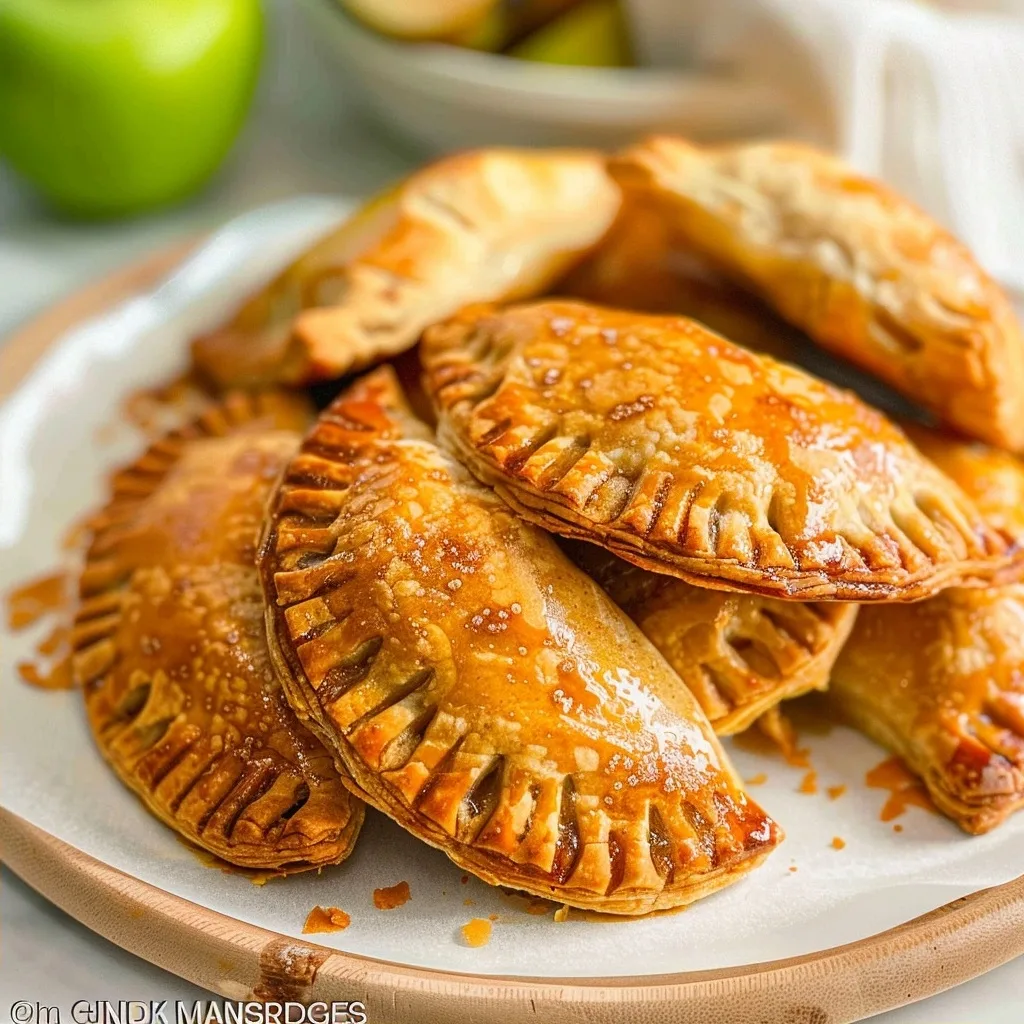
Apple hand pies are the ultimate expression of kitchen warmth, offering a golden, flaky crust filled with the spiced, comforting sweetness of autumn-inspired apples. Whenever I fold these little golden pockets, I am reminded of afternoons spent in my grandmother’s quiet kitchen, where the scent of cinnamon and baking fruit promised a gentle pause from the world. Making these by hand is a beautiful way to ground yourself during a busy week or to share a tangible piece of love with the people who matter most.
Bringing apple hand pies into your collection of go-to recipes ensures that you always have a comforting, accessible treat ready for a quiet evening or a gathering. There is something deeply satisfying about the process of rolling, filling, and crimping the dough, turning simple pantry staples into something that sparkles with warmth and nostalgia. This recipe focuses on creating a perfect balance between a crisp, buttery exterior and a luscious, tender fruit center that feels like a hug in every single bite.
What is Apple Hand Pies?
Apple hand pies are individual, portable desserts that effectively capture all the magic of a traditional full-sized apple pie within a compact, hand-held shape. By cutting pastry into smaller rounds and folding them over a scoop of cinnamon-spiced filling, you create a self-contained serving that requires no plates or forks when you are on the go. They trace their roots back to the old-fashioned concept of a pasty, designed to be carried by field workers or travelers who needed a wholesome, filling meal that could withstand a day in the pocket or lunch pail.
Unlike deep-dish pies that can be messy to serve, these beauties keep all the juices sealed inside by the crimped edges. The combination of high-quality store-bought or homemade pastry and a thoughtful apple filling creates an iconic textural contrast. They are unique because they offer that perfect ratio of crisp crust to sweet fruit in every mouthful, ensuring that no bite is overly dominated by pastry or filling alone.
Reasons to Try Apple Hand Pies
You should try making apple hand pies because they are incredibly versatile and significantly less daunting to prepare than a large, multi-serving pie. For beginners, the process is a masterclass in pastry handling, and for home cooks, it provides a creative outlet for experimenting with different apple varieties or spice blends. They are perfect for serving at breakfast, as a lunchbox surprise, or even as a simple dessert after a hearty family meal.
These pies are also a fantastic time-saver, as they bake much faster than a standard pie. This makes them a brilliant choice when you are short on time but still want to offer something homemade and thoughtful to your houseguests or family. Whether you are dealing with a stressful week and need the grounding ritual of baking, or simply craving something sweet and nostalgic, these pies deliver an immediate sense of comfort.
Ingredients Needed to Make Apple Hand Pies
- 21 ounces apple pie filling (either store-bought or your favorite homemade blend)
- 1 tablespoon ground cinnamon (adjust according to your preference for spice)
- 1 package prepared double pie crust (thawed if frozen, or your own chilled shortcrust)
- 1 large egg
- 1 teaspoon milk (or a splash of water for the wash)
Instructions to Make Apple Hand Pies – Step by Step
Step 1: Start by preheating your oven to 425°F. While the oven reaches temperature, prepare your workspace by clearing a clean, dry surface for rolling out your dough. If you are using pre-prepared filling, take a moment to chop the larger apple slices into smaller, bite-sized pieces, as this makes the pies easier to seal.
Step 2: In a small bowl, stir the chopped apple filling together with the cinnamon until combined. In a separate tiny dish, whisk the egg and milk together until smooth. This egg wash is the secret to getting that gorgeous, glossy golden finish on your crust that makes the pies look truly professional.
Step 3: Roll out your pie dough until it is about 1/8 inch thick. Using a 4-inch circle cutter, carefully cut out 10 rounds of dough, re-rolling the scraps as needed. These circles will form the base of your pies, so try to handle the dough gently to keep it cold and crumbly.
Step 4: Spoon approximately 1 ½ tablespoons of the prepared apple filling into the center of each circle. Be careful not to overfill, as you need enough space around the perimeter to ensure the seal stays tight and the filling doesn’t bubble over during baking.
Step 5: Lightly brush the edges of the dough circle with your egg wash. Fold the dough over to create a half-moon shape, then use a fork to press and crimp the edges firmly together. Once sealed, carefully cut two small slits on top of each pie to allow steam to escape while they are in the oven.
Step 6: Brush the prepared pies with the remaining egg wash and arrange them on a parchment-lined tray. Bake for 12 minutes, or until the dough is a deep, inviting golden brown. Let them cool slightly before serving to allow the filling to set, which prevents it from being too hot when you take that first bite.
Chef’s Tips for a Perfect Result
- Keep the dough cold: If your kitchen is warm, place the cut circles of dough in the refrigerator for 5 minutes before filling to ensure a flaky finish.
- Use a fork for crimping: Pressing down firmly with the tines of a fork not only seals the filling inside but also gives the pies a lovely traditional look.
- Watch the heat: Since 425°F is a high temperature, stay close to the oven during the last few minutes to ensure the crust doesn’t darken too quickly.
- Cut the apples small: Smaller apple pieces ensure that the pie folds neatly and eliminates the risk of jagged edges poking through the crust.
Variations and Substitutions
- Vegan Option: Use a commercial vegan-friendly puff pastry or shortcrust and replace the egg wash with a thin mixture of non-dairy milk and a tiny pinch of turmeric for color.
- Gluten-Free Alternative: Swap the standard pie dough for a gluten-free pastry blend, ensuring it is kept extra cold during the rolling process, as gluten-free dough can be more delicate.
- Budget Swap: If you do not have a circle cutter, use a small bowl or a wide-mouthed glass to cut your dough shapes, saving you the expense of buying specialized tools.
How to Serve and Pair
Serve these warm with a light dusting of powdered sugar or a small scoop of vanilla bean ice cream to balance the intensity of the cinnamon. They pair beautifully with a cup of hot chamomile tea or a spice-forward chai, making them an excellent choice for an afternoon tea time. For a casual gathering, serve them on a wooden board at room temperature so guests can simply grab one and go.
Storage and Reheating
Refrigerator
Store your cooled pies in an airtight container for up to 3 days. This keeps the crust from absorbing too much moisture from the filling.
Freezer
You can freeze unbaked, assembled pies on a tray before transferring them to a heavy-duty freezer bag. They will keep for up to 2 months and can be baked straight from frozen by adding a few minutes to the total bake time.
Reheating
To refresh the crispness of the crust, place the pies in a preheated 350°F oven for 5 to 7 minutes. Avoid the microwave, as it will cause the pastry to lose its signature crunch.
Frequently Asked Questions (FAQ)
Can I substitute the apple filling with another fruit?
You can absolutely substitute the apple filling with other fruits like peaches, berries, or cherries. Ensure the fruit is sliced small and any extra watery juices are drained or thickened with a little cornstarch to prevent a soggy crust.
How can I tell when my apple hand pies are finished baking?
The pies are finished when the pastry is a deep, consistent golden brown color and the edges appear firm to the touch. You may also notice small bubbles of the fruit filling peeking through the steam vents, which indicates the interior is thoroughly cooked.
Why is my filling leaking through the edges?
Leaking usually happens because of trapped air, overfilling, or an incomplete seal during the crimping process. Ensure you use enough egg wash as a glue, press the edges firmly with a fork, and do not pack too much filling into the center.
Can I prepare the pies in advance?
Yes, you can assemble the pies and keep them in the refrigerator covered in plastic wrap for up to 4 hours before baking. For longer periods, it is best to freeze the assembled, unbaked pies until you are ready to bake them fresh.
What is the best way to customize these pies?
You can customize these by adding a pinch of nutmeg, cardamom, or even finely chopped pecans to the apple filling for extra texture and warmth. A sprinkle of coarse sanding sugar over the egg wash before baking also adds a lovely professional crunch.
Conclusion
Apple hand pies are a simple, heart-warming way to invite comfort into your home. Each golden pocket holds a story of patience and simple joy, making them perfect for sharing with those you love. I hope you find as much peace in the baking process as I do, letting the aroma fill your kitchen with a cozy, timeless embrace that turns any day into a special occasion.
Print
Classic Golden Apple Hand Pies
- Prep Time: 45
- Cook Time: 25
- Total Time: 70
- Yield: 12 hand pies 1x
- Category: desserts
- Method: Baking
- Cuisine: American
- Diet: Vegetarian
Description
These delightful apple hand pies are the ultimate expression of kitchen warmth, offering a golden, flaky crust filled with the spiced, comforting sweetness of autumn-inspired apples. Capturing the magic of a traditional pie in a portable, individual serving, they are perfect for a cozy snack, a lunchbox surprise, or a quick dessert. Each pie is carefully crafted for a perfect ratio of crisp pastry to tender fruit, providing a nostalgic taste that feels like a hug in every bite.
Ingredients
2 1/2 cups all-purpose flour
1 cup unsalted butter, cold and cubed
1/4 cup granulated sugar
1/4 teaspoon salt
6 tablespoons ice water
3 large Granny Smith apples, peeled and diced small
1/2 cup brown sugar
1 teaspoon ground cinnamon
1/4 teaspoon ground nutmeg
1 tablespoon lemon juice
1 egg, whisked (for egg wash)
Instructions
In a large bowl, whisk together the flour, sugar, and salt.
Cut the cold butter into the flour mixture using a pastry cutter or your fingers until it resembles coarse crumbs.
Gradually add ice water, one tablespoon at a time, mixing until the dough just comes together into a cohesive disk.
Wrap the dough in plastic and chill in the refrigerator for at least 30 minutes.
Prepare the filling by combining the diced apples, brown sugar, cinnamon, nutmeg, and lemon juice in a saucepan over medium heat, cooking until apples are slightly tender (about 5-8 minutes), then let cool completely.
Preheat your oven to 375°F (190°C) and line a baking sheet with parchment paper.
Roll out the chilled dough on a floured surface and cut into rounds using a 4-inch cookie cutter.
Place a spoonful of the apple mixture in the center of each round, fold the dough over to create a half-moon, and crimp the edges tightly with a fork.
Brush the tops with the egg wash and cut tiny steam vents on each pie.
Bake for 20-25 minutes until the pastry is golden brown.
Cool on a wire rack before serving.
Notes
Ensure the butter remains very cold throughout the process to guarantee a flaky crust. You can substitute Granny Smith apples with Honeycrisp or Gala for a sweeter flavor profile. Store leftovers in an airtight container for up to 3 days or reheat in a toaster oven for the best texture.
Nutrition
- Serving Size: 1 hand pie
- Calories: 260
- Sugar: 14g
- Sodium: 85mg
- Fat: 12g
- Saturated Fat: 7g
- Carbohydrates: 36g
- Fiber: 2g
- Protein: 3g
- Cholesterol: 45mg


