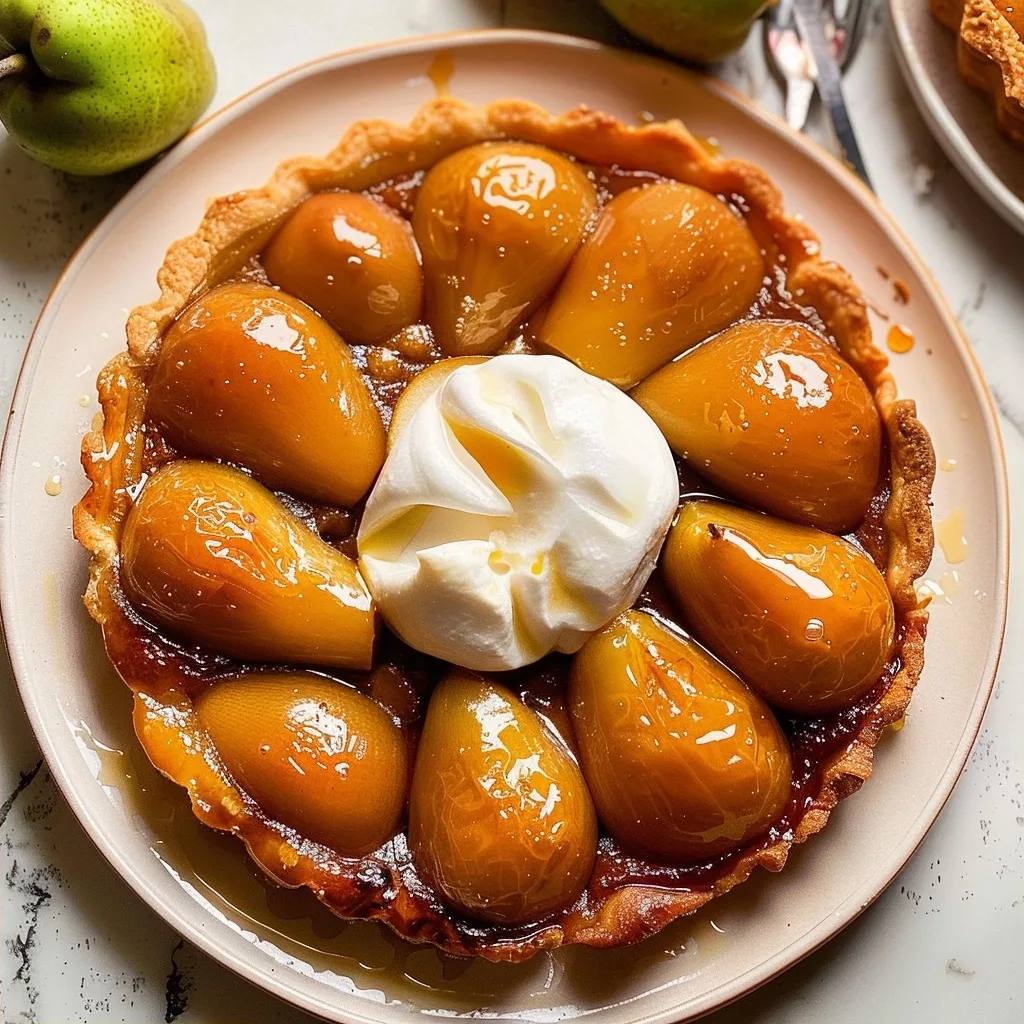
Pear Tarte Tatin is one of those timeless recipes that feels like a quiet hug on a chilly afternoon. When I turn to this rustic French classic, I am reminded of my grandmother’s kitchen, where the scent of butter and fruit bubbling away usually meant that everything in the world was going to be alright. This dessert is essentially the art of patience, where pears are transformed by a simple caramel sauce and tucked beneath a buttery, flaky crust to create a masterpiece that feels both humble and sophisticated.
Creating a beautiful Pear Tarte Tatin at home can be intimidating, but I promise it is far simpler than its reputation suggests. By breaking down the process into mindful, easy steps, you can achieve that perfect balance of caramelized sweetness and crisp, buttery pastry without the stress. It is my favorite recipe to share when I need to slow down and create something that honors the simple, honest ingredients we have at our fingertips.
What is Pear Tarte Tatin?
A Pear Tarte Tatin is a refined version of the traditional French upside-down tart, characteristically known for its gorgeous, inverted presentation. Unlike a standard pie where the fruit sits exposed, the Tarte Tatin is baked fruit-side down, allowing the pears to bathe in a deep, rich caramel as they roast in the oven. The result is a tender, deeply flavored fruit base topped with a golden, crisp crust that is revealed only when you flip the tart over just before serving.
True to its classic origins, this tart prioritizes the natural sweetness of the pears, elevated by a combination of warming spices and a buttery caramel base. It is a dish that highlights the beauty of simplicity, requiring only a handful of pantry staples to achieve a result that tastes professional and deeply comforting.
Reasons to Try Pear Tarte Tatin
If you are looking for a dessert that offers high reward for reasonable effort, this is the one. There is a profound sense of satisfaction in watching the transformation of sugar and butter into a glowing amber caramel, and the final look of the inverted, glossy pears always leaves guests impressed. It is a perfect way to practice your pastry skills while keeping the overall process accessible for any home baker.
Beyond the final result, this recipe is incredibly versatile and forgiving. Whether you are hosting a cozy dinner party or simply need a soulful project for a quiet Sunday afternoon, this tart fits perfectly. It fills your home with the most incredible aroma, turning your kitchen into a sanctuary of warmth and sweetness that invites everyone to the table.
Ingredients Needed to Make Pear Tarte Tatin
For the Crust:
-
1 and 1/2 cups all-purpose flour (spooned and leveled)
-
2 Tablespoons granulated sugar
-
1/4 teaspoon salt
-
1/2 cup cold unsalted butter, cubed (keep it chilled!)
-
1/4 cup ice-cold water, plus more as needed
For the Topping:
-
5–6 small, semi-firm pears (like Anjou or Bosc)
-
1 Tablespoon freshly squeezed lemon or orange juice
-
1/4 teaspoon ground cinnamon
-
1/8 teaspoon ground nutmeg
-
1/8 teaspoon ground ginger
-
1/4 cup unsalted butter
-
1/2 cup packed light or dark brown sugar
Instructions to Make Pear Tarte Tatin – Step by Step
Step 1: Begin by preparing the crust. In a medium mixing bowl, whisk together your flour, sugar, and salt. Use a pastry cutter or two forks to gently cut in the cold, cubed butter until the mixture looks like coarse, pea-sized crumbs. Add the ice-cold water, stirring just until the flour is moistened, adding a tablespoon more if the dough feels too dry to come together. Shape it into a disc, wrap it well, and let it rest in the refrigerator for at least an hour to ensure a flaky texture.
Step 2: While your dough chills, prepare the pears. Peel the pears, halve them lengthwise, and carefully scoop out the core and stem. Place them in a bowl and gently toss with the lemon or orange juice, cinnamon, nutmeg, and ginger so every inch is coated with that warm, fragrant spice. Keeping them chilled in the bowl until needed helps maintain their structure.
Step 3: Make the caramel by melting the butter in a 10-inch oven-safe skillet over medium heat. Whisk in the brown sugar; don’t worry if it looks separated at first, as it will come together into a smooth, bubbling syrup as you whisk for about 3 minutes. Remove the heat, let it cool slightly, and set it aside.
Step 4: Preheat your oven to 400°F (204°C). Roll out your chilled dough into an 11-12 inch circle. Arrange your pear halves, cut-side up, in the skillet. Carefully drape the pastry over the pears, tucking the edges inside the skillet with a spoon. Prick the dough a few times with a fork to let the steam escape, ensuring the crust cooks evenly.
Step 5: Bake the tart for 20 minutes at 400°F, then carefully reduce the heat to 375°F for another 25 minutes. You are looking for a beautiful, deep golden-brown crust. Once finished, let it cool for about 10 minutes on a rack—this resting time is vital for the caramel to set slightly so it doesn’t run everywhere when you flip it.
Step 6: Place a large serving platter over the skillet and, using oven mitts and a confident motion, invert the tart over the sink to catch any stray caramel. Lift the skillet carefully to reveal the gleaming, golden pears. Slice and serve while it is still warm and fragrant.
Chef’s Tips for a Perfect Result
-
Use very cold butter for the crust; chilling the cubes in the freezer for 15 minutes before mixing prevents the butter from melting, ensuring flaky layers.
-
Choose semi-firm pears like Anjou or Bosc, as they hold their shape perfectly under high heat without turning into mush.
-
Do not fear the initial separation when melting butter and sugar; consistent whisking will create a smooth, emulsified caramel every time.
-
Always perform the final flip over the sink; it is a safe, practical way to manage hot caramel while keeping your counters clean.
Variations and Substitutions
-
Gluten-Free Alternative: Swap the all-purpose flour for a high-quality 1-to-1 gluten-free baking blend; the result remains remarkably similar in texture.
-
Spice Adjustments: If you prefer warmer notes, add a pinch of ground cardamom or cloves to the pear mixture for a slightly more exotic aroma.
-
Budget Swap: If you are low on specific pears, firm apples like Granny Smith work beautifully, offering a slightly tart contrast to the sweet caramel.
How to Serve and Pair
The best way to serve a Pear Tarte Tatin is warm, right off the skillet. A generous scoop of cold vanilla bean ice cream or a dollop of unsweetened whipped cream makes for the perfect temperature contrast. For a cozy finish, serve this with a pot of loose-leaf chamomile or spiced tea, making the experience feel intentional and calm.
Storage and Reheating
Refrigerator: Wrap the cooled tart well or place it in an airtight container for up to 4 days. The flavors actually deepen a bit the next day.
Freezer: The unbaked dough disc can be frozen for up to 3 months; simply thaw it overnight in the refrigerator before rolling it out.
Reheating: To restore that crisp crust, place the tart in a 350°F oven for about 10-15 minutes. Avoid the microwave, as it tends to soften the pastry crust too much.
Frequently Asked Questions (FAQ)
Can I use pears that are very ripe?
It is best to use semi-firm pears because they maintain their physical structure during the roasting process. Overly ripe pears will soften too quickly, likely losing their shape before the caramel has reached the right consistency.
How do I know when the tart is finished baking?
The tart is ready when the pastry shell is deep golden-brown and the fruit appears tender and glistening. Check that the crust is firm to the touch and not doughy in the center before removing it from the oven.
Why is my caramel grainy or separated?
If the caramel looks separated at the start of cooking, keep whisking constantly over medium heat until the sugar fully dissolves into the butter. The chemistry of the emulsification takes a few minutes, so be patient and resist the urge to turn the heat too high.
Can I assemble this ahead of time?
Yes, you can prepare the caramel and arrange the pears on top in the skillet a few hours before you plan to bake. Keep it at room temperature, and do not worry if the pears brown slightly, as they will cook into a beautiful amber color during baking.
What is the best way to customize the flavor profile?
You can easily customize the flavor by adding aromatics like fresh thyme leaves or a splash of vanilla bean paste to the caramel. These subtle additions elevate the natural sweetness of the pears and add a sophisticated layer of complexity to the dessert.
Conclusion
A Pear Tarte Tatin is truly more than a dessert; it is an invitation to slow down and create something beautiful from simple, humble roots. I encourage you to take your time with the dough and embrace the golden magic of the caramelized fruit as it comes together in your own kitchen. There is a unique joy in that final, triumphant flip that brings warmth and connection to anyone lucky enough to share a slice.
Print
Pear Tarte Tatin
- Prep Time: 45
- Cook Time: 40
- Total Time: 85
- Yield: 8 servings 1x
- Category: desserts
- Method: Baking
- Cuisine: French
- Diet: Vegetarian
Description
This timeless French classic is a beautifully rustic upside-down tart. Pears are slowly caramelized in a rich, buttery sugar sauce until tender and golden, then covered with a flaky, buttery pastry crust. Once baked, it is inverted to reveal a glossy, sophisticated dessert that offers the comfort of a home-baked treat with the presentation of a professional patisserie masterpiece. Perfect for chilly afternoons and cozy gatherings.
Ingredients
1 1/2 cups all-purpose flour
2 tablespoons granulated sugar
1/4 teaspoon salt
1/2 cup cold unsalted butter, cubed
1/4 cup ice-cold water
6 firm, ripe pears, peeled, cored, and halved
1/2 cup unsalted butter
3/4 cup granulated sugar
1/2 teaspoon ground cinnamon
Instructions
In a bowl, mix flour, 2 tablespoons sugar, and salt. Cut in 1/2 cup cold butter until crumbly. Stir in ice water until dough forms. Wrap and chill for 30 minutes.
Preheat oven to 375°F (190°C).
In a heavy, oven-safe skillet, melt 1/2 cup butter and 3/4 cup sugar over medium heat, stirring until it turns a deep amber caramel. Remove from heat.
Arrange pear halves in the caramel, cut side up, fitting them snugly.
Roll out the chilled dough into a circle slightly larger than the skillet. Place it over the pears, tucking the edges down into the sides of the pan.
Bake for 35-40 minutes until the crust is golden brown.
Let cool for 10 minutes, then invert carefully onto a serving plate.
Notes
Ensure the butter for the crust remains cold to achieve a flaky texture. Use firm pears like Bosc to prevent them from becoming too mushy during the caramelization process. Be very careful when inverting the skillet; use oven mitts as the caramel is extremely hot.
Nutrition
- Serving Size: 1 slice
- Calories: 380
- Sugar: 28g
- Sodium: 85mg
- Fat: 18g
- Saturated Fat: 11g
- Carbohydrates: 52g
- Fiber: 4g
- Protein: 3g
- Cholesterol: 45mg


