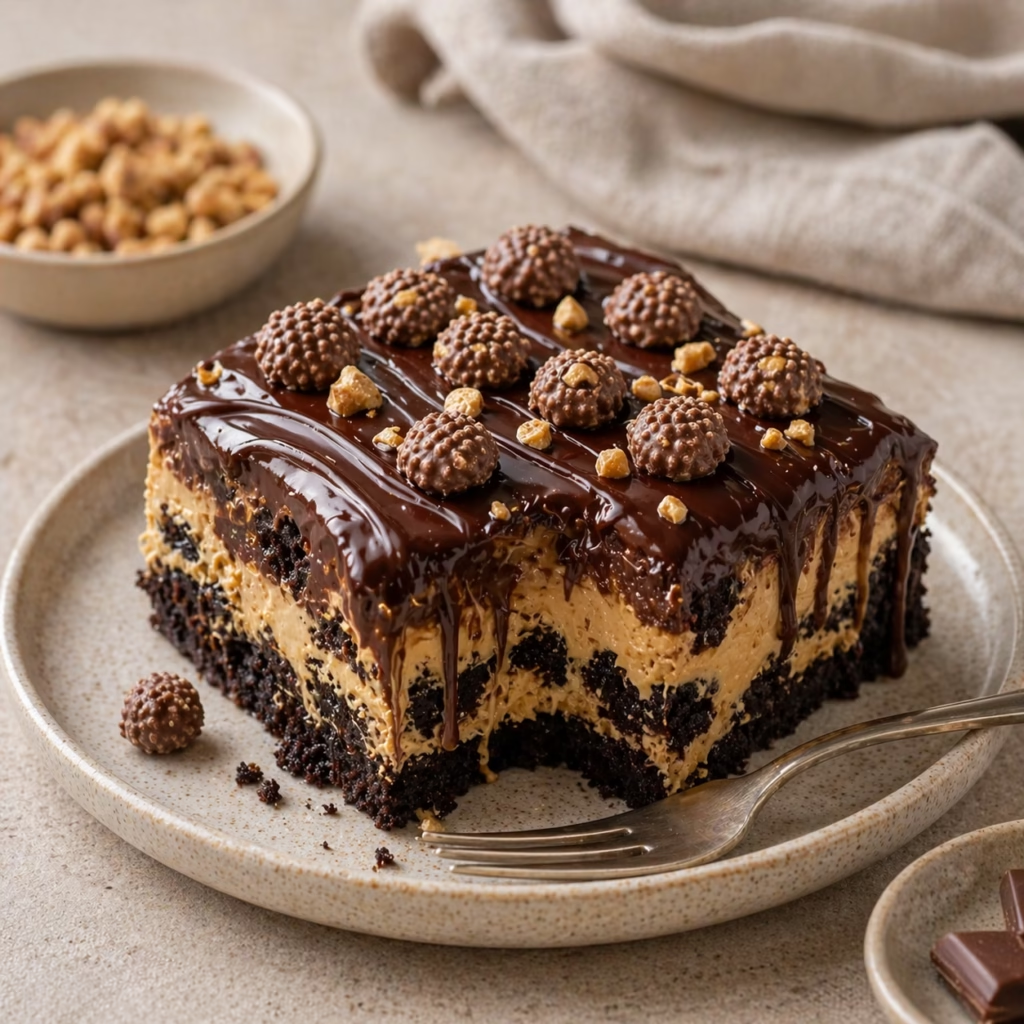
Reese’s Peanut Butter Earthquake Cake is a dessert that captures the heart’s most unfiltered joy. Imagine breaking into a chocolatey fortress, only to be met with a river of peanut butter and melted caramel—a slow, molten eruption of comfort and sweetness. This cake is a love letter to those who crave decadence without pretense, a dessert that feels like a warm hug from your grandmother’s kitchen. With its two-tiered design and hidden treasure inside, it’s a masterpiece of simplicity and surprise. Whether you’re celebrating a milestone or just enjoying an ordinary evening, this cake promises to turn the moment into something unforgettable. And yes, it’s just the kind of recipe that makes your kitchen smell like a bakery in the spring.
The name Earthquake Cake isn’t just dramatic—it’s a testament to the chaos of chocolate and peanut butter mingling, the way the layers shift and settle as they cool. It’s a dessert for people who believe in savoring every bite, who treat baking as both an art and a science. And for those who have never made one before, the process will feel like a quiet rite of passage. With just a few ingredients and 55 minutes of your time, you’ll create a cake that bursts with flavor and tells a story. Let’s dive into what makes this dish truly special.
What is Reese’s Peanut Butter Earthquake Cake?
Reese’s Peanut Butter Earthquake Cake is a two-layer dessert where rich chocolate and creamy peanut butter collide in a molten display. The cake is baked in a 9×13-inch pan, with a layer of chocolate batter, a drizzle of sweetened condensed milk, and a top layer that finishes the job. When you cut into it, the center continues to yield a gooey, peanut butter-laced center that mixes with the chocolate above. There’s no need for fancy techniques—just simple layers and a little patience while it cools. It’s a modern take on the lava cake, reimagined with the help of Reese’s Peanut Butter Cups and a humble box of chocolate cake mix.
Though it’s not tied to any formal cuisine, the cake nods to the American love affair with peanut butter and chocolate. Scientists might call it a chemical reaction, but we prefer to call it magic. The joy of this recipe lies in its accessibility; no pastry chef’s tools required, just a bowl, a whisk, and a pan. It’s a dessert for housewarming parties, after-school snacks, or simply for turning a lazy Sunday into a memory worth savoring. But what truly makes it beloved is the way it gathers people around the table, encouraging seconds, thirds, and that shared giggle when the center oozes out unexpectedly.
Reasons to Try Reese’s Peanut Butter Earthquake Cake
You won’t regret introducing this cake into your kitchen. First, it’s elegant in its simplicity, disguising its indulgence as a quick dessert. Second, it’s the kind of recipe that thrives on spontaneity—no need to plan hours in advance when you can skip the complicated tariffs of madelines or soufflés. Third, it’s a crowd-pleaser, guaranteeing smiles from children, teenagers, and grandparents alike. And for home cooks who are new to baking, it’s a gentle teacher, offering clear steps and forgiving proportions.
This cake isn’t just about flavor; it’s about creating moments. Picture your family gathered around the table, the scent of chocolate and peanut butter lingering in the air, the clink of forks and the occasional “My favorite part is always the middle!” The beauty of this dessert lies in its power to connect, to create a pause in the chaos of daily life. Plus, it’s incredibly shareable—yes, it can feed a small spread of 10 no problem—but also adapts well for smaller batches. Ready or not, it’s time to gather your ingredients and create your own kitchen magic.
Ingredients Needed to Make Reese’s Peanut Butter Earthquake Cake
Assemble the following ingredients for this molten-citizen cake:
1 box (450 g) chocolate cake mix
1 cup (240 ml) water
1/2 cup (120 ml) vegetable oil
3 large eggs
1 cup (250 g) creamy peanut butter (ensure it’s smooth for a silky finish)
1 cup (170 g) Reese’s Peanut Butter Cups, chopped
1 cup (175 g) chocolate chips
1 cup (240 ml) sweetened condensed milk
1/2 cup (60 g) powdered sugar, for dusting
If you’re making substitutions later (we’ll talk about them), start with this list. Each ingredient plays a role in the cake’s symphony of texture and flavor—from the cake mix’s backbone to the peanut butter’s creamy embrace.
Instructions to Make Reese’s Peanut Butter Earthquake Cake – Step by Step
Step 1: Begin by preparing your oven and workspace. Preheat it to 350°F (175°C). While it warms up, grease a 9×13-inch baking dish with butter or non-stick spray. This isn’t just for polish; it’s your insurance against a stuck masterpiece later. Set the dish aside and gather all your ingredients on the counter. The closer they are, the smoother your mixing will feel—no wanting for a forgotten egg, please!
Step 2: In a large mixing bowl, combine the chocolate cake mix, water, vegetable oil, and eggs. Use a whisk or electric mixer to blend them on medium speed for about 2 minutes. You’re aiming for a smooth, glossy batter. Resist the urge to mix for too long—overmixing can make the cake dense. Once it’s silky and free of lumps, scoop it into the pan but only fill it halfway.
Step 3: Now comes the secret. Drizzle the sweetened condensed milk evenly over the first layer. This isn’t just for sweetness—it’s the catalyst for that molten center. Speared like a hidden treasure, the condensed milk will soften during baking and create a river of richness. Then, gently press the chopped Reese’s cups into the batter, followed by the chocolate chips. They’ll melt into swirls and freckles, adding texture and depth.
Step 4: Pour the remaining chocolate cake batter over the top layer, smoothing it out with a spatula. The second layer acts as a lid for the peanut butter and condensed milk, baking into a velvety cap. Don’t worry about the layers being perfectly aligned—this is a work of edible art, not engineering. Place the pan in the oven and bake for 30-35 minutes, or until a toothpick comes out with moist crumbs. Underbaking is key for that gooey center!
Step 5: After baking, let the cake cool in the pan for 10 minutes. This brief rest allows the center to set just enough for slicing. When you’re ready to serve, dust the top with powdered sugar (a nod to elegance) and cut the cake into warm, aerated squares. Pair each piece with a mug of coffee, a spoonful of ice cream, or simply with a sly smile. The first bite is always the loudest—layered chocolate, oozing peanut butter, and that honeyed whisper of condensed milk.
Chef’s Tips for a Perfect Result
- Use room-temperature eggs: They incorporate 30% better into the batter, ensuring a lighter, airier texture.
- Grease the pan generously: Even if your pan is non-stick, an extra coat of butter or oil prevents the cake from tearing when you pour the layers.
- Don’t overmix the batter: Mixing beyond 2 minutes develops the gluten in the cake mix, resulting in a more cake-like, less ethereal crumb.
- Bake it just until done: The center should feel slightly unstable when touched but not wet. A toothpick should yield moist crumbs, not raw batter.
- Let it rest before slicing: At least 10 minutes in the pan will let the layers settle, preventing the molten center from oozing prematurely.
- Storage Tip: Cut the cake after cooling and store the portions in an airtight container. The center stays soft for 2-3 days when refrigerated.
Variations and Substitutions
Reese’s Peanut Butter Earthquake Cake is a canvas, not a strict recipe. Here’s how to keep it fresh and personal.
Vegan Option: Replace the eggs with 3/4 cup applesauce, the vegetable oil with coconut oil, and the powdered sugar with a dairy-free alternative. Use vegan chocolate chips and peanut butter, of course.
Gluten-Free Alternative: Choose a gluten-free chocolate cake mix (most major brands offer this now). Ensure the chocolate chips and peanut butter are certified gluten-free as well.
Low-Carb Version: Swap the sweetened condensed milk with a sugar-free condensed milk substitute. Opt for low-carb chocolate chips and a grain-free cake mix. The peanut butter remains the star.
Budget Swap: Use a high-quality chocolate cake mix (even a more affordable brand) and cut back on the number of Reese’s cups. The difference is subtle when you steep the chocolate chips in their own glory.
Flavor Twist: Replace half the peanut butter with Nutella or a chunky peanut butter to add a playful texture. A splash of espresso in the batter deepens the chocolate flavor, making it feel more decadent.
How to Serve and Pair
This cake is a showstopper, but the way you serve it matters just as much as the baking itself. Cutting into it warm is key—use a sharp knife and let each square sit for a moment to reveal the molten center. When you pass the plate, sprinkle a bit of powdered sugar over the top again, just to keep that edge of “just-baked” charm intact.
Pair it with cold, unsweetened coffee to balance the richness. A thick, velvety milk (plant-based or dairy) also works, especially for younger diners. If you’re feeling adventurous, add a scoop of chilled vanilla ice cream on top—the contrast of hot cake and cold ice cream is a perfect dance of textures.
For special occasions, pass small glass bowls of sea salt sprinkled with a touch of ground cayenne. A pinprick in the cake and a drizzle of salted caramel deepens the flavor profile. Who needs a fancy restaurant when your kitchen can do this?
Storage and Reheating
Refrigerator
Keep uncut cake in an airtight container for up to 2 days. The moisture from the condensed milk will cause the texture to soften slightly. For longer storage, cut the cake into squares and refrigerate for an additional 3 days. Don’t refrigerate uncut cake for more than 2 days, or the center might harden.
Freezer
Cut the cake into portions, or freeze the entire pan. Wrap the pan in plastic wrap and then in foil. Freeze for up to 2 months. Thawing in the fridge overnight preserves the gooey center. For reheating, use a microwave on 50% power for 10-15 seconds, or a 250°F oven for 5 minutes.
Room Temperature
Uncut cake stays fresh at room temperature for 24 hours. Covered, it dries out slowly but maintains its gooey center. Always serve it at room temperature for optimal texture.
Reheating
Reheat slices in the microwave on low power, wrapped in a paper towel to prevent sogginess. Alternatively, set the cake on a tray and warm in a 250°F oven for 5 minutes. Be careful not to overheat—the texture shifts from gooey to brittle quickly!
Nutritional Values
Per serving (1 out of 10):
- Calories: 420
- Protein: 6g
- Carbohydrates: 52g
- Fat: 22g
- Fiber: 2g
Approximate values.
Frequently Asked Questions
Q1: Can I substitute sweetened condensed milk with something else?
A1: Yes! Use 1 cup of heavy cream and 1/2 cup granulated sugar, whipped until stiff peaks form. This mimics the richness and sweetness of condensed milk.
Q2: How do I know when the cake is done?
A2: Insert a toothpick into the center of the cake. It should come out with moist crumbs, not raw batter. The chocolate layer will still jiggle slightly in the center.
Q3: My cake is dry—what went wrong?
A3: Overmixing the batter or overbaking are the most common causes. Reduce mixing time to 1.5 minutes and check the cake at 30 minutes to avoid over-drying.
Q4: Can I prepare this cake in advance?
A4: Yes! Bake the cake up to 24 hours ahead. Let it cool completely, then cover and refrigerate. Reheat before serving to restore the gooey texture.
Q5: What’s the best way to cut the cake for serving?
A5: Use a sharp, non-stick knife and wipe it clean between slices. Slicing warm cake (after 10 minutes of cooling) ensures the center stays beautifully molten.
Conclusion
Reese’s Peanut Butter Earthquake Cake is more than a dessert—it’s a warm, gooey promise of joy. With two layers of chocolate, a peanut butter core, and a molten surprise in every bite, it’s the kind of treat that makes the kitchen come alive. Whether you’re a seasoned baker or a kitchen novice, this cake offers a path to decadence without effort, connecting moments through flavor and memory. So pop on your apron, gather your ingredients, and let the center erupt with love.
Print
Reese’s Peanut Butter Earthquake Cake
- Prep Time: 15
- Cook Time: 30
- Total Time: 55
- Yield: 12 servings 1x
- Category: desserts
- Method: Baking
- Cuisine: American
- Diet: Vegetarian
Description
A decadent two-layer cake with a gooey peanut butter center and molten caramel. Made with chocolate cake mix, peanut butter cups, and sweetened condensed milk, this easy dessert is perfect for special occasions or cozy evenings.
Ingredients
1 box chocolate cake mix (15.25 oz)
1 cup water
1/2 cup vegetable oil
4 large eggs
14 oz sweetened condensed milk
1/2 cup creamy peanut butter
10 Reese’s Peanut Butter Cups (chopped)
1/2 cup semi-sweet chocolate chips
Instructions
Preheat oven to 350°F (175°C)
Grease and flour a 9×13-inch baking pan
Mix cake mix, water, oil, and eggs per package instructions
Spread half the batter into the pan
Drizzle sweetened condensed milk and peanut butter over the batter
Sprinkle chopped Reese’s Cups and chocolate chips
Add remaining batter to create a second layer
Bake for 30 minutes until a toothpick comes out clean
Cool completely before slicing for gooey center effect
Notes
Store in an airtight container for up to 2 days
Chopped Reese’s Cups ensure even distribution
Use mini peanut butter cups for easier chopping
For non-stick pans, minimal additional flour may be needed
Nutrition
- Serving Size: 1 slice (1/12 of recipe)
- Calories: 600
- Sugar: 42g
- Sodium: 320mg
- Fat: 28g
- Saturated Fat: 14g
- Carbohydrates: 82g
- Fiber: 3g
- Protein: 7g
- Cholesterol: 75mg