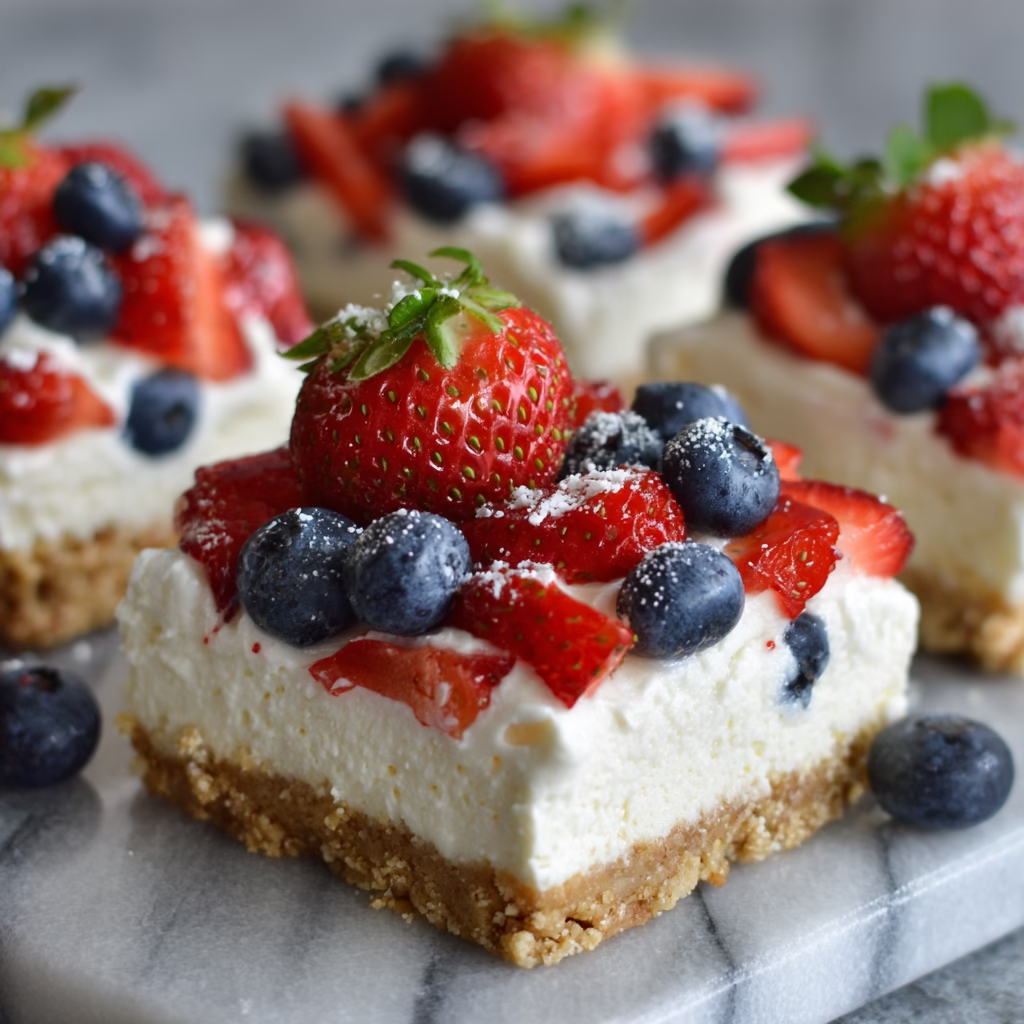
No-Bake Red, White, and Blue Cheesecake Bars are a vibrant, patriotic dessert that perfectly embodies the spirit of summer celebrations. With a buttery graham cracker crust, a velvety cheesecake layer, and a colorful topping of fresh strawberries and blueberries, these bars bring together creamy comfort and crisp flavor in every bite. What’s more, they require no baking, making them an ideal recipe for hot summer days or any occasion where you’d love a crowd-pleasing yet effortless treat.
Rich and satisfying, yet refreshingly light on the palate, these easy no-bake bars are a delicious expression of American tradition—reimagined with a home-cooked flair. Whether you’re preparing for a Fourth of July party, a backyard barbecue, or even just a quiet afternoon at home, these bars offer a sense of celebration and connection. The red, white, and blue design isn’t only visually appealing but also a delicious way to honor heritage and community through food.
What Are No-Bake Red, White, and Blue Cheesecake Bars?
No-Bake Red, White, and Blue Cheesecake Bars are a delightful twist on classic cheesecake, adapted to be made without an oven, with a patriotic flair in flavor and presentation. The base is usually a buttery graham cracker crust, pressed into a pan and chilled, giving a sturdy foundation for the no-bake cheesecake layer. This layer is a smooth combination of cream cheese, sugar, vanilla, and whipped topping, creating a velvety, cool filling that perfectly contrasts with the crunch of the crust.
The real showstopper? The fresh fruit topping made from strawberries and blueberries, arranged carefully to mimic a red, white, and blue palette. Each bar bursts with fresh flavor and a satisfying sweetness that balances the richness of the cream cheese. These bars are often chilled for several hours to allow the filling to firm up and the flavors to deepen, making them a true treat when served fresh from the refrigerator on a warm day.
Reasons to Try No-Bake Red, White, and Blue Cheesecake Bars
These bars are an excellent choice for home cooks of all skill levels who want to create something both impressive and easy. With no need for an oven, no need to worry about melting in the kitchen or burning the bottom of the crust. The ingredients are simple and accessible—many can be found in your pantry, with only a few added at the store on your way home. Whether you’re catering to a party, feeding a family, or simply wanting to treat yourself to something special, this recipe is perfect for beginners and experienced bakers alike.
Beyond their ease and convenience, these bars are a joyful representation of summer flavor. There is something incredibly satisfying about slicing into a cool, creamy bar with the colors of the flag dancing across the surface. They’re ideal for patriotic holidays, summer gatherings, and even afternoon tea. Plus, the layers can be personalized to suit your preferences—add a different fruit for a new twist or swap the crust to a gluten-free blend for a modern alternative.
Ingredients Needed to Make No-Bake Red, White, and Blue Cheesecake Bars
- 2 cups graham cracker crumbs
- ½ cup unsalted butter, melted
- 2 tablespoons granulated sugar
- 16 oz cream cheese, softened
- 1 cup powdered sugar
- 1 teaspoon vanilla extract
- 1½ cups whipped topping (such as Cool Whip)
- Fresh strawberries, halved
- Fresh blueberries
For the best results, it’s recommended to use high-quality ingredients. The graham cracker crumbs should be freshly crushed for maximum texture, and using full-fat cream cheese enhances the richness and stability of the filling. For the whipped topping, try to find a brand that is creamy and not too stiff to ensure that the layers remain smooth and spreadable. The blueberries and strawberries should be fresh and plump to maintain their vibrant color and slight crunch when arranged on top.
Instructions to Make No-Bake Red, White, and Blue Cheesecake Bars – Step by Step
Step 1: Begin by preparing the crust. In a large mixing bowl, combine the graham cracker crumbs, melted butter, and granulated sugar. Use a fork or a small wooden spoon to mix the ingredients together until thoroughly blended. The mixture should resemble wet sand, sticking together when pressed in your hand. This is an important step, as the crust will serve as the foundation for the entire cheesecake bar. Once combined, transfer the mixture to a 9×13-inch rectangular pan that has been lined with parchment paper for easy removal. Press the crust firmly and evenly into the base of the pan, using the back of a spoon or measuring cup for even pressure. Make sure there are no air pockets so that the layers sit flat and stable.
Step 2: While the crust chills, prepare the cheesecake layer. In a large mixing bowl, beat the softened cream cheese using a hand-held mixer or stand mixer at medium speed until it becomes light and fluffy. Gradually add the powdered sugar and continue to mix until just combined. It’s important not to over-mix at this stage to avoid incorporating too much air, which can lead to small bubbles in the final layer. Once the sugar is fully incorporated, add the vanilla extract and continue mixing until smooth and creamy. This step gives the layer its signature flavor, a balanced combination of sweet and warm vanilla.
Step 3: Once the cream cheese mixture is fully blended, gently fold in the whipped topping using a spatula. Start from the center of the bowl and bring the whipped topping in slowly to preserve as much volume as possible. This fold ensures that the mixture remains soft and light while still firm enough to hold up the next layer. Once fully combined, the mixture should be smooth and silky with a slight sheen. At this point, you may transfer the mixture to a spatula or piping bag if you’re planning to spread it directly into the pan for even distribution.
Step 4: Carefully spread the cheesecake mixture evenly across the chilled crust. Use a spatula or offset spatula to smooth it out, ensuring an even layer of about ½ inch in height. This step is crucial for creating a uniform texture when sliced later. To avoid creating air pockets or uneven thickness, take your time and press gently. The filling should be cool, smooth, and ready for the final touch—the colorful topping of fruit.
Step 5: Once the base layers are in place, move on to the fruit topping. Take the halved strawberries and blueberries and begin arranging them on top of the chilled cheesecake layer to create a festive, patriotic look. Place the strawberries in red, evenly spaced around the bars, and intersperse blueberries in the gaps to represent blue. This step offers an opportunity for creativity and fun—don’t be afraid to play with the layout and spacing until you’re pleased with the visual impact. Once arranged, return the pan to the refrigerator to chill and allow the layers to set and firm up.
Step 6: Once the bars have chilled for at least 4 hours or overnight, it’s time to slice and serve. Use a large knife slightly warmed on a hot water towel to make clean cuts through the chilled layers. The knife should glide through smoothly if the layers are set. As you cut, the vibrant colors of the strawberries and blueberries will peek through the smooth creamy base, making each bar a miniature work of art and a tasty celebration of flavor.
Chef’s Tips for a Perfect Result
- Chill the crust before adding the cheesecake layer to prevent the mixture from sinking or becoming too soft.
- Fold the whipped topping gently to maintain its volume and avoid deflating it, which helps keep the texture light and airy.
- Use fresh, high-quality strawberries and blueberries for the best flavor and color—avoid over-ripe berries that will leave behind too much juice.
- Line the pan with parchment paper for clean and easy slicing; lift the bars out on the paper and transfer to a cutting board for neat, even cuts.
- For a smoother fruit presentation, use a small spoon to gently press the berries into the surface just enough to hold in place without sinking.
- Cool for at least 4 hours—this allows the mixture to set properly and ensures the bars hold their shape when cut.
Variations and Substitutions
One of the joys of this recipe is how flexible it can be. Here are a few fun and easy variations or substitutions depending on your dietary needs or personal preferences:
- Vegan Option: Replace the cream cheese with vegan cream cheese and use a plant-based whipped topping. For the crust, substitute graham crackers with vegan graham crackers or an oat-based alternative. For the berries, use any fresh fruit, like blackberries or raspberries for a different visual twist.
Gluten-Free Alternative: If you are avoiding gluten, ensure all graham crackers used are certified gluten-free. This is essential to maintain a true gluten-free version without cross-contamination. The rest of the ingredients can be used as written, as they are naturally gluten-free.
- Low-Carb Version: Swap regular sugar with a low-carb sweetener like stevia or erythritol. The same goes for the powdered sugar—opt for a powdered sugar alternative to meet low-carb requirements. This also helps adjust the texture of the filling to remain light and firm.
- Budget Swap: Use store-brand brands for graham crackers, cream cheese, and whipped topping. They are often just as good for flavor and texture, while saving money without compromising quality.
Pink Lemonade Twist: Dab some lemon zest into the whipped topping or add a splash of lemon juice for an extra zing and subtle color shift for a patriotic lemonade twist.
- Fruit-Free Option: If you’re making these for someone with a fruit allergy, simply omit the fruit and add a colorful topping such as chocolate shavings, edible flowers, or even a swirl of bright fruit preserves for a colorful garnish.
How to Serve and Pair No-Bake Red, White, and Blue Cheesecake Bars
These charming bars are best served chilled and make a delightful addition to any summer tablescape or patriotic picnic. To serve, simply cut into neat squares and arrange on a decorative platter or tiered tray. Consider placing them on a red, white, or blue tablecloth to enhance the festive vibe.
Pair these bars with a cold drink for a refreshing summery snack. A chilled glass of lemonade is the perfect match, complementing the tart and creamy flavors beautifully. Alternatively, serve them with sparkling water infused with lime or mint for a more grown-up twist. They also pair well with light, fruity wines like white zinfandel, which echo the sweet and tangy notes of the berries.
To elevate the presentation, serve with mini American flags or star-shaped cookie cutters as part of the dessert table. These bars can also be served as part of a dessert spread that includes patriotic cupcakes or red, white, and blue cookies for a complete themed celebration.
Storage and Reheating No-Bake Red, White, and Blue Cheesecake Bars
Refrigerator: These cheesecake bars can be stored in the refrigerator for up to 4 days in an airtight container. Make sure the container is covered with plastic wrap or a lid to prevent them from drying out or absorbing other odors. To keep the fruit from becoming soft or squishing, it’s best to store them already cut into bars if time allows.
Freezer: While these bars are best enjoyed chilled, not frozen, they can be safely refrigerated. If you wish to extend their shelf life, you can freeze the uncut bars in a freezer-safe airtight container for up to 2 weeks. Thaw overnight in the refrigerator before serving for the best texture and flavor.
Room Temperature: These bars should only be left at room temperature for a maximum of 2 hours. The cream cheese mixture will begin to soften in warm conditions and can lose its shape, especially when cut. Make sure to keep them in a cool place, such as a shaded area or under a table cloth, if you plan to serve them outside during summer events.
Reheating: As these bars are no-bake and best served cold, there is no need to reheat them. Simply return them to the refrigerator for a few minutes before serving again if they have been sitting out for a while.
Frequently Asked Questions
Q1: Can I substitute a different crust for a gluten-free version?
Yes, for a gluten-free version, use certified gluten-free graham crackers or substitute with crushed gluten-free cookies like shortbread or digestive. Make sure to check the labels for added sugars and binders.
Q2: How do I tell when the no-bake filling is ready to set properly?
The filling is ready when it’s firm to the touch but still slightly soft and sliceable. You can test by gently pressing a finger into the surface—it shouldn’t sink or show a deep impression. Refrigeration time typically takes 4–6 hours for full set.
Q3: Why is my cheesecake layer runny or not setting properly after chilling?
There are a few reasons this can happen: over-mixing the whipped topping can deflate it, causing the filling to be too soft; not chilling long enough can prevent it from setting; or using a type of cream cheese or whipped topping that is too low-fat or unstable. Stick to full-fat, stable brands and avoid over-mixing for best results.
Q4: Can I make this recipe ahead of time for a party?
Yes, you can prepare these bars up to a day in advance and store them in the refrigerator. It is recommended to add the strawberries and blueberries just before serving to keep their freshness and color at its peak.
Q5: What are some fun ways to customize my No-Bake Red, White, and Blue Cheesecake Bars for a special event?
Get creative with toppings: add a swirl of whipped topping, sprinkle crushed nuts or cookie crumbs for texture, or add a dusting of powdered sugar for a decorative touch. For a themed event, use edible glitter or small red and blue sprinkles to make the topping more festive. The possibilities are endless!
Conclusion
No-Bake Red, White, and Blue Cheesecake Bars are a simple yet elegant dessert that brings together the comfort of creamy cheesecake with the brightness of fresh fruit in a patriotic presentation. Perfect for summer or any celebration, these bars are a fun and easy way to show off your culinary flair. With just a few quality ingredients and a little time, you can create something that brings joy, brings people together, and brings a touch of home to your table.
Print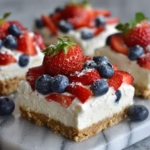
No-Bake Red, White, and Blue Cheesecake Bars
- Prep Time: 20 minutes
- Cook Time: 0 minutes
- Total Time: 4 hours 20 minutes
- Yield: 12 bars 1x
- Category: Dessert
- Method: No-Bake
- Cuisine: American
- Diet: Vegetarian
Description
These No-Bake Red, White, and Blue Cheesecake Bars feature a buttery graham cracker crust, creamy cheesecake filling, and fresh strawberries and blueberries for a festive summer dessert.
Ingredients
- 2 cups graham cracker crumbs
- 1/2 cup unsalted butter, melted
- 2 tablespoons granulated sugar
- 16 oz cream cheese, softened
- 1 cup powdered sugar
- 1 teaspoon vanilla extract
- 1 1/2 cups whipped topping
- Fresh strawberries, halved, for topping
- Fresh blueberries, for topping
Instructions
1. In a medium bowl, mix graham cracker crumbs, melted butter, and granulated sugar until well combined.
2. Press the crust mixture firmly into the bottom of a parchment-lined 9×13-inch pan.
3. Refrigerate the crust for 20 minutes.
4. In a large bowl, beat softened cream cheese, powdered sugar, and vanilla extract until smooth and creamy.
5. Gently fold in the whipped topping until fully combined.
6. Spread the cheesecake mixture evenly over the chilled crust.
7. Arrange halved strawberries and blueberries over the cheesecake layer.
8. Refrigerate for at least 4 hours, or until fully set.
9. Cut into squares and serve chilled.
Notes
Line the pan with parchment paper for easier removal and slicing.
Chill the bars fully before cutting for clean squares.
These bars are great for making ahead for 4th of July, Memorial Day, or summer parties.
Store leftovers covered in the refrigerator.
Nutrition
- Serving Size: 1 bar
- Calories: 320
- Sugar: 22g
- Sodium: 180mg
- Fat: 22g
- Saturated Fat: 13g
- Unsaturated Fat: 7g
- Trans Fat: 0g
- Carbohydrates: 28g
- Fiber: 1g
- Protein: 4g
- Cholesterol: 45mg