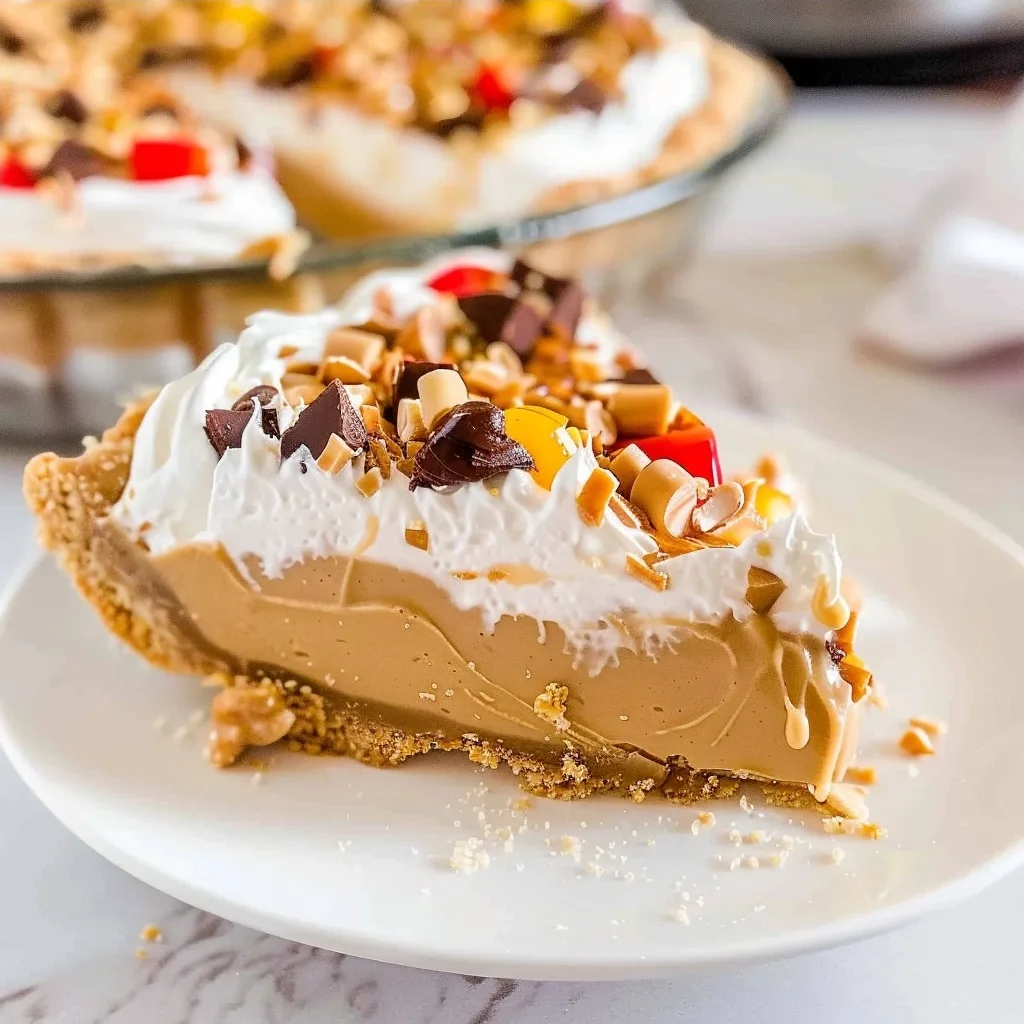
Peanut Butter Pie with Cool Whip: A Hug in Dessert Form
Peanut butter pie with Cool Whip is more than just a dessert; it’s a whispered invitation to slow down, to savor the sweet moments, and to reconnect with the simple joys that food brings into our lives. This no-bake marvel offers a luscious, creamy peanut butter filling nestled within a crisp graham cracker crust, crowned with a cloud of fluffy Cool Whip and a sprinkle of delightful crunch. It’s the kind of dessert that feels like a comforting embrace, perfect for those evenings when you just need a little extra sweetness and warmth.
The magic of this peanut butter pie with Cool Whip lies in its effortless elegance and its ability to evoke cherished memories. It whispers of family gatherings, spontaneous celebrations, and quiet afternoons spent in good company. Each spoonful is a journey back to simpler times, a testament to how a few humble ingredients can create something truly extraordinary and deeply satisfying. This recipe is a love letter to the enduring appeal of peanut butter, transformed into a dessert that’s both incredibly easy to make and impossibly delicious.
What is Peanut Butter Pie with Cool Whip?
Peanut butter pie with Cool Whip is a beloved no-bake dessert celebrated for its incredibly rich and creamy texture, coupled with the unmistakable, comforting flavor of peanut butter. Unlike traditional baked pies, this version relies on a chilled setting process, making it an ideal choice for warm weather or when oven space is limited. It’s a recipe that champions the straightforward goodness of its key ingredients: smooth peanut butter, a light and airy Cool Whip topping, and the satisfying crunch of a store-bought graham cracker crust, often enhanced with finely crushed graham crackers or cookie crumbs.
While its exact origins are a bit of a culinary mystery, much like many beloved American comfort foods, this pie embodies a spirit of accessible indulgence. It’s a testament to smart shortcuts and delightful combinations, often appearing at potlucks, family dinners, and holiday celebrations as a reliable crowd-pleaser. The inclusion of Cool Whip not only adds its signature lightness but also simplifies the dessert-making process, ensuring a consistently smooth and creamy filling that’s universally loved.
Reasons to Try Peanut Butter Pie with Cool Whip
This peanut butter pie with Cool Whip is an absolute dream for anyone who cherishes the classic combination of peanut butter and sweet creaminess. Its allure lies in its sheer simplicity; it offers all the decadent flavor without the fuss of baking. Imagine a dessert that requires no oven time, allowing you more precious moments to spend with loved ones or simply to relax. It’s a testament to the idea that true comfort food doesn’t need to be complicated—it just needs to be made with heart.
Perfect for beginner bakers or those of us navigating busy schedules, this pie requires minimal effort for maximum impact. The ingredients are readily available, and the steps are so straightforward that even the youngest kitchen helpers can participate. Whether you’re planning a backyard barbecue, a cozy movie night, or simply craving a sweet escape, this peanut butter pie with Cool Whip delivers pure, unadulterated joy. It’s a versatile treat that brings smiles and requests for seconds, every single time.
Ingredients Needed to Make Peanut Butter Pie with Cool Whip
- 1 package (3.4 oz) vanilla instant pudding mix (ensure it’s instant, not cook-and-serve)
- 1 cup cold milk (whole milk is recommended for richness)
- 1 cup Reese’s peanut butter baking chips (or similar high-quality peanut butter chips)
- ½ cup creamy peanut butter (your favorite brand, smooth variety)
- 1 cup Cool Whip (thawed, or one 8 oz tub)
- 1 store-bought graham pie crust (9-inch, pre-made)
- 1 cup Cool Whip, thawed (for topping)
- 4 oz Reese’s Pieces Peanut candies (for topping)
Instructions to Make Peanut Butter Pie with Cool Whip – Step by Step
Step 1: Create the Lush Pudding Base
Begin by gathering a large mixing bowl. Into this bowl, pour the contents of your vanilla instant pudding mix. Measure out 1 cup of cold milk and add it to the pudding mix. It is important that the milk is cold; this helps the pudding set beautifully. Now, using an electric mixer on a medium speed, begin to blend these two ingredients together. You’ll want to mix until the pudding mixture transforms into a wonderfully thick and cohesive consistency, like a creamy cloud ready to embrace its peanut butter destiny.
Step 2: Melt the Peanut Butter Bliss
Take your Reese’s peanut butter baking chips and place them into a microwave-safe bowl. Aim for a microwave-safe bowl that allows for easy stirring, perhaps one with a slightly wider base. Microwave these delightful chips on high power for exactly one minute. After the minute is up, carefully remove the bowl from the microwave and stir the chips very well. You want to see them starting to melt and become smooth. If they aren’t completely melted and still hold their chip shape, return them to the microwave for another 30 seconds on high, stirring again until they are perfectly smooth and glossy.
Step 3: Unify the Peanut Butter Flavors
Now, it’s time to bring the two star peanut butter elements together. Carefully pour the melted peanut butter chips from their bowl into the larger mixing bowl that holds your thickened vanilla pudding. Next, add the ½ cup of creamy peanut butter directly into the same bowl. This is where the rich, authentic peanut butter flavor truly deepens. Grab your electric mixer once more and begin to mix these ingredients. Continue mixing until everything is completely combined, creating a uniform, velvety peanut butter-pudding mixture that smells heavenly.
Step 4: Fold in the Airy Cool Whip
Gently add the 1 cup of thawed Cool Whip to your peanut butter mixture. This is where the magic happens, transforming the dense peanut butter mixture into a light, airy, and impossibly smooth filling. Switch from the electric mixer to a trusty rubber spatula for this step. Delicately fold the Cool Whip into the peanut butter mixture. The goal here is to incorporate the Cool Whip without overmixing, preserving its airy texture while ensuring the entire filling is beautifully smooth and homogenous. The result should be a light yet incredibly rich peanut butter filling.
Step 5: Assemble the Pie Foundation
Take your store-bought graham pie crust, which provides that perfect crunchy base. Carefully spoon the luscious peanut butter filling you’ve just created into the pie crust. Use your spatula or the back of a spoon to spread the filling out evenly, ensuring it reaches all the edges of the crust and creates a beautifully level surface for the topping.
Step 6: Crown with Cloud-Like Topping
Now, with the remaining 1 cup of thawed Cool Whip, you’ll add the signature fluffy topping. Gently spread this Cool Whip over the top of the peanut butter filling, creating a smooth, even layer. This brings a beautiful contrast in texture and appearance to the pie, making it look as delightful as it tastes.
Step 7: Prepare the Crunchy Sweet Surprise
For that irresistible final touch, turn your attention to the Reese’s Pieces Peanut candies. Place the candies into a small, sturdy Ziploc bag. Seal the bag securely, ensuring no pieces can escape. Using a heavy-bottomed pot or even a rolling pin, gently crush the Reese’s Pieces. You’re looking for a delightful mix of whole pieces and smaller crumbles, which will add a wonderful textural contrast and bursts of candy flavor when sprinkled over the pie.
Step 8: The Final Flourish and Chill
Generously sprinkle the crushed Reese’s Pieces Peanut candies evenly over the Cool Whip topping. This adds a playful element and a delightful crunch that perfectly complements the creamy filling. Once adorned, cover the pie securely. Place the pie in the refrigerator and allow it to chill for a minimum of 2 hours. This crucial resting period allows the filling to set firmly, ensuring clean slices and the best possible texture. After chilling, your beautiful peanut butter pie with Cool Whip is ready to be sliced and savored.
Chef’s Tips for a Perfect Result
- Always use cold milk when preparing the instant pudding mix. This is key to achieving a thick and stable filling that sets properly.
- Ensure your Cool Whip is fully thawed but still chilled when you fold it into the peanut butter mixture. This helps maintain its airy texture and prevents the filling from becoming too warm.
- Don’t over-melt the peanut butter chips. Microwave them in short intervals, stirring between each, to prevent them from seizing or becoming oily.
- For an extra layer of flaky texture and peanut butter flavor, consider mixing a tablespoon or two of peanut butter into the graham cracker crust crumbs before pressing them into the pie plate.
- Crush the Reese’s Pieces just before you’re ready to sprinkle them on top. This keeps them fresh and ensures their crunch.
- Chill the pie for at least 2 hours, but overnight is even better. This allows the flavors to meld beautifully and the texture to become perfectly firm.
Variations and Substitutions
- Gluten-Free Alternative: Use a gluten-free graham cracker crust or a chocolate cookie crust made with gluten-free cookies. Ensure your pudding mix and peanut butter chips are also certified gluten-free. The texture will be similar, offering a delicious option for those with gluten sensitivities.
- Chocolate Lover’s Dream: Add ½ cup of mini chocolate chips to the filling mixture along with the peanut butter chips, or swirl in melted chocolate just before chilling for an extra layer of indulgence. This deepens the flavor profile, creating a delightful chocolate-peanut butter combination everyone adores.
- Dark Chocolate Drizzle: Instead of crushed Reese’s Pieces, drizzle the top of the pie with melted dark chocolate for an elegant finish. The slight bitterness of dark chocolate beautifully balances the sweetness of the pie.
- Nut-Free Option: If allergies are a concern, create a ‘SunButter Pie’. Substitute the peanut butter chips and creamy peanut butter with sunflower seed butter chips and creamy sunflower seed butter. Use a vanilla cookie crust if gluten-free is also needed, and top with a sprinkle of toasted seeds or a drizzle of chocolate. This provides a safe and equally delicious alternative.
- Mini Pie Creations: Instead of one large pie, use mini graham cracker crust tart shells or muffin tins lined with foil or parchment paper to create personal-sized peanut butter pies. These are perfect for parties and portion control, baking and chilling time may vary slightly.
How to Serve and Pair
This peanut butter pie with Cool Whip is a star on its own, requiring little accompaniment, but it truly shines when served slightly chilled. The best way to present it is in clean, distinct slices, allowing the layers of creamy filling, fluffy topping, and crunchy crust to be appreciated. For an extra touch of elegance, consider a delicate swirl of extra Cool Whip on top of each slice or a few whole Reese’s Pieces candies reserved for garnish. It’s a dessert that brings comfort and joy to any occasion, from casual family dinners to more festive holiday gatherings. It pairs beautifully with a cold glass of milk, a warm cup of coffee, or even a refreshing glass of unsweetened iced tea to cut through the sweetness.
Storage and Reheating
Refrigerator
Leftover peanut butter pie with Cool Whip is best stored in the refrigerator. Cover the pie tightly with plastic wrap or transfer it to an airtight container to prevent it from absorbing odors from other foods. It will keep its delightful texture and flavor for up to 3 to 4 days. For the best texture, make sure the pie is well-chilled before storing.
Freezer
While this pie is designed to be enjoyed fresh, it can be frozen. It’s best to freeze it before the toppings are added, or freeze individual slices. Wrap slices tightly in plastic wrap, then in aluminum foil, or place in a freezer-safe container for up to 1 month. Thaw frozen pie slices in the refrigerator overnight before serving.
Room Temperature
Due to the Cool Whip and pudding mixture, this pie should not be left at room temperature for more than 2 hours. Prolonged exposure can compromise its texture and safety.
Reheating
This pie is a no-bake dessert and is not intended to be reheated. Enjoying it chilled is essential for its characteristic creamy texture and flavors to fully shine. Reheating would alter its delicate structure and is not recommended.
Frequently Asked Questions (FAQ)
Can I use a different kind of peanut butter?
Yes, you can use crunchy peanut butter if you prefer more texture. However, creamy peanut butter generally yields a smoother, more luxurious filling consistency, often preferred for this style of pie.
How do I know if my peanut butter pie is set?
The pie is set when the center is firm to the touch and doesn’t jiggle excessively when the crust is gently nudged. The edges should appear solid, and the Cool Whip topping should hold its shape.
My pie filling is too runny, what went wrong?
A runny filling often occurs if the instant pudding mix wasn’t allowed enough time to set, if the milk wasn’t cold enough, or if the Cool Whip was overmixed. Ensure all ingredient measurements are accurate and the chilling time is sufficient.
Can I make this peanut butter pie with Cool Whip ahead of time?
Absolutely. This pie is ideal for making ahead. It needs at least 2 hours to chill and set, but flavors meld beautifully when made the day before serving. Just add the final topping and candy right before serving for the best texture.
What’s the best way to customize my peanut butter pie topping?
Get creative with your toppings! Besides Reese’s Pieces, consider a drizzle of chocolate syrup, mini peanut butter cups chopped, a sprinkle of flaky sea salt, or even a dusting of cocoa powder for a sophisticated flair.
CONCLUSION
This peanut butter pie with Cool Whip is a beacon of simple, comforting joy, embodying the essence of a perfectly creamy, no-bake delight. It’s a recipe that invites you to create something truly special with ease, filling your home with warmth and delicious anticipation. The signature rich peanut butter flavor, kissed by airy Cool Whip and crowned with a delightful crunch, makes this dessert an unforgettable treat that calls you back for just one more bite.
Print
Peanut Butter Pie with Cool Whip: A Hug in Dessert Form
- Prep Time: 15
- Total Time: 120
- Yield: 8 slices 1x
- Category: desserts
- Method: No-Bake
- Cuisine: American
- Diet: Vegetarian
Description
A no-bake, creamy peanut butter filling layered with a graham cracker crust and fluffed with Cool Whip. Effortlessly comforting, perfect for cozy gatherings or a sweet treat.
Ingredients
1 1/2 cups graham cracker crumbs
1/3 cup melted butter
2 cups creamy peanut butter
1/4 cup powdered sugar, unsweetened
1 carton (8 oz) Cool Whip (whipped topping)
1/4 cup crushed graham crackers or cookie crumbs (for topping)
Instructions
Prep a 9-inch springform pan by greasing and lining with parchment paper.
Mix graham cracker crumbs and melted butter; press into the pan’s base.
In a bowl, blend peanut butter with powdered sugar until smooth.
Fold in Cool Whip gently until fully incorporated.
Spread mixture over the crust and refrigerate for 2 hours.
Sprinkle crushed crumbs on top before serving with chilled.
Notes
Chilling ensures firm texture.
Crust can be substituted with gluten-free graham crackers.
Freeze cooled pie for 30 minutes for colder serving.
Nutrition
- Serving Size: 1 slice
- Calories: 350
- Sugar: 20g
- Sodium: 300mg
- Fat: 20g
- Saturated Fat: 10g
- Carbohydrates: 35g
- Fiber: 2g
- Protein: 5g
- Cholesterol: 30mg


