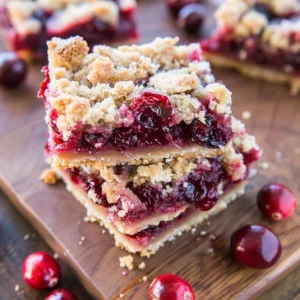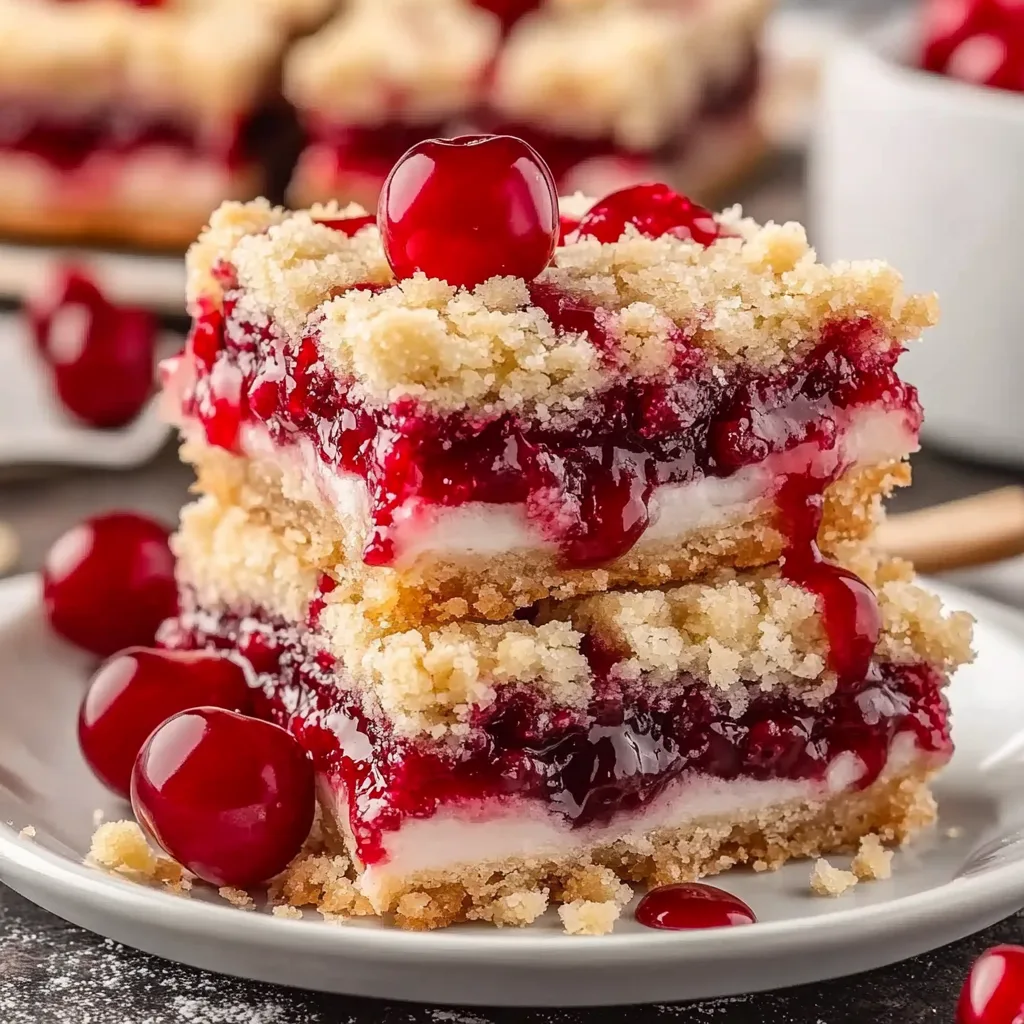
Cherry Pie Bars are a delightful treasure, a portable, less fussed-over cousin to the classic cherry pie. They capture all the beloved flavors and textures we adore – that sweet, slightly tart cherry filling nestled between a buttery, crumbly crust and a tender shortbread-like topping. It’s a symphony of sweet and tangy, soft and crisp, all wrapped up in a convenient bar form. This recipe brings a touch of that nostalgic comfort right into your kitchen, making moments sweeter and always, always warmer.
The beauty of cherry pie bars lies in their simplicity and their ability to evoke cherished memories. They remind me of summer afternoons spent with my grandmother, her kitchen filled with the scent of baking fruit and the gentle hum of the oven. Making these bars is like holding a piece of that history, a comforting echo of love and shared moments. It’s amazing how a simple combination of ingredients can bring so much joy and connection, reminding us to slow down and savor the sweet things in life.
What is Cherry Pie Bars?
Cherry Pie Bars are a delightful bake that takes the essence of a classic cherry pie and transforms it into a more manageable and versatile dessert. Imagine a tender, shortbread-like base, generously topped with a sweet and tangy cherry filling, and then finished with a crumble or streusel-style topping. This allows for all the comforting flavors of cherry pie without the need for a traditional pie crust. They are structured as a single layer of dough, a layer of filling, and then a second layer of dough, baked together to create a cohesive, easy-to-cut bar.
The magic of these bars often comes from the contrast between the buttery, slightly crumbly dough and the vibrant, juicy cherry filling. It’s a flavor profile that speaks of home, comfort, and simple pleasures. While often associated with American baking, the concept of fruit-filled bars with a crumb topping is a beloved tradition across many cultures, adapting to local fruits and spices. This particular recipe uses readily available canned cherry pie filling, making it an accessible treat for any time of year, bringing that summery fruit flavor into any season.
Reasons to Try Cherry Pie Bars
There are so many reasons to fall in love with cherry pie bars, but perhaps the most compelling is their utter deliciousness combined with their remarkable ease. They offer that quintessential taste of cherry pie – that perfect balance of sweet cherries with a hint of tartness, enveloped in a buttery, crumbly goodness – but without the intimidating process of rolling and shaping a pie crust. This recipe is a weeknight hero, a perfect dessert for potlucks, or a delightful afternoon treat that brings a smile to everyone’s face. They are wonderfully forgiving and remarkably satisfying.
These bars are perfect for beginner bakers, for busy parents looking for a quick yet impressive dessert, or for anyone who simply craves a slice of comfort without a lot of fuss. Their compact size makes them ideal for picnics, bake sales, or packing into lunchboxes. The joy of a homemade dessert is magnified when it’s this straightforward to create. They are a gentle reminder that sometimes, life’s sweetest moments arrive in the simplest, most comforting packages, bringing warmth and connection to casual gatherings or quiet evenings.
Ingredients Needed to Make Cherry Pie Bars
The beauty of these cherry pie bars lies in their simple, pantry-friendly ingredients that come together to create something truly special.
- 1 cup unsalted butter, barely softened (ensure it’s not too cold for easy mixing)
- ¾ cup granulated sugar
- 1 teaspoon vanilla extract
- ½ teaspoon almond extract (optional, but highly recommended for that classic cherry pie flavor)
- 2 cups all-purpose flour
- ½ teaspoon baking powder
- ¾ teaspoon fine sea salt or table salt
- 21 ounces cherry pie filling (one standard can)
- ½ cup powdered sugar (for the glaze)
- ¼ teaspoon almond extract or vanilla extract (for the glaze)
- 1 Tablespoon milk or cream (for the glaze, adjust for consistency)
Instructions to Make Cherry Pie Bars – Step by Step
Bringing these delightful cherry pie bars to life is a joy, a simple process filled with the promise of sweet reward.
Step 1: Begin by preheating your oven to 350°F (175°C). This gentle warmth is crucial for achieving that perfect bake. Next, prepare your 9×9 inch baking pan by lining it generously with parchment paper, leaving an overhang on the sides. This overhang acts as helpful handles, making it a breeze to lift the entire baked treat out of the pan once it’s cooled. It’s these small touches that make kitchen tasks feel less like chores and more like loving preparations.
Step 2: In a large bowl, combine the softened unsalted butter and granulated sugar. This is where the magic of texture begins. Beat them together until the mixture becomes light, fluffy, and pale in color; this process incorporates air, contributing to the tender crumb of the bars. If you have an electric mixer, this step is quite swift, but a sturdy whisk and a bit of arm power work beautifully too. After achieving that lovely fluffiness, stir in the vanilla extract and the almond extract if you’re using it. The aroma alone is a hint of the deliciousness to come, a promise of that distinct cherry pie essence.
Step 3: Now, it’s time to add the dry ingredients to the buttery mixture. Gently incorporate the all-purpose flour, baking powder, and salt. Mix until just combined – we want a tender dough, not a tough one. Overmixing can develop the gluten too much, resulting in a chewier bar than we desire. Scrape down the sides of the bowl periodically to ensure everything is evenly incorporated. The dough should be crumbly yet hold together when pressed.
Step 4: Take about two-thirds of this prepared dough and press it evenly into the bottom of your parchment-lined baking pan. Use your fingers, or the bottom of a glass, to create a neat, compact layer. This forms the base of our cherry pie bars. Once the base is laid, carefully spread the canned cherry pie filling evenly over this dough layer. Ensure you get close to the edges, but leave a small border to help contain the bubbling filling during baking.
Step 5: Now for the topping. Take the remaining one-third of the dough and drop small spoonfuls over the cherry filling. Don’t worry about covering it completely; the gaps are intentional. These openings allow the vibrant cherry filling to peek through during baking, creating those beautiful, jammy pockets and adding visual appeal. This rustic topping adds a lovely textural contrast to the smooth filling.
Step 6: Place the pan into the preheated oven and bake for 20 to 30 minutes. You’ll know they are ready when the topping is a lovely, lightly golden brown and the cherry filling is bubbling merrily around the edges, a sign that it’s heated through and ready to be enjoyed. The aroma filling your kitchen at this stage is simply divine, a comforting, sweet scent that promises pure delight.
Step 7: Once baked to perfection, carefully remove the pan from the oven. Place it on a wire rack and allow the cherry pie bars to cool completely. This is a critical step for clean slicing. Rushing this process can lead to a messy, gooey situation, and while still delicious, it’s not quite the elegant presentation we aim for. Patience here is truly a virtue for the best results.
Step 8: While the bars are cooling, whisk together the ingredients for the glaze. In a small bowl, combine the powdered sugar, the remaining ¼ teaspoon of almond or vanilla extract, and 1 tablespoon of milk or cream. Whisk until smooth and creamy. If the glaze seems too thick, add a tiny bit more milk, a teaspoon at a time, until you reach your desired drizzling consistency. If it’s too thin, a little more powdered sugar will thicken it right up.
Step 9: Once the bars have cooled entirely, drizzle the prepared glaze evenly over the top. This adds a touch of sweetness and visual appeal, making these bars even more irresistible. For the glaze to set nicely and make slicing easier, refrigerate the bars for about 10 minutes before slicing.
Step 10: Finally, slice the cooled and set bars into 16 portions using the parchment paper overhangs to help lift them from the pan. Serve them and savor that moment of pure, sweet satisfaction.
Chef’s Tips for a Perfect Result
- Use room-temperature butter: This ensures the butter creams properly with the sugar, creating a lighter, more tender crumb for both the base and the topping.
- Don’t overmix the dough: Mix the flour into the wet ingredients just until combined to avoid developing the gluten, which results in a tougher texture.
- Prepare your pan well: Lining the pan with parchment paper, with overhangs, is key for easy removal, preventing sticking and making slicing much simpler.
- Allow bars to cool completely: Resist the urge to slice warm bars; letting them cool fully allows the filling to set and the bars to hold their shape for clean cuts.
- Adjust glaze consistency: Start with the recommended liquid for the glaze and adjust with tiny amounts of milk or powdered sugar until it reaches a smooth, drizzly consistency that coats the back of a spoon.
- Embrace the gaps in the topping: Leaving spaces in the dropped dough topping allows the cherry filling to bubble up gorgeously, creating a beautiful mosaic and delightful pockets of fruit.
Variations and Substitutions
While these cherry pie bars are wonderful as they are, their adaptable nature allows for delightful modifications to suit various tastes and dietary needs.
- Another Fruit Filling: If cherries aren’t your favorite or are out of season, easily swap the cherry pie filling for raspberry, blueberry, or even a mixed berry pie filling for a different, yet equally delicious, fruit bar.
- Gluten-Free Alternative: To make these bars gluten-free, use a good quality gluten-free all-purpose flour blend in place of the all-purpose flour. You might need to adjust the liquid slightly in the dough if the blend is very different.
- Nutty Variation: For an added layer of flavor and texture, you can incorporate chopped nuts like almonds or pecans into the topping dough, or sprinkle them over the cherry filling before adding the topping.
- Spice It Up: A pinch of cinnamon or a tiny grate of nutmeg added to the dry ingredients will bring a warm, cozy spice note that complements the cherries beautifully.
- Lemon Zest Boost: Adding the zest of half a lemon to the dough or even a bit into the cherry filling adds a bright, fresh counterpoint that enhances the cherry flavor delightfully.
How to Serve and Pair
These cherry pie bars are wonderfully versatile, perfect for almost any occasion, and pair beautifully with a variety of drinks and complementary desserts. Serve them slightly chilled after the glaze has set, or at room temperature for a softer texture. They are ideal for casual gatherings, backyard BBQs, bake sales, or as a comforting end to a family dinner. For a touch of elegance, serve them dusted with a little extra powdered sugar or alongside a dollop of freshly whipped cream or a scoop of vanilla bean ice cream.
To drink, they pair wonderfully with a cold glass of milk, a fragrant cup of herbal tea like chamomile or peppermint, or even a lightly sweetened iced tea. For a more grown-up pairing, a sweet Moscato or a sparkling cider can also be delightful choices that echo the sweetness of the dessert without overpowering it. Their portable nature also makes them fantastic for picnics, road trips, or simply enjoying with a cup of coffee on a quiet morning.
Storage and Reheating
Proper storage ensures your delicious cherry pie bars remain a delightful treat for days to come, maintaining their perfect texture and flavor.
Refrigerator
Store leftover cherry pie bars in an airtight container in the refrigerator for up to 4-5 days. The coolness helps maintain the glaze’s set and keeps the filling from becoming too soft. Ensure they are completely cooled before sealing the container to prevent condensation.
Freezer
For longer storage, individual bars or a whole uncut pan (once fully cooled and glazed) can be frozen. Wrap them tightly in plastic wrap, then in aluminum foil or place them in a freezer-safe airtight container for up to 2-3 months. This method preserves their fresh-baked quality beautifully.
Room Temperature
Cherry pie bars stored at room temperature are best enjoyed within 1-2 days, especially if they are not heavily glazed and if your climate is warm. If room temperature storage is needed, keep them in an airtight container and ensure they are placed in a cool, dry spot away from direct sunlight.
Reheating
While often enjoyed at room temperature or chilled, you can gently reheat these bars if desired. For a refreshingly warm center, place a bar on a baking sheet in a preheated oven at 300°F (150°C) for about 5-8 minutes, or until warmed through. Avoid microwaving, as it can make the crust soggy and the filling gummy. If reheating from frozen, allow them to thaw slightly at room temperature first, then reheat.
Frequently Asked Questions (FAQ)
Can I use fresh cherries instead of canned pie filling?
Yes, you can certainly use fresh cherries. You will need to pit about 3-4 cups of fresh cherries and cook them down with sugar and a thickener (like cornstarch or tapioca starch) until they reach a jam-like consistency. This will alter the flavor slightly, as canned filling often has extra spices and a specific sweetness.
How do I know when my cherry pie bars are done baking?
Your cherry pie bars are perfectly done when the topping is a beautiful golden brown and the cherry filling is visibly bubbling around the edges. This indicates the filling is heated through and the crust is baked through.
My dough is too sticky to handle, what can I do?
If the dough feels too sticky, chilling it in the refrigerator for 15-30 minutes can firm it up. You can also place parchment paper over the dough in the pan and press it down with your hands or a flat-bottomed glass for an even layer without direct sticky contact.
Can I prepare the dough for these bars ahead of time?
Yes, the dough can be made a day in advance and stored, well-wrapped, in the refrigerator. You can also freeze the dough for up to a month; allow it to thaw in the refrigerator before pressing into the pan. The fully baked and cooled bars freeze well too.
What are the best ways to customize or serve these cherry pie bars?
To customize, add a sprinkle of almond slivers to the topping or a dash of cinnamon to the dough. For serving, they are delightful on their own, but a scoop of vanilla ice cream, a dollop of whipped cream, or a drizzle of chocolate sauce elevates them further.
CONCLUSION
These Cherry Pie Bars offer a comforting embrace of flavor and texture, making any moment feel special. They are a testament to how simple ingredients and a little love can create pure joy, perfect for sharing or savoring alone. The irresistible combination of buttery crust and sweet-tart cherry filling makes these bars a truly unforgettable treat. Give them a try and taste the magic!