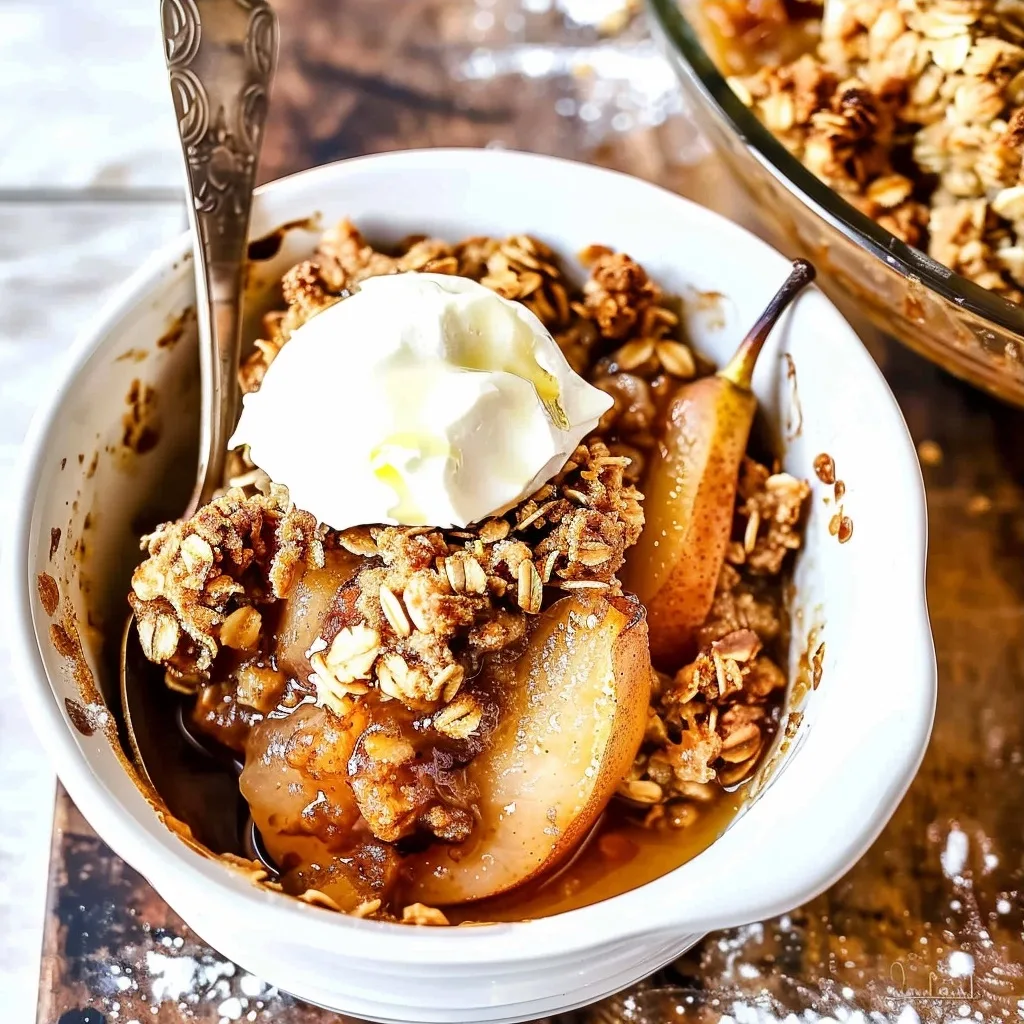
Easy Pear Crisp Recipe with Oats and Fresh Pears invites you into a world of warmth and comfort, a place where the sweetness of ripe fruit meets the satisfying crunch of a wholesome topping. This is more than just a dessert; it’s a feeling, a memory whispered from my grandmother’s kitchen, where the scent of cinnamon and baked pears would fill every corner, creating an embrace of pure love. It’s the kind of simple magic that transforms an ordinary evening into something truly special, a moment to slow down and savor.
Crafting this beautiful pear crisp recipe feels like weaving a culinary story, one that celebrates the season’s bounty with genuine heart. It’s designed for those moments when you crave something sweet, something grounding, something that tastes like home and reminds us of simpler times. With just a little bit of time and a lot of love, you can create a dessert that not only delights the senses but also nourishes the soul, making every gathering, big or small, feel like a cherished celebration.
What is Easy Pear Crisp Recipe with Oats and Fresh Pears?
This Easy Pear Crisp Recipe with Oats and Fresh Pears is a comforting baked dessert that celebrates the delicate sweetness of ripe pears. Unlike its more common apple cousin, pear crisp offers a subtle, floral sweetness that pairs beautifully with warm spices like cinnamon, nutmeg, and ginger. The magic lies in the contrast: tender, yielding pears bathed in their own fragrant juices beneath a delightfully crisp, golden topping made from oats, flour, and pecans. It’s a rustic dessert, born from the humble tradition of using seasonal fruits to create something extraordinary.
At its heart, this recipe is about simplicity and embracing natural flavors. The pears, when baked, become incredibly tender and release a lovely syrup, while the topping provides a satisfying textural counterpoint. It’s a dish that feels both sophisticated and accessible, perfect for a cozy evening at home or for sharing with loved ones. The inclusion of oats and pecans in the topping adds a wonderful nutty depth and a rustic charm, making each spoonful a delightful experience.
Reasons to Try Easy Pear Crisp Recipe with Oats and Fresh Pears
There are so many reasons to fall in love with this Easy Pear Crisp Recipe with Oats and Fresh Pears, but its sheer simplicity and incredible flavor stand out. Imagine a dessert that requires only about 20 minutes of active preparation time, making it perfect for busy weeknights or impromptu gatherings. It’s a recipe where you can feel completely confident, even if you’re new to baking; the results are consistently warm, comforting, and utterly delicious. The aroma alone, as it bakes, will fill your home with a sense of peace and anticipation.
This pear crisp is also wonderfully versatile, a true crowd-pleaser that appeals to all ages. For families, it’s a wholesome treat that feels decadent. For those hosting holidays like Thanksgiving or Christmas, it offers a sophisticated yet easy-to-make dessert option that beautifully complements seasonal flavors. It’s for anyone who yearns for a taste of handcrafted comfort, who believes that the best moments are often found around a table filled with good food shared with good company.
Ingredients Needed to Make Easy Pear Crisp Recipe with Oats and Fresh Pears
For the filling:
-
3 pounds ripe but firm Bartlett pears (peeled, cored, and sliced into 1/2-inch thick slices)
-
1/4 cup granulated sugar
-
1 tablespoon fresh lemon juice
-
1 tablespoon cornstarch (to thicken the juices)
-
1 teaspoon pure vanilla extract
-
1 1/2 teaspoons ground cinnamon
-
1/2 teaspoon ground nutmeg
-
1/4 teaspoon ground ginger
-
1/4 teaspoon ground cardamom
-
1/4 teaspoon salt
For the topping:
-
1/2 cup all-purpose flour
-
1/2 cup old-fashioned rolled oats (not instant)
-
1/2 cup finely chopped pecans
-
1/3 cup packed light brown sugar
-
3 tablespoons granulated sugar
-
1/4 teaspoon ground cinnamon
-
1/8 teaspoon ground nutmeg
-
1/8 teaspoon salt
-
8 tablespoons unsalted butter (melted)
Instructions to Make Easy Pear Crisp Recipe with Oats and Fresh Pears – Step by Step
Step 1:
Begin by preheating your oven to a warm 425 degrees F. This higher temperature is key to achieving that perfect, bubbly fruit filling and a wonderfully crisp topping. Take a moment to gently grease an 8×8 inch baking pan or a 9-inch cast-iron skillet with softened butter; this ensures your beautiful crisp will release cleanly, ready to be admired.
Step 2:
Now, let’s create that irresistible topping. In a generous bowl, add all of your topping ingredients – the flour, oats, chopped pecans, brown sugar, granulated sugar, cinnamon, nutmeg, and salt. Give them a gentle stir to combine their dry spirits. Next, pour in the beautifully melted unsalted butter. Start stirring with a spatula, drawing the mixture together, but don’t be afraid to use your hands to truly work the butter in. The goal is a crumbly, wet-sand texture that holds together slightly when squeezed. Cover this delightful mixture and let it chill in the refrigerator while you turn your attention to the pears.
Step 3:
It’s time to prepare the heart of our crisp. In another large bowl, whisk together all the filling ingredients – the granulated sugar, lemon juice, cornstarch, vanilla extract, cinnamon, nutmeg, ginger, cardamom, and salt. This fragrant blend will coat the pears and create a luscious, slightly thickened sauce as it bakes. Once the spices and sugar have mingled, gently add your prepared pear slices to the bowl. Stir everything together with care, ensuring each pear slice is lovingly coated in the sweet, spiced mixture.
Step 4:
Assemble your masterpiece. Pour the beautifully coated pear filling evenly into your prepared baking dish. Then, take the chilled topping mixture from the refrigerator and sprinkle it generously over the pears, making sure to cover the entire surface. Gently break up any larger clumps of topping with your fingers to ensure even baking and texture.
Step 5:
A final step into the oven’s warmth. Place the assembled crisp into your preheated 425 degrees F oven. Let it bake for about 30 minutes, or until you see the fruit bubbling enticingly around the edges and the topping has turned a lovely golden brown. About halfway through the baking time, it’s a good idea to rotate the pan to ensure even browning. Once baked to perfection, carefully transfer the dish to a wire rack and let it cool for about 15 minutes. This allows the juices to settle slightly, making it perfect for serving warm with a dollop of vanilla ice cream.
Chef’s Tips for a Perfect Result
-
Choose pears that are ripe but still firm; they should yield slightly to gentle pressure but not be mushy, ensuring your filling doesn’t become watery.
-
If your pears are ripening too quickly, store them in the refrigerator to slow the process, and consider buying a couple of extra just in case.
-
Ensure pears are at room temperature before baking for more even cooking; take them out of the fridge a couple of hours prior.
-
Do not skip chilling the topping mixture; this cold butter is crucial for achieving a truly crisp, crumbly texture.
-
Use your hands to thoroughly combine the melted butter into the topping ingredients, ensuring every bit of flour, oats, and nuts is coated for maximum crispiness.
-
If the topping starts to brown too quickly, tent the dish loosely with aluminum foil to prevent burning while the fruit finishes cooking.
Variations and Substitutions
-
Vegan Option: Replace the unsalted butter in the topping with a good quality vegan butter or melted coconut oil. The texture will be similar, with a slightly different flavor profile depending on your choice.
-
Gluten-Free Alternative: Use a gluten-free all-purpose flour blend in place of the regular flour in the topping. Ensure your oats are certified gluten-free if necessary. This substitution will maintain the crispiness with the usual delightful texture.
-
Nut-Free Version: Omit the pecans from the topping altogether. You can increase the oats slightly or add some seeds like sunflower or pumpkin seeds for a similar crunch. This exclusion will simplify the flavor while keeping the satisfying texture.
-
Different Pears: While Bartlett pears are recommended for their texture and sweetness, other varieties like Bosc or Anjou can be used. They might offer a slightly firmer texture or a different sweetness level, adjusting the overall flavor profile subtly.
-
Spice Level: Feel free to adjust the spices to your preference. Add a pinch more cinnamon for a classic warmth or a little extra ginger for a spicier kick. This allows for a personalized flavor experience.
How to Serve and Pair
This Easy Pear Crisp Recipe with Oats and Fresh Pears is a versatile dessert that shines when served warm, allowing its comforting aromas to fill the room. The ultimate accompaniment is a scoop of cool, creamy vanilla bean ice cream, its sweetness and chill creating a perfect counterpoint to the warm, spiced pears and crunchy topping. A drizzle of warm caramel sauce or a dollop of lightly sweetened whipped cream also adds an extra touch of indulgence. For a lighter option, a spoonful of thick Greek yogurt can offer a delightful tang.
This crisp is perfect for casual family dinners, festive holiday gatherings, or simply as a treat to brighten a cozy afternoon. It pairs beautifully with a soothing cup of herbal tea, like chamomile or peppermint, or even a warm spiced cider for a truly autumnal experience. The presentation is naturally rustic and inviting; serve directly from the baking dish or skillet, allowing guests to spoon their own generous portions.
Storage and Reheating
Refrigerator
To store leftover pear crisp, allow it to cool completely to room temperature first. Once cool, cover the baking dish tightly with plastic wrap or aluminum foil. Refrigerated pear crisp will maintain its best quality for 3 to 4 days. It’s often best to store it in its original baking dish to preserve the topping’s integrity.
Freezer
This pear crisp freezes beautifully, whether baked or unbaked, though storing unbaked is ideal if planning ahead. If unbaked, assemble the crisp as usual, cover tightly with plastic wrap then foil, and freeze for up to 3 months. For baked leftovers, ensure the crisp is fully cooled, then wrap and freeze for up to 3 months. Freezing allows you to have this comforting dessert ready whenever a craving strikes.
Room Temperature
While it’s best to refrigerate leftovers for longer storage, you can leave a freshly baked pear crisp at room temperature for a few hours until it has cooled down before serving or storing. It is not recommended to store it at room temperature for extended periods due to the fruit and dairy content.
Reheating
To reheat the crisp in a conventional oven, place the desired portion in a small baking dish or skillet and warm at 350 degrees F for about 15-20 minutes, or until heated through and bubbly. For quicker reheating, especially for individual servings, use the microwave. Heat on 30-second intervals until warm. Be aware that microwaving may soften the topping, so the oven method is preferred for maintaining crispness.
Frequently Asked Questions (FAQ)
Can I use a different type of pear for this recipe?
Yes, you can use different pear varieties like Bosc or Anjou if Bartlett pears are unavailable. Just ensure they are ripe but firm, as softer pears can lead to a mushy filling. The subtle flavor differences will create a unique twist on the classic pear crisp.
How do I know when my pear crisp is perfectly baked?
Your pear crisp is ready when the edges of the pear filling are visibly bubbling and the topping is a beautiful golden brown. There should be a lovely aroma filling your kitchen, indicating the fruit has softened and the topping is perfectly toasted.
My topping isn’t getting crispy, what could be wrong?
A common reason for a soft topping is insufficient chilling of the topping mixture before baking; ensure the butter is very cold. Also, avoid over-mixing the topping once the butter is added, as this can develop the gluten too much. Baking at the correct temperature and rotating the pan also helps ensure even crisping.
Can I prepare this pear crisp recipe ahead of time?
Absolutely. You can assemble the entire crisp, cover it well, and refrigerate it for up to 24 hours before baking. When ready to bake, you may need to add an extra 5-10 minutes to the cooking time to ensure it’s thoroughly heated and bubbly.
What are the best ways to serve or customize this pear crisp?
Serve this pear crisp warm with vanilla ice cream, whipped cream, or a drizzle of caramel sauce. To customize, consider adding a handful of dried cranberries or raisins to the filling for a touch of tartness, or a sprinkle of chopped walnuts instead of pecans.
CONCLUSION
This Easy Pear Crisp Recipe with Oats and Fresh Pears is a testament to the beauty of simple, honest ingredients transformed into comforting magic. It’s a dessert that wraps you in warmth, perfect for sharing moments of connection and joy. Embrace the gentle sweetness and the delightful crunch, a signature combination that makes this pear crisp an unforgettable treat that nourishes the heart and soul.
Print
Easy Pear Crisp Recipe with Oats and Fresh Pears
- Prep Time: 15
- Cook Time: 35
- Total Time: 50
- Yield: 6 servings 1x
- Category: desserts
- Method: Baking
- Cuisine: American
- Diet: Vegetarian
Description
A rustic dessert featuring tender baked pears topped with a cinnamon-spiced oat crumble. Sweet, warm, and soothing, this homemade treat feels like a cozy memory in every bite.
Ingredients
6–7 fresh pears (about 3 cups sliced)
1 cup all-purpose flour
1/2 cup quick oats
1/2 cup packed brown sugar
1 tsp ground cinnamon
1/4 tsp ground nutmeg
1/4 tsp salt
1/2 cup cold vegan butter (substitute vegetable shortening if needed)
1/4 cup chopped pecans (optional)
2 tbsp maple syrup (optional, for extra sweetness)
Instructions
Preheat oven to 375°F (190°C)
Peel and slice pears into thin wedges
Combine flour, brown sugar, cinnamon, nutmeg, and salt in a bowl
Crumble cooled vegan butter into dry mix until pea-sized clumps form
Spread pear slices in a baking dish, toss with 1/4 tsp cinnamon
Sprinkle crumble topping evenly over pears
Add chopped pecans if using
Bake 30-35 minutes until topping is golden and pears bubble
Let cool slightly before serving (optional: drizzle with maple syrup after baking)
Notes
Use Bosc or Anjou pears for best texture
For gluten-free version, substitute flour with oat flour
covers 1/2 cup pears = 3 medium pears
Store in airtight container up to 3 days
Nutrition
- Serving Size: 1 serving (about 1/6 of dish)
- Calories: 260
- Sugar: 25g
- Sodium: 200mg
- Fat: 12g
- Saturated Fat: 7g
- Carbohydrates: 35g
- Fiber: 2g
- Protein: 3g
- Cholesterol: 10mg


