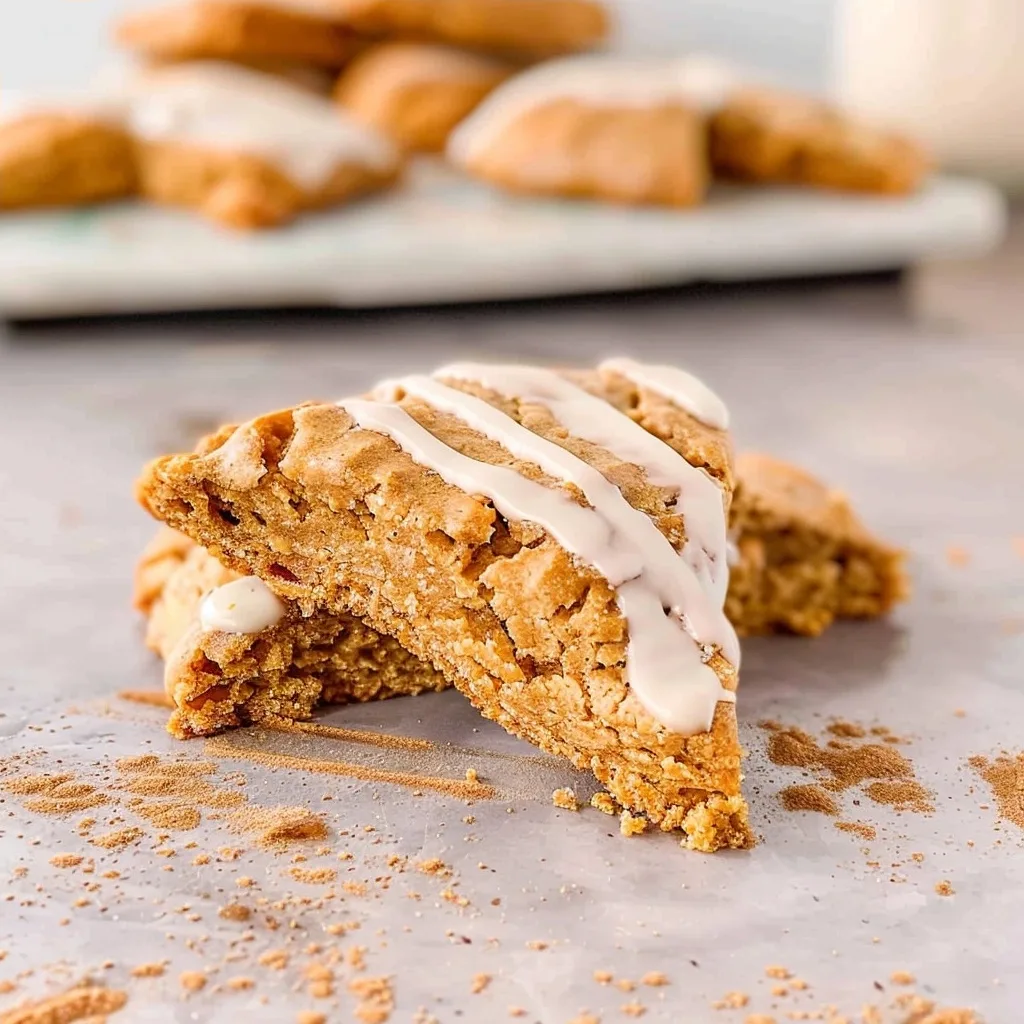
Gluten-Free Pumpkin Scones
Gluten-Free Pumpkin Scones are a soulful reminder that comfort is always within reach, no matter your dietary journey. These golden, spiced triangles bring the warm essence of autumn into your kitchen, acting as a gentle invitation to slow down and embrace the quiet moments of the morning with a cup of tea in hand. Just as my grandmother would preserve the season through her baking, these scones offer a way to honor the harvest while ensuring everyone at your table feels cared for and included.
Crafted with a blend of warmth, the right balance of gluten-free flour, and cozy pumpkin notes, these Gluten-Free Pumpkin Scones are perfectly crumbly yet tender. Whether you are baking for a festive weekend brunch or simply needing a gentle pick-me-up on a lazy Tuesday, these treats bridge the gap between wholesome ingredients and indulgent flavor. They represent the love we pour into our meals, turning humble pantry staples into a shared memory.
What is Gluten-Free Pumpkin Scones?
These scones are a delightful adaptation of the classic, flaky Scottish pastry, reimagined to accommodate gluten-free lifestyles without sacrificing that essential buttery crispness. At their heart, they combine real pumpkin puree with a fragrant symphony of ground cinnamon, ginger, nutmeg, cloves, and allspice, capturing the nostalgic spirit of fall in every bite.
Unlike traditional bakes that rely on wheat flour for structure, these scones utilize a high-quality gluten-free flour blend that provides a light, airy crumb. The marriage of cold butter and earthy pumpkin ensures they remain moist on the inside while achieving a beautiful, golden-brown edge during baking. It is a simple recipe that feels sophisticated, relying on the quality of your spices and the chill of your butter to create a perfect texture.
Reasons to Try Gluten-Free Pumpkin Scones
There is a unique joy in mastering a gluten-free bake that rivals the texture of traditional recipes. These scones are inherently forgiving for beginners, yet they offer the refined crumb that experienced bakers crave. Because they come together in less than thirty minutes, they are the ideal companion for those hectic mornings when you still want to offer something heart-warming to your loved ones.
Beyond the ease of preparation, this recipe is incredibly versatile and inclusive. Whether you are navigating a gluten sensitivity or simply looking for a lighter, seasonal treat, these scones fit the bill beautifully. Sharing a tray of freshly baked, aromatic scones is a simple, profound way to build connection and create a sense of sanctuary within your home, one warm wedge at a time.
Ingredients Needed to Make Gluten-Free Pumpkin Scones
- 2 cups high-quality gluten-free flour blend (ensure it contains xanthan gum)
- 1/2 cup brown sugar (lightly packed for a touch of molasses sweetness)
- 2 teaspoons baking powder (the secret to that gentle lift)
- 1/2 teaspoon baking soda
- 2 1/2 teaspoons ground cinnamon (for that signature aromatic warmth)
- 1/2 teaspoon ground ginger
- 1/2 teaspoon ground nutmeg
- 1/4 teaspoon ground cloves
- 1/4 teaspoon ground allspice
- 1/4 teaspoon salt
- 1/2 cup cold butter, cubed (keep this chilled until the very last second)
- 1/2 cup pumpkin puree (use pure canned pumpkin, not pumpkin pie filling)
- 1 large egg
- 2 tablespoons heavy cream (plus a little extra for brushing if desired)
Instructions to Make Gluten-Free Pumpkin Scones – Step by Step
Step 1: Begin by preheating your oven to 400 degrees Fahrenheit. Line a large baking sheet with parchment paper, which ensures an easy cleanup and prevents the bottoms of your scones from darkening too quickly.
Step 2: In a wide mixing bowl, whisk together your flour, brown sugar, baking powder, baking soda, and the warm array of spices. Once combined, add the cold, cubed butter and use a pastry cutter or two forks to work it into the dry ingredients until the mixture resembles coarse, buttery crumbs.
Step 3: In a separate small bowl, gently whisk the pumpkin puree, the egg, and the heavy cream until smooth. Create a well in the center of your dry ingredients and pour in this wet mixture, folding it together just until the dough begins to unite, being careful not to overwork the tender base.
Step 4: Turn the delicate dough onto a lightly floured surface and gently pat it into a circle roughly three-quarters of an inch thick. Using a sharp, floured knife, divide the circle into eight even wedges, taking care to handle the dough with a light touch to preserve its delicate structure.
Step 5: Carefully lift the wedges and arrange them on your prepared baking sheet, leaving an inch between each one to allow for proper heat circulation. Bake for 13 to 15 minutes, watching for that lovely golden hue and ensuring a toothpick inserted into the center comes out clean.
Step 6: While the scones cool, prepare your simple vanilla glaze and the spiced pumpkin glaze by whisking the respective ingredients until smooth. Drizzle them over the fully cooled scones in stages, allowing each layer to set so you have those beautiful, professional-looking ribbons of sweetness on top.
Chef’s Tips for a Perfect Result
- Keep the butter icy cold: This is essential for creating those beautiful, flaky layers that define a perfect scone.
- Measure flour correctly: Use the spoon-and-level method rather than scooping directly from the bag to avoid a dry, heavy dough.
- Don’t overwork the dough: Mix only until the ingredients are just combined, as overworking can lead to a tougher, less tender scone.
- Use room temperature pumpkin: While butter should be cold, bringing your pumpkin puree to room temperature helps it emulsify better with the cream and egg.
- Glaze carefully: Always wait until the scones are completely cold before glazing, otherwise the heat will cause the icing to slide right off.
Variations and Substitutions
- Dairy-Free Option: Swap the butter for a high-quality vegan butter stick and replace the heavy cream with full-fat canned coconut milk for a rich, dairy-free alternative that maintains structural integrity.
- Sugar Swap: If you prefer a refined-sugar-free version, you can substitute the brown sugar with a high-quality coconut sugar; keep in mind this will result in a deeper, caramelly color and flavor profile.
- Nutty Texture: Fold in a quarter cup of finely chopped pecans or walnuts just before shaping the dough to add a satisfying, earthy crunch that pairs perfectly with the pumpkin spices.
How to Serve and Pair
These scones are best enjoyed on a ceramic plate, served alongside a piping hot mug of spiced chai tea or a smooth, creamy latte. For a festive addition, serve them during a cozy autumn brunch with a dollop of honey-whipped cream on the side. They make for a soulful gift when wrapped in brown parchment paper and tied with a string, bringing comfort to anyone who receives them.
Storage and Reheating
Refrigerator: Store any leftover scones in an airtight container for up to three days. To keep them at their best, place a small piece of parchment paper between layers to prevent sticking.
Freezer: For long-term storage, wrap each cooled scone individually in plastic wrap and place them in a freezer-safe bag. They will maintain their quality for up to one month; simply thaw them at room temperature when you are ready to enjoy.
Reheating: To restore that ‘fresh from the oven’ texture, reheat in a preheated oven at 300 degrees Fahrenheit for five to seven minutes. Avoid the microwave if possible, as it tends to make the gluten-free crumb slightly gummy rather than flaky.
Frequently Asked Questions (FAQ)
Can I substitute the gluten-free flour with almond flour?
Almond flour behaves quite differently than a gluten-free all-purpose blend, so it is not a direct substitute due to the lack of structure and binders. Stick to a high-quality 1-to-1 gluten-free baking flour containing xanthan gum to ensure your scones hold their shape perfectly.
How do I know when the scones are fully baked?
The scones are finished when the edges are lightly golden brown and the tops feel set to the touch. You can also insert a toothpick into the center of a wedge; if it comes out clean without any wet dough, they are ready for the cooling rack.
My dough is very sticky, what did I do wrong?
Gluten-free doughs are naturally stickier than wheat-based ones, so do not be tempted to add too much extra flour. Simply dust your hands and the work surface with a fine layer of flour, and use a bench scraper or a spatula to help shape the dough without needing to knead it excessively.
Can I prepare the dough the night before?
You can certainly prepare the dough, shape it into wedges, and store them on a lined tray in the refrigerator overnight. When you are ready to bake in the morning, simply pop them directly into the preheated oven, adding an extra minute or two to the total baking time.
What is the best way to keep these scones moist?
The secret to keeping these scones soft is to store them in an airtight container at room temperature only for the first day, then move them to the refrigerator. When reheating, a quick toast in a low-temperature oven will help re-crisp the edges while keeping the inside tender and moist.
Conclusion
These Gluten-Free Pumpkin Scones are a testament to the fact that dietary restrictions never have to compromise the joy of baking. By filling your kitchen with the scent of cinnamon and warm pumpkin, you are doing more than just making breakfast; you are creating a moment of peace and care to share with those you love. I hope this recipe brings as much warmth and comfort to your home as it has to mine, becoming a cherished part of your own seasonal traditions for years to come.
Print
Gluten-Free Pumpkin Scones
- Prep Time: 15
- Cook Time: 20
- Total Time: 35
- Yield: 8 scones 1x
- Category: desserts
- Method: Baking
- Cuisine: American
- Diet: Gluten-Free, Vegetarian
Description
These golden, spiced Gluten-Free Pumpkin Scones are a soulful, comforting embrace of autumn. Crafted with a delicate gluten-free flour blend, real pumpkin puree, and a warming symphony of ginger, cinnamon, and nutmeg, these scones achieve a perfectly crumbly yet tender texture. They offer a sophisticated yet simple way to bring a touch of seasonal nostalgia and cozy warmth to your morning routine, perfect for sharing with those you love.
Ingredients
2 cups gluten-free flour blend (with xanthan gum)
1/2 cup brown sugar, packed
2 teaspoons baking powder
1 teaspoon ground cinnamon
1/2 teaspoon ground ginger
1/4 teaspoon ground nutmeg
1/4 teaspoon ground cloves
1/4 teaspoon ground allspice
1/2 cup cold unsalted butter, cubed
1/2 cup pumpkin puree
1/4 cup heavy cream
1 large egg
Instructions
Preheat your oven to 400°F (200°C) and line a baking sheet with parchment paper.
In a large bowl, whisk together the gluten-free flour, brown sugar, baking powder, and all the spices.
Cut the cold, cubed butter into the flour mixture using a pastry cutter or your fingers until it resembles coarse crumbs.
In a separate small bowl, whisk together the pumpkin puree, heavy cream, and egg until smooth.
Add the wet ingredients to the dry ingredients and stir gently until just combined into a soft dough.
Turn the dough onto a lightly floured surface and pat into a 1-inch thick circle.
Cut the dough into 8 equal wedges and place them on the prepared baking sheet.
Bake for 15-20 minutes, or until the edges are golden brown and the center is set.
Allow the scones to cool slightly on a wire rack before serving.
Notes
Ensure your butter is very cold to achieve the best texture. If the dough feels too sticky, chill it in the refrigerator for 15 minutes before forming the wedges. Store leftovers in an airtight container at room temperature for up to two days.
Nutrition
- Serving Size: 1 scone
- Calories: 240
- Sugar: 12g
- Sodium: 180mg
- Fat: 11g
- Saturated Fat: 7g
- Carbohydrates: 32g
- Fiber: 2g
- Protein: 3g
- Cholesterol: 55mg


