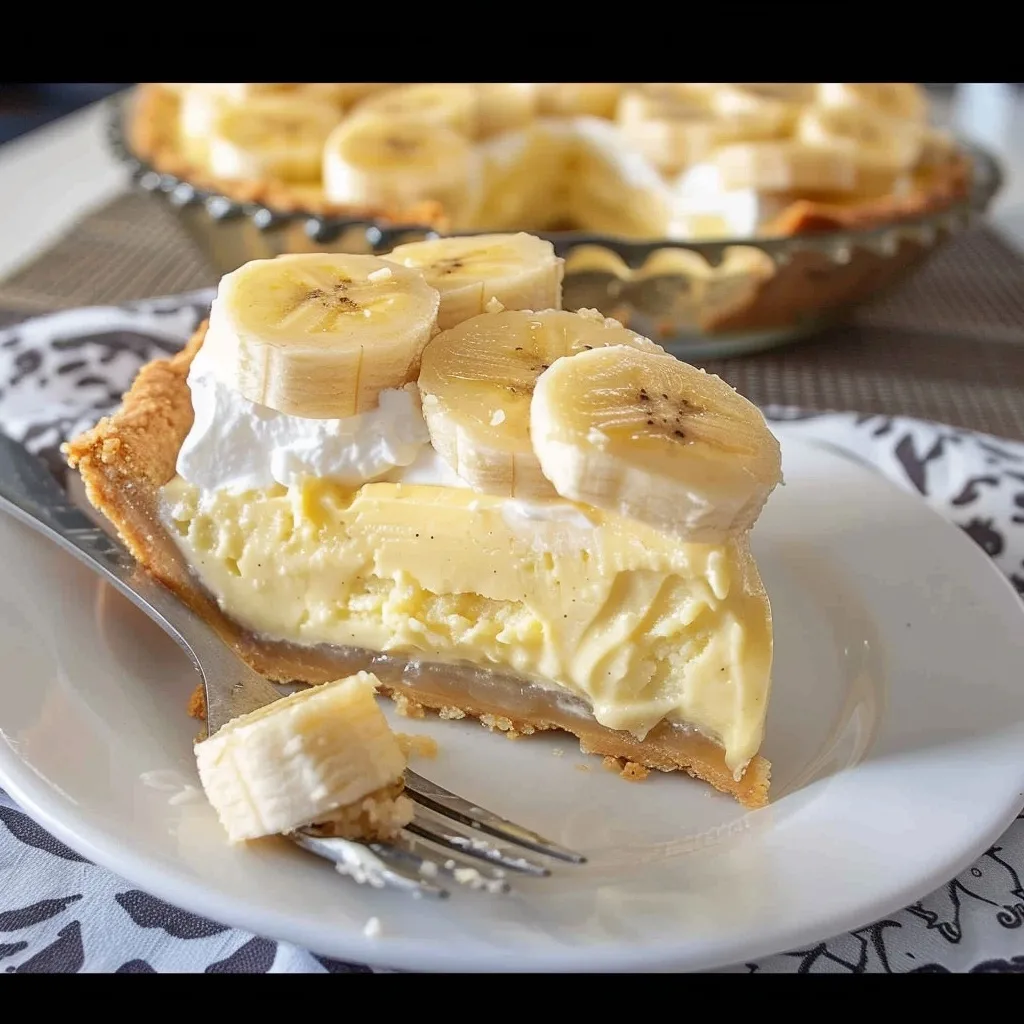
Icebox Banana Cream Pie isn’t just a dessert; it’s a whispered promise of cool, creamy comfort on a warm afternoon. It takes me back to my grandmother’s kitchen, a place filled with the gentle hum of the refrigerator and the sweet scent of ripe bananas waiting to become something magical. This recipe captures that very essence – simple ingredients coming together to create a moment of pure bliss. It’s the kind of pie that doesn’t demand hours by the hot oven, but instead, offers a quiet, patient transformation in the cool embrace of the icebox.
In a world that often rushes, an icebox pie is a gentle reminder to slow down. It’s about anticipating joy, the satisfying feeling of letting time do its work, transforming simple elements into a decadent treat. This Icebox Banana Cream Pie is perfect for those days when you crave something utterly delicious but want to keep your kitchen calm and cool. It’s an uncomplicated path to a show-stopping dessert, one that will earn smiles and satisfied sighs all around. Let’s create a little bit of magic together, one creamy slice at a time.
What is Icebox Banana Cream Pie?
An Icebox Banana Cream Pie is a delightful, no-bake dessert that centers around layers of sweet, ripe bananas nestled in a creamy, vanilla-infused filling, all embraced by a no-bake, crumbly crust. Unlike traditional baked pies that require oven time and careful cooling, this version relies on refrigeration or freezing to set, making it wonderfully convenient and perfect for warmer days or busy cooks. The magic lies in its simplicity and the way it showcases the natural sweetness of bananas.
Its origins are rooted in the American tradition of no-bake desserts, a practical and popular choice born from the need for refreshing treats that didn’t heat up the kitchen. The name ‘icebox’ itself harks back to a time before modern refrigerators, highlighting its connection to cool storage. This pie is often built on a foundation of crushed vanilla wafer cookies, butter, and a touch of salt, providing a subtly sweet and firm base that holds the creamy filling beautifully. It’s a dessert that feels both nostalgic and utterly current, a testament to the enduring appeal of classic flavors executed with pure simplicity.
Reasons to Try Icebox Banana Cream Pie
There are so many delightful reasons to welcome this Icebox Banana Cream Pie into your dessert repertoire. First and foremost, it’s incredibly easy to make, requiring no baking skills whatsoever. The minimal prep time means you can whip it up with relative ease, freeing up your time for other things, or simply to relax. This convenience doesn’t compromise on flavor; in fact, it allows the pure, sweet taste of banana and creamy vanilla to shine through without being masked by baked crust complexities.
This no-bake wonder is perfect for beginner bakers, busy parents looking for a quick yet impressive dessert, or anyone who wants to avoid turning on their oven. It’s a forgiving recipe that’s hard to get wrong, and the results are consistently delicious. Imagine serving a dessert that looks elegant, tastes heavenly, and required very little effort – that’s the joy of an icebox pie. It’s a welcome guest at potlucks, family gatherings, or even just a Tuesday night when you need a little sweetness in your life.
Ingredients Needed to Make Icebox Banana Cream Pie
To bring this creamy dream to life, gather these simple treasures:
-
1 (3.4 ounce) box instant vanilla pudding mix
-
2 cups milk (whole milk or 2% recommended for creaminess)
-
1 cup frozen whipped topping, thawed (like Cool Whip)
-
4 ripe bananas (medium-sized, with a few brown spots are ideal)
-
For the Crust:
-
2 1/2 cups vanilla wafer cookie crumbs (about 45-50 cookies)
-
1 stick (1/2 cup) unsalted butter, melted
-
1/8 teaspoon salt
Instructions to Make Icebox Banana Cream Pie – Step by Step
Step 1: Prepare the No-Bake Crust
Begin by creating the perfect foundation for our pie. Take your vanilla wafer cookies and either place them in a sturdy zip-top bag and crush them with a rolling pin until they are fine crumbs, or pulse them in a food processor until you achieve that crumbly consistency. You’ll need about 2 and a half cups of these crumbs. In a medium bowl, combine the cookie crumbs with the melted butter and the pinch of salt. Stir everything together until the crumbs are evenly moistened and resemble wet sand. This mixture will hold together beautifully. Press this crumb mixture firmly and evenly into the bottom and up the sides of a 9-inch shallow pie pan. Using the bottom of a glass or your fingers, pack it down really well to create a solid, even crust. This will prevent it from crumbling later. No need to grease the pan; the butter in the crust does all the work!
Step 2: Craft the Creamy Pudding Filling
Now, let’s bring together the luscious filling that defines this pie. In a separate medium bowl, combine the instant vanilla pudding mix with the milk. Whisk these together vigorously for about one to two minutes, or until the pudding starts to thicken. Instant pudding sets quite quickly, so don’t over-whisk. In another small bowl, gently mash two of your ripe bananas with a fork until they are mostly smooth but still have a little bit of texture left – we want those little bits of banana goodness! Carefully fold the mashed bananas into the thickened pudding mixture. Once that’s well combined, gently fold in the cup of thawed frozen whipped topping. Be tender as you fold; we want to keep the filling light and airy, creating beautiful swirls of banana within the creamy pudding.
Step 3: Assemble and Chill the Pie
It’s time to bring all the elements together for their transformation in the icebox. Take your prepared pie crust and the remaining two ripe bananas. Slice these bananas into thin rounds, about 1/4-inch thick. Arrange these banana slices in an even layer over the bottom of the pressed vanilla wafer crust. Try to make them as uniform as possible for a beautiful presentation later. Now, gently pour the prepared banana cream pudding mixture over the layer of sliced bananas, spreading it evenly with a spatula to cover them completely. Smooth the top so it looks neat and inviting. Cover the pie loosely with plastic wrap or foil, making sure it doesn’t touch the surface of the filling, and place it in the freezer for at least 6 to 8 hours, or until it’s completely firm and set. This chilling time is crucial for the pie to develop that perfect, sliceable icebox consistency.
Step 4: Thaw and Serve Your Masterpiece
Just before you’re ready to share this delightful treat, it needs a little time to warm up from its frozen state into a perfectly sliceable dessert. Remove the pie from the freezer and place it on your kitchen counter. Allow it to sit at room temperature for about 20 to 30 minutes. This brief thawing period is just enough to soften the filling and crust slightly, making it easy to cut into clean slices without it melting away. It also brings out the full flavor and creamy texture. Once thawed to perfection, slice it generously and serve. If you like, you can add a dollop of extra frozen whipped topping on each slice and sprinkle with a few extra vanilla wafer cookie crumbs for a touch of elegance and added texture.
Chef’s Tips for a Perfect Result
-
Use very ripe bananas, the ones with more brown spots, as they offer the most sweetness and a more intense banana flavor.
-
Ensure your frozen whipped topping is completely thawed but not melted; this will help it incorporate smoothly into the pudding.
-
Press the crust mixture firmly into the pie plate to create a sturdy base that will hold the creamy filling without breaking.
-
Chill the pie for the full recommended time in the freezer to ensure it sets correctly and is easy to slice.
-
For an even smoother filling, you can lightly mash the bananas or even briefly process them before folding them into the pudding mixture.
-
Slice the pie using a sharp knife dipped in hot water and wiped dry between each cut for the cleanest, most professional-looking slices.
Variations and Substitutions
Vegan Option
Use dairy-free, gluten-free vanilla wafer cookies for the crust, and sub vegan butter. For the filling, opt for a plant-based milk (like almond or soy) and coconut-based whipped topping. The flavor will be slightly different but still delicious.
Gluten-Free Alternative
Crush gluten-free vanilla cookies or graham crackers for the crust. Ensure your pudding mix is also certified gluten-free.
Lower Sugar Version
Use sugar-free instant vanilla pudding and a sugar-free frozen whipped topping. You can also reduce the number of bananas slightly, though this may impact sweetness.
Chocolate Lover’s Twist
Add a tablespoon or two of unsweetened cocoa powder to the pudding mix for a hint of chocolate flavor, or use chocolate wafer cookie crumbs for the crust.
Crunchy Topping
Instead of extra cookie crumbs, sprinkle toasted chopped nuts like pecans or walnuts over the top for added texture and flavor.
How to Serve and Pair
This Icebox Banana Cream Pie is a star on its own, but a few touches can elevate the experience. Serve it chilled, straight from the icebox, after its brief thawing period. A classic presentation involves a generous swirl of extra frozen whipped topping on each slice, perhaps adorned with a few thinly sliced fresh banana rounds or a dusting of vanilla wafer cookie crumbs. For a bit of elegance, consider a sprinkle of shaved dark chocolate or a few fresh berries like raspberries or blueberries to add a pop of color and a hint of tartness.
This pie pairs beautifully with a chilled glass of milk, making it a perfect childhood favorite reborn. A light, herbal tea like chamomile or peppermint can also offer a refreshing contrast to the sweetness. It is ideal for casual family dinners, summer barbecues, birthday celebrations or anytime you need a comforting, impressive dessert without the stress of baking. It’s a slice of pure, creamy joy that brings people together.
Storage and Reheating
Refrigerator
Store any leftover Icebox Banana Cream Pie in an airtight container in the refrigerator for up to 2 days. Because it is a no-bake dessert with fresh bananas, texture can degrade over time. It’s best enjoyed fresh, but leftovers can be kept for a short period.
Freezer
This pie is designed to be frozen and then slightly thawed, so freezing is its primary storage method before serving. If you have leftovers and wish to freeze them, wrap the pie tightly in plastic wrap, then in aluminum foil. It can be stored in the freezer for up to 1 month, though the texture of the bananas and crust may change slightly upon thawing.
Room Temperature
It is not recommended to store this pie at room temperature for extended periods, as it contains dairy-based ingredients and fresh fruit, which require refrigeration or freezing to remain safe and maintain their quality. The thawing time of about 20-30 minutes before serving is the only time it should be outside of cold storage.
Reheating
This Icebox Banana Cream Pie is not meant to be reheated. It is designed to be served chilled or slightly thawed from a frozen state. Attempting to reheat it would likely result in a melted, mushy consistency and is not advised.
Frequently Asked Questions (FAQ)
Can I substitute the vanilla pudding mix for a different flavor?
Absolutely, you can use a different flavor of instant pudding, such as banana cream or even chocolate, for a variation. However, be aware that a banana-flavored pudding might make the banana flavor too intense, and a different flavor will alter the classic banana cream profile.
How can I tell when the icebox banana cream pie is perfectly set?
The pie is perfectly set when it is firm to the touch and can be easily sliced without the filling being runny or mushy. After its recommended freezing time, it should feel solid, and when slightly thawed, it should hold its shape when cut.
My crust is crumbly, what happened?
A crumbly crust usually happens if there isn’t enough butter to bind the crumbs together, or if the crumbs weren’t pressed firmly enough into the pan. Ensure the butter is fully melted and evenly distributed throughout the crumbs, and pack the mixture down tightly.
Can I make this pie a day ahead of time?
Yes, you can certainly make this pie a day ahead. After assembling and smoothing the filling, cover it and freeze it. It will be ready to thaw and serve as needed the following day, making it an excellent make-ahead dessert option.
What are the best ways to customize or serve this icebox pie?
To customize, consider adding a thin layer of sliced fresh strawberries beneath the banana slices, or swirl in some caramel sauce into the filling. For serving, a simple dollop of whipped cream and a sprinkle of toasted coconut flakes makes it extra special.
CONCLUSION
This Icebox Banana Cream Pie is a testament to the beauty of simple, no-bake desserts, offering unparalleled creamy texture and delightful banana sweetness. It’s a comforting and accessible recipe that brings a touch of homemade charm to any occasion. Give it a try and discover the irresistible, cool, and dreamy flavor that makes this icebox treat so special.
Print
Icebox Banana Cream Pie
- Prep Time: 15
- Total Time: 15
- Yield: 8 slices 1x
- Category: desserts
- Method: No-Bake
- Cuisine: American
- Diet: Vegetarian
Description
A no-bake dessert with layers of ripe bananas and creamy vanilla filling in a buttery cookie crust, chilled to perfection for a cool, refreshing treat. Simple prep, no oven needed.
Ingredients
1 1/2 cups crushed vanilla wafer cookies
1/3 cup melted butter
1/8 tsp salt
3 large ripe bananas, mashed
1 cup milk
1 1/2 cups heavy whipping cream
1/2 tsp pure vanilla extract
1/2 cup sweetened condensed milk
Instructions
Mix crushed cookies, melted butter, and salt; press into a 9-inch pie pan.
Mash bananas and set aside.
Combine milk, sweetened condensed milk, and vanilla extract in a bowl.
Whip heavy cream until soft peaks form; fold into banana mixture.
Spoon over crust in pie pan.
Refrigerate for 4-8 hours before serving.
Notes
Chilling for 4 hours is essential to set the filling.
For a firmer crust, add 1/2 cup all-purpose flour to the cookie mixture.
Replace heavy cream with coconut milk for a vegan option.
Nutrition
- Serving Size: 1 slice
- Calories: 420
- Sugar: 10g
- Sodium: 140mg
- Fat: 23g
- Saturated Fat: 15g
- Carbohydrates: 39g
- Fiber: 4g
- Protein: 5g
- Cholesterol: 75mg


