No Bake Chocolate Mousse Cheesecake
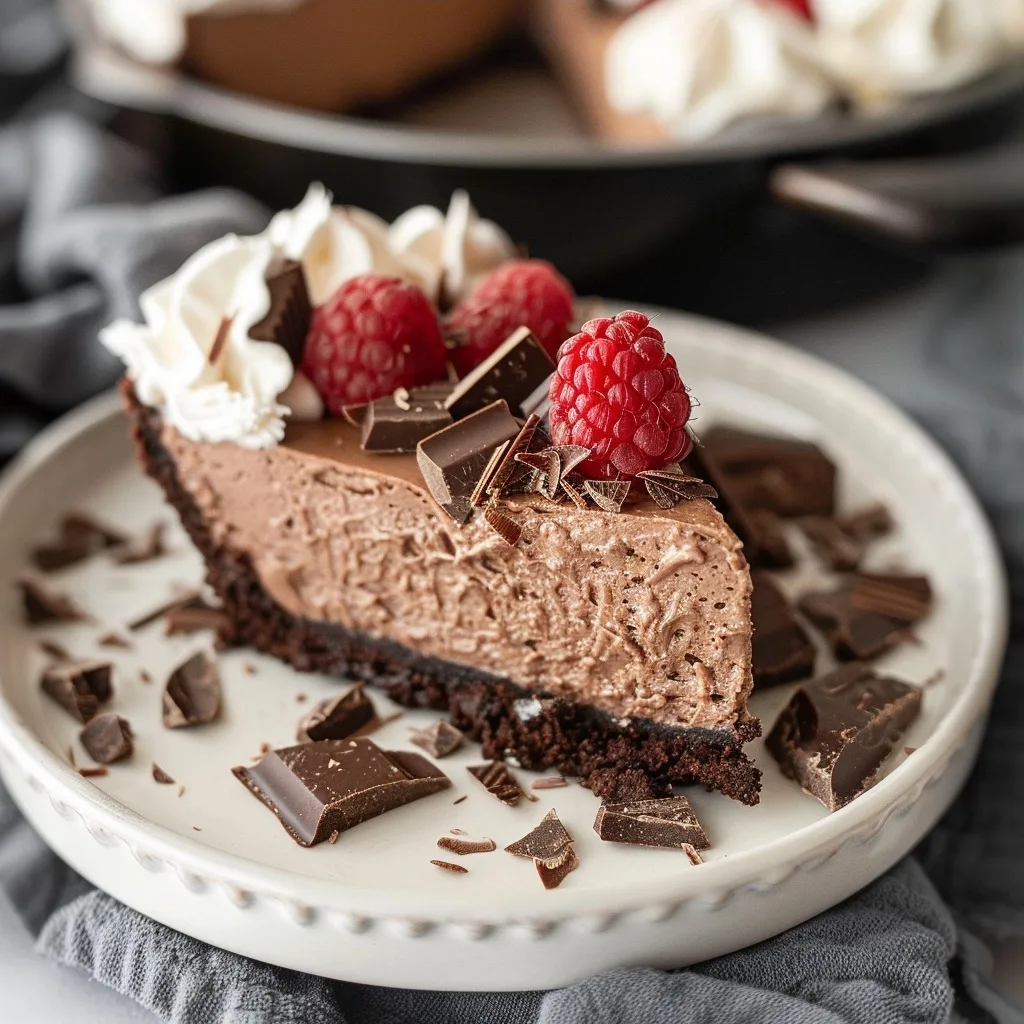
No Bake Chocolate Mousse Cheesecake is an easy, creamy, and decadent dessert that brings together the rich indulgence of chocolate mousse with the beloved tang of cheesecake. It’s a truly magical creation, born from a desire to capture pure comfort in a slice, reminiscent of quiet afternoons spent learning cherished recipes with loved ones. This dessert skips the oven, embracing a simpler, more soulful approach to creating something utterly spectacular.
Imagine a base kissed by the deep flavor of chocolate cookies, giving way to a cloud-like filling that melts in your mouth. It’s the kind of dessert that feels both elegant and incredibly accessible, perfect for those moments when you want to create something special without the fuss. This No Bake Chocolate Mousse Cheesecake is a testament to the idea that extraordinary flavors can bloom with simple ingredients and a little bit of love.
What is No Bake Chocolate Mousse Cheesecake?
At its heart, a No Bake Chocolate Mousse Cheesecake is an elegant dessert that marries the luxurious texture of chocolate mousse with the creamy, slightly tangy foundation of a cheesecake, all without the need for an oven. It typically features a crumbly, often chocolate-based crust, layered with a light and airy chocolate mousse filling that sets beautifully in the refrigerator. This no-bake approach makes it wonderfully approachable for home cooks of all skill levels.
The magic lies in the contrast of textures and flavors: the satisfying crunch of the crust, the dreamy smoothness of the mousse, and that subtle, irresistible cheesecake essence. It’s a dessert that speaks of pure indulgence, offering a sophisticated taste experience that feels both familiar and exciting. Think of it as a comforting hug in dessert form, perfect for sharing life’s sweet moments.
Reasons to Try No Bake Chocolate Mousse Cheesecake
This No Bake Chocolate Mousse Cheesecake is a dream come true for anyone seeking a quick yet impressive dessert. Its beauty lies in its simplicity; you can create a showstopper without ever turning on your oven, making it an absolute lifesaver on hot summer days or when your oven is already occupied. The process is wonderfully intuitive, allowing you to focus on the joy of creation rather than the pressure of baking perfection.
It’s the kind of recipe that feels like a secret whispered from one cook to another – easy, reliable, and always met with delighted sighs. Whether you’re a beginner looking to impress or a seasoned baker wanting a break, this dessert delivers on taste, texture, and pure happiness. It’s perfect for busy weeknights, spontaneous gatherings, or simply as a way to bring a little extra sweetness and comfort into your everyday.
Ingredients Needed to Make No Bake Chocolate Mousse Cheesecake
Crust:
- 23 Oreo cookies (finely ground into crumbs)
- 5 tablespoons unsalted butter (melted)
Chocolate Mousse Filling:
- 8 ounces semi-sweet chocolate (finely chopped)
- 16 ounces cream cheese (two standard blocks), softened beautifully to room temperature
- 1 cup powdered sugar (sifted to ensure smoothness)
- 2 teaspoons vanilla bean paste (or pure vanilla extract for that warm aroma)
- 1½ cups heavy whipping cream (cold, ready to whip)
Topping (Optional, but highly recommended for that final flourish):
- Freshly whipped cream
- Assorted fresh fruits like strawberries or raspberries
- Chocolate shavings or curls
Instructions to Make No Bake Chocolate Mousse Cheesecake – Step by Step
Step 1: Prepare the Crust Foundation
Begin by gathering your Oreo cookies and ensuring they are ground into fine crumbs, aiming for a texture that feels like rich soil. If you don’t have a food processor, a sturdy blender or even a rolling pin and a zip-top bag can do the trick. In a medium mixing bowl, gently combine these chocolatey crumbs with the melted unsalted butter. You want the mixture to resemble damp sand, sticking together when gently pressed. Take a 9-inch springform pan, and press this delightful mixture evenly into the bottom and slightly up the sides. This creates the sturdy, chocolatey foundation for our creamy dream. Once pressed, place the pan into the refrigerator to chill and firm up while you move on to crafting the luscious filling. This chilling step is key to a crust that holds its shape beautifully.
Step 2: Melt and Cool the Chocolate
Now, let’s work with the heart of our chocolate mousse. Take your finely chopped semi-sweet chocolate and place it in a medium, heatproof bowl. The best way to melt chocolate gently is often in the microwave. Heat it on medium power, stirring every 15 to 30 seconds. Watch carefully, stirring until the chocolate is smooth and glossy. It’s important to avoid overheating, as chocolate can seize up and become grainy if cooked too quickly. Once melted, set this bowl aside to cool slightly. We want it perfectly melted but not so hot that it will melt the cream cheese we’ll be adding later.
Step 3: Create the Creamy Cheesecake Base
In a large mixing bowl, ensure your softened cream cheese is ready to go. Add the sifted powdered sugar and vanilla bean paste (or extract) to the cream cheese. Using an electric hand mixer, start beating these ingredients together. Begin on a low speed to avoid a sugar cloud, then increase the speed until the mixture is completely smooth, creamy, and free of any lumps. Scrape down the sides of the bowl as needed to ensure everything is incorporated beautifully. This smooth, creamy base is the soul of any good cheesecake, no-bake or otherwise, and it’s crucial that it’s perfectly blended before we add our melted chocolate.
Step 4: Marry Chocolate and Cream Cheese
Gently pour the slightly cooled, melted semi-sweet chocolate into the cream cheese mixture. Continue beating with your electric mixer until everything is seamlessly combined, creating a rich, chocolatey batter that smells absolutely divine. Take a moment to appreciate this deep, dark chocolatey goodness. This is where the magic of a chocolate cheesecake truly begins to unfold, transforming simple ingredients into a luxurious dessert.
Step 5: Whip the Cream to Perfection
In a separate, clean large bowl, pour in the cold heavy whipping cream. Using your electric hand mixer, whip the cream until stiff peaks form. Stiff peaks mean that when you lift the beaters out of the cream, the cream holds its shape and the peaks stand straight up, perhaps with a slight curl at the very tip. Be careful not to over-whip, which can turn cream into butter. This light, airy whipped cream is what will give our chocolate cheesecake its ethereal mousse-like texture, making it feel utterly indulgent yet surprisingly light.
Step 6: Fold for the Ultimate Mousse
Now, it’s time to bring the two beautifully prepared components together. Take about a third of the whipped cream and gently fold it into the chocolate cream cheese mixture. This first addition helps to lighten the chocolate mixture, making it easier to incorporate the remaining cream. Once that’s incorporated, add the rest of the whipped cream and continue to fold gently. The goal is to incorporate the whipped cream without deflating it too much, preserving that lovely airiness. You want to see streaks of white disappear until the mixture is uniformly creamy and smooth, like liquid velvet.
Step 7: Assemble and Chill
Retrieve your chilled crust from the refrigerator. Gently and evenly spread the luscious chocolate mousse filling over the prepared crust. Use a spatula to smooth the top, creating a beautiful, even surface. Cover the springform pan loosely with plastic wrap, ensuring it doesn’t touch the mousse filling. Now, the hardest part: patience! Place the cheesecake into the refrigerator to chill and set for at least 4 to 5 hours, or ideally, overnight. This extended chilling time allows the flavors to meld and the mousse to firm up perfectly into that dreamy, sliceable texture we’re aiming for. It’s during this quiet time in the cool refrigerator that the dessert truly comes to life.
Step 8: Garnish and Serve
Once your No Bake Chocolate Mousse Cheesecake has had ample time to chill and firm up, it’s ready for its grand unveiling. Carefully unbuckle and remove the sides of the springform pan. If you used parchment paper on the bottom, as suggested in the notes, removal will be even smoother. The moment of serving is your chance to add a personal touch. Garnish with swirls of freshly whipped cream, a scattering of vibrant fresh berries like strawberries or raspberries, or delicate chocolate shavings. Serve chilled, and prepare for gasps of delight.
Chef’s Tips for a Perfect Result
- Ensure your cream cheese is truly softened, not just slightly cool. This prevents lumps and ensures a silky-smooth filling.
- Chill the heavy whipping cream and your mixing bowl beforehand. Cold cream whips up faster and to better peaks, contributing to a lighter mousse.
- When melting chocolate, use a microwave on medium power and stir frequently. This prevents scorching and ensures you achieve a perfectly smooth, glossy texture.
- Fold the whipped cream in gently. Overmixing or beating at this stage can deflate the cream, resulting in a denser mousse.
- Allow adequate chilling time. At least 4-5 hours is essential for the cheesecake to set properly, but chilling overnight yields the best texture and flavor development.
- For an easier release from the springform pan, line the bottom with a circle of parchment paper before adding the crust. This prevents sticking and makes serving a breeze.
Variations and Substitutions
- Vegan Option: For a vegan treat, use vegan chocolate sandwich cookies for the crust and incorporate vegan butter. For the filling, substitute cream cheese with a blended mixture of soaked cashews and coconut cream, and use a plant-based whipping cream alternative, ensuring it whips well. This will yield a richer, slightly denser dessert with a distinct, delightful coconut undertone.
- Gluten-Free Alternative: Create a gluten-free crust by using your favorite gluten-free chocolate cookie crumbs or even a mix of almond flour and cocoa powder bound with melted butter. The filling remains the same, offering a delightful contrast to a nuttier or more delicate gluten-free base.
- Dark Chocolate Delight: If you prefer a more intense chocolate flavor, use dark chocolate (70% cacao or higher) for melting. This will result in a less sweet, more sophisticated mousse filling with a deeper, more complex chocolate profile.
- White Chocolate Dream: Swap the semi-sweet chocolate for white chocolate. Melt and incorporate it into the cream cheese mixture. This will create a paler, sweeter, and creamier filling with a characteristic vanilla-forward taste.
- Coffee Infusion: Dissolve 1-2 teaspoons of instant espresso powder into the melted semi-sweet chocolate before adding it to the cream cheese. This adds a wonderful depth and complements the chocolate beautifully, enhancing its richness without tasting overtly of coffee.
How to Serve and Pair
This No Bake Chocolate Mousse Cheesecake is a statement dessert that shines on its own but loves a little accompaniment. Serve each slice chilled for the best texture. A dollop of freshly whipped cream is a classic, providing a fluffy contrast. For a pop of color and freshness, top with a medley of fresh berries like raspberries, strawberries, or even a few tart cherries. A dusting of cocoa powder or a few delicate chocolate shavings adds an extra touch of elegance. This dessert is perfect for celebrations like birthdays, anniversaries, or holidays, but it’s also wonderfully suited for a cozy, comforting treat on any given evening. Pair it with a rich coffee or a delicate herbal tea to round out the experience.
Storage and Reheating
Refrigerator
Store your No Bake Chocolate Mousse Cheesecake in an airtight container in the refrigerator for up to 3 to 4 days. To prevent the filling from drying out, gently cover the cut surface with plastic wrap or a layer of whipped cream if it’s still intact. The chilling process continues to firm the cheesecake, so it might even taste better on the second day.
Freezer
While freezing is possible, the texture of no-bake cheesecakes can sometimes change, becoming a bit more crumbly or icy. If you choose to freeze, ensure it’s well-wrapped in plastic wrap and then placed in an airtight container or freezer bag. It can last for up to 1 month. Thaw it slowly in the refrigerator overnight for the best results.
Room Temperature
It is best to keep this cheesecake refrigerated. Due to the dairy content in the cream cheese and heavy cream, it should not be left at room temperature for more than 2 hours to ensure food safety and maintain its delightful texture.
Reheating
This No Bake Chocolate Mousse Cheesecake is designed to be served chilled and does not require reheating. If it has been stored in the refrigerator, simply bring it to serving temperature by letting it sit out for about 10-15 minutes before slicing. If serving directly from the freezer, allow it to thaw in the refrigerator overnight.
Frequently Asked Questions (FAQ)
Can I substitute the Oreo cookies in the crust?
Yes, you can substitute Oreo cookies with other chocolate sandwich cookies or even graham crackers or digestive biscuits for a different flavor profile. You may need to adjust the amount of butter slightly depending on the dryness of your chosen cookie crumbs to achieve a pressable texture.
How do I know when the No Bake Chocolate Mousse Cheesecake is set?
The cheesecake is set when the filling is firm to the touch and holds its shape when gently pressed. It should not feel jiggly or soft; a fork or knife should meet resistance when cutting into it. It typically requires at least 4-5 hours of chilling.
My cheesecake filling is too soft, what went wrong?
A soft filling usually indicates insufficient chilling time or that the heavy cream was not whipped to stiff peaks. Ensure you allow the full chilling time and that your cream is properly whipped before folding it in. Using softened cream cheese that is too warm can also contribute to a softer set.
Can I make this No Bake Chocolate Mousse Cheesecake a day in advance?
Absolutely! This cheesecake is perfect for making ahead. In fact, chilling it overnight allows the flavors to meld beautifully and the texture to set perfectly, making it ideal for entertaining or busy schedules.
What are the best ways to customize or serve this cheesecake?
You can customize its flavor by adding different extracts like peppermint or raspberry to the filling, or by swirling in fruit purees. For serving, consider mini individual cheesecakes in muffin tins or a decorative topping of chocolate ganache, fruit compote, or even a sprinkle of sea salt for a sweet and salty contrast.
CONCLUSION
This No Bake Chocolate Mousse Cheesecake is a testament to culinary simplicity and profound flavor. It offers a luscious, creamy texture and an intensely chocolatey experience that feels both comforting and sophisticated. Gather your loved ones, take a deep breath, and create this dessert as a heartfelt expression of care and connection; its signature rich chocolate depth is utterly irresistible.
Print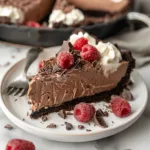
No Bake Chocolate Mousse Cheesecake
- Prep Time: 20
- Total Time: 440
- Yield: 12 slices 1x
- Category: desserts
- Method: No Bake
- Cuisine: American
- Diet: Vegetarian
Description
A creamy, indulgent dessert combining a chocolate crust with layered chocolate mousse and tangy cheesecake filling, topped with rich ganache. No oven required!
Ingredients
23 Oreo cookies (finely ground)
5 tablespoons melted butter (for crust)
8 oz cream cheese
1/4 cup cocoa powder
1/2 cup sugar
1 large egg
1 teaspoon vanilla extract
1/2 cup heavy cream
1/2 cup semisweet chocolate chips
1/4 tsp salt (for ganache)
Instructions
1. Crush Oreo cookies into fine crumbs and mix with melted butter until combined.
2. Press mixture into a 9-inch springform pan lined with parchment paper.
3. In a bowl, beat cream cheese, 1/4 cup cocoa powder, 1/2 cup sugar, and 1 egg until smooth.
4. In separate bowl, whip heavy cream until stiff peaks form.
5. Gently fold whipped cream into cream cheese mixture.
6. Pour mousse layer over crust and chill for 8 hours.
7. Melt chocolate chips and 1/4 cup warmed milk, then spread over mousse.
8. Refrigerate for 2 hours before serving.
Notes
Use a springform pan for easy slicing.
Let cheesecake chill fully to set.
Best served chilled, within 3 days.
Optional: Add a layer of chocolate wafer cookies between crust and mousse.
Nutrition
- Serving Size: 1 slice
- Calories: 350
- Sugar: 25g
- Sodium: 200mg
- Fat: 18g
- Saturated Fat: 10g
- Carbohydrates: 32g
- Fiber: 2g
- Protein: 6g
- Cholesterol: 60mg