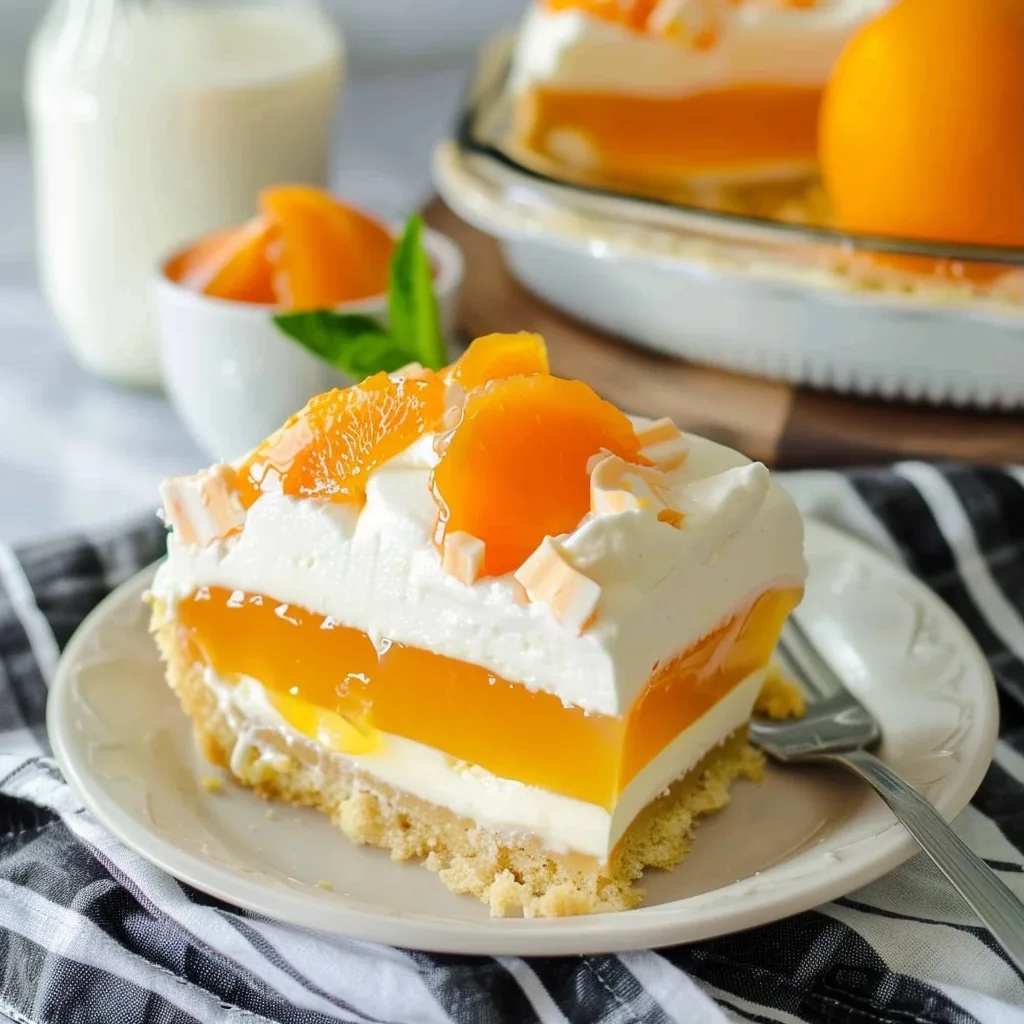
No Bake Creamsicle Lush Cake is one of those desserts that instantly transports you back to carefree summer days, to that moment the ice cream truck chimed its happy tune. It’s the essence of that beloved creamsicle flavor – that perfect, nostalgic blend of creamy vanilla and bright, zesty orange – captured in a stunning, layered dessert that requires absolutely no oven time. Imagine a dream made edible, a fluffy cloud of citrusy sweetness cradled by a crisp cookie base. This recipe is more than just a dessert; it’s an invitation to slow down, spread some joy, and create a little magic in your own kitchen, just like my grandmother used to do.
As a cook, I often find myself drawn to recipes that evoke strong memories and emotions, and this No Bake Creamsicle Lush Cake does just that. It’s a testament to how simple ingredients, prepared with a little love and patience, can create something truly spectacular. The layers are not just for show; they represent different textures and bursts of flavor that come together in perfect harmony. This is the kind of dessert that makes people stop, savor, and ask for the recipe, a true testament to its irresistible charm.
What is No Bake Creamsicle Lush Cake?
This No Bake Creamsicle Lush Cake is a delightful layered dessert that captures the iconic flavor profile of a classic creamsicle. Think of it as your favorite orange and vanilla ice cream bar transformed into an elegant, yet incredibly easy, no-bake confection. It features a buttery cookie crust, a luscious cream cheese filling, a vibrant orange gelatin layer, and is topped with pillowy whipped topping. It’s a celebration of creamy, dreamy textures and the familiar, comforting taste of orange and vanilla dancing together.
While its exact origins are a bit hazy, the spirit of layered, no-bake desserts like this can be traced back to simple home baking traditions, where pantry staples were transformed into showstoppers. It embodies a desire for refreshing, easy-to-make treats that don’t require the heat of an oven, making it perfect for warm weather gatherings or anytime you crave a fuss-free indulgence. The beauty lies in its straightforward assembly and the delightful contrast between the sturdy cookie base and the airy, creamy layers above.
Reasons to Try No Bake Creamsicle Lush Cake
There are so many reasons why this No Bake Creamsicle Lush Cake should be on your dessert radar. First and foremost, it’s incredibly easy to make. With no baking involved, it’s perfect for beginners or for those busy days when you want a stunning dessert without the stress. The minimal prep time and the straightforward instructions mean you can whip this up in about 30 minutes, leaving plenty of time for chilling and, of course, enjoying the fruits of your labor. It’s a true lifesaver for last-minute gatherings.
Beyond its ease, the flavor is simply divine. It’s a taste of pure sunshine and nostalgia, reminding you of simpler times while delighting your taste buds with its refreshing zest and creamy sweetness. This cake is incredibly versatile, making it perfect for picnics, potlucks, birthdays, or just a weeknight treat to brighten everyone’s day. It’s a crowd-pleaser that appeals to all ages, from the youngest family members to the fondest grandparents, offering a moment of shared joy and deliciousness.
Ingredients Needed to Make No Bake Creamsicle Lush Cake
You’ll need these simple ingredients to bring this delightful No Bake Creamsicle Lush Cake to life:
- 36 vanilla Oreo cookies (about 2 standard sleeves)
- 6 tablespoons unsalted butter, melted
- 2 boxes (3 ounce each) orange gelatin
- ⅓ cup boiling water
- 2 boxes (3.4 ounce each) vanilla instant pudding & pie filling mix
- 2 ½ cups cold milk
- 1 package (8 ounce) cream cheese, softened to room temperature
- 1 cup powdered sugar (confectioners’ sugar)
- 2 (8 ounce) tubs whipped topping (like Cool Whip), thawed
- Mandarin oranges (canned or fresh segments) for garnish
- Fresh mint leaves for garnish (optional)
Instructions to Make No Bake Creamsicle Lush Cake – Step by Step
Let’s bring this beautiful No Bake Creamsicle Lush Cake to life, layer by delicious layer. Remember, the magic is in the gentle assembly and allowing each component to shine.
Step 1: Create the Vanilla Cookie Crust
Begin by preparing the base for our lush creation. Take your 36 vanilla Oreo cookies and place them into the bowl of a food processor. Pulse them until they are finely crushed into uniform crumbs. If you don’t have a food processor, you can place the cookies in a sturdy zip-top bag and crush them with a rolling pin – it’s a great way to release a little stress! Once crushed, transfer these cookie crumbs into a medium-sized mixing bowl. Pour the 6 tablespoons of melted butter over the crumbs. Stir everything together with a spatula or a fork until the crumbs are evenly moistened and resemble wet sand. This mixture will hold together when pressed, forming our sturdy crust. Take a 9×13 inch glass baking dish; pressing the cookie and butter mixture evenly across the bottom creates the foundation for our layered dessert. Using the bottom of a measuring cup or your hands, press the crumbs firmly into the dish to create a compact layer that won’t crumble when sliced.
Step 2: Prepare the Orange Gelatin Layer
Now, let’s get started on the vibrant orange layer that gives this cake its signature creamsicle flair. In a small bowl, combine the contents of your two 3-ounce boxes of orange gelatin. Carefully add the ⅓ cup of boiling water to the gelatin. Whisk this mixture gently but thoroughly until the gelatin powder has mostly dissolved. You want a smooth, clear liquid with no stubborn granules at the bottom. This concentrated gelatin mixture will add a bright burst of orange flavor and a bit of wobble to our dessert. Set this aside for a moment to cool slightly while we prepare the next component.
Step 3: Combine the Vanilla Pudding and Orange Gelatin
This step is where the creamsicle magic truly begins to merge. In a medium-sized mixing bowl, combine the contents of your two 3.4-ounce boxes of vanilla instant pudding & pie filling mix. Pour in the 2 ½ cups of cold milk. Whisk these together vigorously until the pudding starts to thicken. It should become smooth and creamy, with a consistency that holds its shape. Now, gently whisk the slightly cooled orange gelatin mixture into the thickened vanilla pudding. Continue whisking until everything is completely combined and you have a beautifully uniform, pale orange pudding layer. This combination creates that iconic creamsicle swirl of flavors and colors.
Step 4: Craft the Creamy Cream Cheese Layer
It’s time to introduce the rich, luscious cream cheese layer that adds a wonderful tang and velvety texture. In a large mixing bowl, place your 8-ounce package of softened cream cheese. Add the 1 cup of powdered sugar. Using an electric mixer (or a sturdy whisk and some elbow grease!), cream these two ingredients together until the mixture is exceptionally smooth and free of lumps. This should take a few minutes, ensuring a truly velvety texture. Once smooth, gently fold in 2 cups of the thawed whipped topping. Use a spatula to incorporate the whipped topping, trying to keep as much air in the mixture as possible. This creates a light, fluffy, and tangy cream cheese layer that complements the pudding perfectly. Spread this creamy mixture evenly over the prepared cookie crust in your 9×13 inch dish. Ensure it covers the crust all the way to the edges.
Step 5: Assemble the Lush Orange Pudding Layer
With our crust and cream cheese base ready, it’s time to add the vibrant orange pudding layer. Carefully spoon the combined orange gelatin and vanilla pudding mixture over the cream cheese layer. Use your spatula to gently spread it into an even layer, again making sure to reach all the corners of the dish. Try not to disturb the cream cheese layer too much; a gentle hand here ensures distinct layers. The vibrant color will start to peek through, a promise of the delightful flavor to come. This layer will be the most delicate before it sets, so smooth it gently.
Step 6: Top with Whipped Cream and Chill to Perfection
For the final crowning touch, we’ll use the remaining whipped topping. Take the rest of your thawed whipped topping and dollop it over the orange pudding layer. Gently spread it to cover the entire surface, creating a soft, cloud-like finish. This is the final layer of creamy indulgence. Once your No Bake Creamsicle Lush Cake is fully assembled, it’s time for the magic of chilling. Cover the dish with plastic wrap or a lid. Refrigerate for at least 4 hours, or until the cake is firm and set. This resting period is crucial for the flavors to meld and the textures to set properly, ensuring easy slicing and a delightful eating experience.
Step 7: Garnish and Serve Your Masterpiece!
Once the cake has chilled and is beautifully set, it’s time for the final flourish. Gently arrange mandarin orange segments over the top of the whipped topping for a burst of color and a hint of fresh citrus. Tuck in a few fresh mint leaves if you have them; they add a lovely pop of green and a subtle, refreshing aroma. This final touch makes the cake not only a delight for the palate but also a feast for the eyes. Slice the No Bake Creamsicle Lush Cake into generous portions using a sharp knife and serve immediately. Enjoy that wonderful taste of summer!
Chef’s Tips for a Perfect Result
- Ensure your cream cheese is fully softened to room temperature; this is key for a super smooth, lump-free cream cheese layer. Spread it out on a plate for about 30 minutes before you begin.
- When dissolving the gelatin, use only the specified amount of boiling water. Too much water will result in a softer, less set layer, making slicing more difficult.
- For the cookie crust, thoroughly combine the melted butter with the cookie crumbs. Pressing them firmly into the dish prevents them from crumbling when you cut and serve the cake.
- Chill the cake for the full recommended time. Patience is a virtue when it comes to no-bake desserts; this allows the layers to set properly and meld their flavors.
- Use good quality instant pudding mix. While any brand works, a slightly higher quality mix can offer a richer vanilla flavor that balances the orange beautifully.
- For cleaner slicing, you can briefly freeze the chilled cake for about 15-20 minutes before serving. This firms up the layers just enough to slice cleanly without disturbing the delicate structure.
Variations and Substitutions
- Orange Gelatin Swap: If you’re not a fan of orange, or can’t find it, feel free to use lemon or even strawberry gelatin for a different, equally delicious flavor profile. The taste will shift, but the creamy texture will remain.
- Crust Alternatives: Instead of vanilla Oreos, try graham crackers or shortbread cookies for your crust. You might need slightly less butter with graham crackers as they are finer. This change offers a nuttier or more buttery undertone to the base.
- Dairy-Free Dream: For a dairy-free version, use vegan vanilla cookies or graham crackers for the crust, ensuring they contain no dairy. Substitute plant-based milk (almond or soy work well) for the real milk, and use a dairy-free whipped topping and vegan cream cheese alternative.
- Gluten-Free Indulgence: To make this gluten-free, opt for gluten-free vanilla sandwich cookies or gluten-free graham crackers for the crust. Ensure your pudding mix and whipped topping are also certified gluten-free.
- Lighter Version: For a slightly lighter twist, use a light cream cheese and a sugar-free instant vanilla pudding mix. Reduced-fat whipped topping can also be used, though it might slightly alter the final texture and richness.
How to Serve and Pair
This No Bake Creamsicle Lush Cake is a stunning centerpiece on its own, especially when presented in a beautiful clear glass dish that showcases its vibrant layers. For those warmer months and outdoor celebrations like picnics or BBQs, it brings a refreshing, festive touch. It’s also a perfect dessert for birthdays, family gatherings, or even as a treat to simply brighten a weeknight. Serve chilled, allowing guests to appreciate its cool, creamy texture. It pairs wonderfully with a tall glass of iced tea or a light, sparkling lemonade. A small dollop of extra whipped cream on the side or a few fresh berries can be a lovely addition for those who desire a little extra.
Storage and Reheating
Refrigerator
Leftovers of your No Bake Creamsicle Lush Cake should be stored in the refrigerator. Keep it tightly covered with plastic wrap or an airtight lid to prevent it from drying out or absorbing any other odors from your fridge. Properly stored, it will maintain its delicious texture and flavor for up to 4 days. For the best texture, try to consume it within the first 2-3 days.
Freezer
While this cake is best enjoyed fresh, you can freeze it for longer storage. Wrap the entire cake or individual slices tightly in several layers of plastic wrap, followed by a layer of aluminum foil or a freezer-safe container to prevent freezer burn. It can be stored in the freezer for up to 1 month. Thaw overnight in the refrigerator before serving. Freezing can sometimes make the texture slightly firmer, which can actually aid in cleaner slicing.
Room Temperature
It is advisable not to leave this No Bake Creamsicle Lush Cake at room temperature for extended periods, especially since it contains dairy and gelatin-based layers. A brief period at room temperature for serving is acceptable, but it should be returned to the refrigerator within 1-2 hours to maintain its quality and safety.
Reheating
This No Bake Creamsicle Lush Cake is designed to be served chilled and does not require reheating. In fact, attempting to reheat it would likely cause the layers to melt and lose their structure. Enjoy it cold or slightly thawed from the freezer for the best experience.
Frequently Asked Questions (FAQ)
Can I substitute the orange gelatin for another flavor?
Yes, you can absolutely substitute the orange gelatin with other flavors like lemon, lime, or even strawberry. Each flavor will impart its unique taste and color, creating a different but equally delightful variation of the Creamsicle Lush Cake.
How do I know when the No Bake Creamsicle Lush Cake is fully set?
The cake is fully set when the layers are firm to the touch and do not jiggle or ooze when gently pressed. After at least 4 hours of refrigeration, the gelatin layer should be solid, and the cream cheese layer should be stable.
My cream cheese layer is lumpy, what did I do wrong?
Lumps in the cream cheese layer usually occur if the cream cheese was not softened enough or was not beaten sufficiently with the powdered sugar. Ensure the cream cheese is at room temperature and whisk or beat it until completely smooth before folding in the whipped topping.
Can I make this No Bake Creamsicle Lush Cake the day before serving?
Absolutely! This cake is an ideal make-ahead dessert. It actually benefits from chilling for at least 4 hours, so making it the day before ensures it is perfectly set and the flavors have had time to meld beautifully.
What is the best way to serve and customize this cake?
Serve this cake chilled, cut into generous squares. You can customize it further by adding a swirl of orange zest to the cream cheese layer or topping it with fresh orange segments. It also looks lovely with a few fresh berries alongside.
Print
No Bake Creamsicle Lush Cake
- Prep Time: 25
- Total Time: 280
- Yield: 12 large slices 1x
- Category: desserts
- Method: No-Bake
- Cuisine: American
- Diet: Vegetarian
Description
A no-bake layered dessert capturing the sweet, zesty essence of a creamsicle. Features a buttery crust, cream cheese filling, vibrant orange gelatin, and airy whipped topping—all assembled in 25 minutes for a nostalgic, crowd-pleasing treat.
Ingredients
1 1/2 cups graham cracker crumbs
3/4 cup unsalted butter, melted
1 package (8 oz) cream cheese, softened
3/4 cup granulated sugar
2 tsp orange zest
1 cup crushed orange candies or orange gelatin
3/4 cup cold water
1 cup heavy whipping cream
2 tbsp powdered sugar
Instructions
Mix graham cracker crumbs and melted butter; press into a greased 8-inch springform pan.
Beat cream cheese, 1/3 cup sugar, and orange zest until smooth. Spread over crust.
In a small bowl, sprinkle gelatin over 1/4 cup cold water. In another bowl, mix 1/2 cup hot water with remaining sugar, then stir in gelatin mixture. Cool slightly; pour over cream cheese layer.
Chill for 1 hour. Beat whipping cream and powdered sugar until stiff peaks form; spread over gelatin layer.
Chill for 4 hours or overnight before slicing.
Notes
Use an 8-inch springform pan for proper layering.
Chill at least 4 hours for firm layers.
Top with additional orange zest or whipped cream if desired.
Nutrition
- Serving Size: 1 slice
- Calories: 350
- Sugar: 35g
- Sodium: 300mg
- Fat: 18g
- Saturated Fat: 10g
- Carbohydrates: 30g
- Fiber: 1g
- Protein: 4g
- Cholesterol: 50mg


