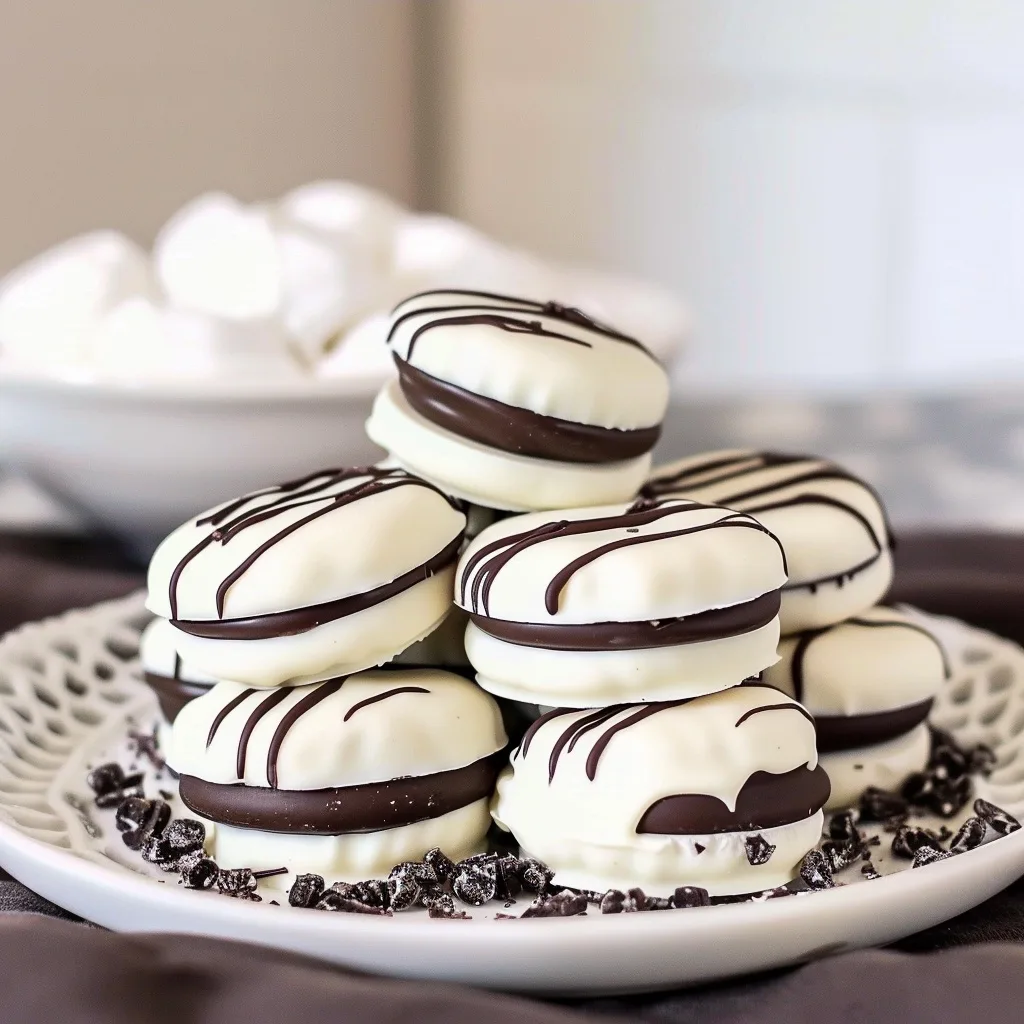
White Chocolate Covered OREOs
White chocolate covered OREOs are the kind of treat that feels like a quiet hug on a rainy afternoon. There is a simple magic in taking a humble, store-bought cookie and dressing it in a smooth, elegant coat of ivory chocolate. Growing up in a home where the kitchen was the heartbeat of our family, my mother always taught me that the most beautiful desserts did not need to be complicated. They just needed to be made with intention and a touch of sweetness.
These cookies transform into something quite extraordinary with minimal effort, making them a perfect companion for slow Sunday mornings or busy afternoons when you need a moment of peace. When you bite through that crisp, velvety white shell, you meet the familiar crunch of dark cocoa, a combination that always reminds me of the small, joyful traditions that bind us together. Making white chocolate covered OREOs is less about the cooking and more about the gentle act of creating something lovely to share.
What is White Chocolate Covered OREOs?
White chocolate covered OREOs are a delightful confection featuring the classic, crunchy chocolate sandwich cookie enveloped in a rich, creamy white coating. It is essentially an elevated version of the original snack, taking the contrast between the dark cocoa wafers and the sweet, vanilla-scented cream center to a new level by adding a smooth, milky exterior. This recipe relies on the balance of textures, ensuring that the slight snap of the coating gives way to the familiar, comforting crunch we all grew up loving.
The origin of these treats sits firmly in the realm of creative home baking, where the simple desire to celebrate the OREO led to dipping them in various melted sweets. While you can use high-quality white chocolate bars, many home cooks reach for candy melts for their reliability and ease of use. This dish stands out because it requires no oven, no complex chemistry, and absolutely no stress, making it an ideal entry point for anyone learning to find their footing in the kitchen.
Reasons to Try White Chocolate Covered OREOs
You should try this recipe because it is a masterclass in the beauty of simplicity. Sometimes life feels loud and demanding, and the kitchen offers a sanctuary where the stakes are low but the rewards are tangible. Preparing these cookies allows you to slow down, dip them one by one, and enjoy the rhythmic, meditative process of coating each cookie until it is perfectly cloaked in ivory.
Beyond the emotional comfort, they are incredibly versatile and practical for any gathering. Whether you are prepping for a bake sale, a quiet birthday celebration, or just a small midweek treat to brighten the mood, these cookies never fail to bring a smile to faces. They keep remarkably well and look stunning on a plate, making them the ultimate “go-to” recipe for busy home cooks who refuse to sacrifice quality for speed.
Ingredients Needed to Make White Chocolate Covered OREOs
- 12 ounces white candy melts (you can use high-quality white chocolate as a substitute)
- 2 teaspoons vegetable oil, separated (this helps thin the chocolate for a smooth finish)
- 15 OREO Dark Chocolate Cookies or Original OREO Cookies
- 1/3 cup dark chocolate chips (for that beautiful drizzled contrast)
Instructions to Make White Chocolate Covered OREOs – Step by Step
Step 1: Begin by preparing your primary coating. In a microwave-safe bowl, combine your white candy melts with 1 1/2 teaspoons of the vegetable oil. This small amount of oil is the secret to achieving that silky, pourable consistency that makes dipping so much easier.
Step 2: Carefully microwave the mixture for one minute, then pull it out and give it a thorough, gentle stir. Continue to microwave in 30-second intervals, stirring in between each burst, until the chocolate is completely smooth and free of any stubborn lumps. Patience is your best friend here, as chocolate can scorch if pushed too hard or too fast.
Step 3: Now comes the rhythmic part of the process. One at a time, submerge an OREO into the white chocolate, using a fork to gently turn it until every edge is fully coated. Lift the cookie with your fork, giving it a light tap against the side of the bowl to let the excess chocolate drip away, then place it carefully onto a sheet of parchment paper to set.
Step 4: Once all your cookies are coated, place them into the refrigerator. This brief chill is essential as it firms up that luscious white chocolate shell, ensuring it stays crisp and clean to the touch. While they are setting, take a moment to breathe and appreciate the quiet hum of your kitchen.
Step 5: To add that final artistic touch, melt your dark chocolate chips with the remaining 1/2 teaspoon of vegetable oil, following the same 30-second interval method you used earlier. Transfer the melted dark chocolate into a piping bag or a small plastic sandwich bag with the tip snipped off, and drizzle it in lovely, messy lines over your chilled cookies. Refrigerate for another 15 minutes, and they are ready to serve.
Chef’s Tips for a Perfect Result
- Use vegetable oil to thin the chocolate, as it ensures a professional, glass-like finish on your cookies.
- Work in a cool room to prevent the white chocolate from becoming too soft during the dipping process.
- Tap your fork gently against the bowl to remove excess chocolate, which prevents unsightly “feet” or pools from forming at the base of the cookie.
- Always use a fresh piece of parchment paper to ensure the cookies lift away cleanly once set.
- If you are using high-quality white chocolate bars instead of melts, be sure to chop them finely so they melt evenly without burning.
Variations and Substitutions
- Vegan Option: Swap the standard OREOs for a vegan-friendly sandwich cookie and use dairy-free white chocolate or cocoa butter-based melts to maintain that signature creamy texture.
- Gluten-Free Alternative: Simply replace the traditional OREOs with a certified gluten-free chocolate sandwich cookie, which provides the same satisfying crunch without the wheat.
- Festive Twist: Add a pinch of peppermint extract to the white chocolate for a winter holiday version, or sprinkle some naturally colored sanding sugar on top while the chocolate is still wet.
How to Serve and Pair
Serve these on a vintage tiered tray for an afternoon tea or stack them in a simple ceramic bowl for a more rustic approach. They pair beautifully with a warm cup of Earl Grey tea or a glass of cold, creamy milk. For a cozy evening, consider serving them alongside a steaming cup of hot cocoa, letting the slight bitterness of the drink balance the sweetness of the white chocolate.
Storage and Reheating
Refrigerator
Store your finished cookies in an airtight container in the refrigerator for up to two weeks. Keep them away from strong-smelling foods in the fridge to ensure they stay fresh and maintain their delicate flavor.
Freezer
If you wish to keep them longer, place the cookies in a single layer in a freezer-safe container, separated by parchment paper. They will stay perfect for up to two months, though you should let them thaw in the refrigerator before serving.
Room Temperature
It is best to avoid leaving these out for long periods, especially in warmer weather, as the white chocolate can soften. Keep them in a cool, dark pantry if you plan to eat them within a day or two.
Reheating
There is truly no need to reheat these cookies, as they are best enjoyed at a cool or room temperature where the snap of the chocolate is at its peak. If you find them too hard after being in the freezer, let them sit on the counter for ten minutes to soften slightly.
Frequently Asked Questions (FAQ)
Can I use white chocolate chips instead of candy melts?
Yes, you can certainly use white chocolate chips, though they often contain stabilizers that make them thicker. If you use chips, melt them in a double boiler over very low heat and ensure you keep the water underneath from boiling to prevent seizing.
How do I know when the coating has set correctly?
The cookies are properly set when the surface looks matte or satin rather than wet and glossy. You can gently touch the edge of the parchment paper—if the cookie slides easily without leaving a smear, they are ready to enjoy.
Why is my white chocolate clumping while melting?
Clumping, or seizing, usually happens if even a tiny drop of water gets into your chocolate or if it has been overheated. If it starts to look grainy, stir in a tiny bit more vegetable oil to see if you can smooth it back out, but it is best to avoid water at all costs.
Can I make these a day before a party?
These are excellent for make-ahead prep because they actually store quite well in the refrigerator. Making them a day or two in advance allows you to focus on other aspects of your gathering while knowing your dessert is already perfect.
What is the best way to customize these for holidays?
The best way to customize them is by changing the drizzle or adding garnishes like crushed nuts, dried fruit, or seasonal sprinkles while the chocolate is still tacky. This simple addition transforms a classic everyday cookie into a themed treat for any occasion.
Conclusion
White chocolate covered OREOs represent the quiet joy of simple, heartfelt cooking that celebrates the small moments in life. Whether you are sharing them with dear friends or enjoying a quiet evening, their balance of rich cocoa and creamy sweetness is truly timeless. I encourage you to slow down, embrace the process, and let these cookies bring a little extra light into your kitchen. It is the signature combination of textures and the love poured into every dip that makes them such an irresistible comfort.
Print
White Chocolate Covered OREOs
- Prep Time: 10
- Total Time: 40
- Yield: 24 cookies 1x
- Category: desserts
- Method: No-Bake
- Cuisine: American
- Diet: Vegetarian
Description
Transform humble, store-bought chocolate sandwich cookies into an elegant, creamy treat with this simple white chocolate dipping technique. These cookies offer a beautiful contrast between the dark, crunchy cocoa wafers and a smooth, ivory-colored shell. Perfect for quiet moments of indulgence, these treats require no oven and are a meditative, rewarding project for home cooks of all levels. They are the ideal balance of simple ingredients and sophisticated presentation, making them perfect for sharing with family and friends.
Ingredients
1 package (15 ounces) standard OREO cookies
16 ounces high-quality white chocolate or vanilla candy melts
Optional: Sprinkles or edible glitter for decoration
Instructions
Line a large baking sheet with parchment or wax paper.
Place the white chocolate or candy melts in a microwave-safe bowl.
Microwave the chocolate in 30-second intervals, stirring between each, until completely smooth and melted.
Using a fork, dip each OREO cookie into the melted chocolate, ensuring it is fully coated.
Use the fork to lift the cookie out, gently tapping it against the edge of the bowl to let excess chocolate drip off.
Place the coated cookie onto the prepared baking sheet.
Repeat the process for all cookies, adding decorations if desired before the chocolate sets.
Allow the cookies to sit at room temperature for at least 30 minutes until the shell is completely hardened.
Notes
Ensure your workspace is free of moisture, as water can cause white chocolate to seize. If the chocolate gets too thick while dipping, reheat it in the microwave for 10-15 seconds. Store in an airtight container at room temperature for up to one week.
Nutrition
- Serving Size: 1 cookie
- Calories: 160
- Sugar: 18g
- Sodium: 95mg
- Fat: 7g
- Saturated Fat: 4g
- Carbohydrates: 22g
- Fiber: 0.5g
- Protein: 1g
- Cholesterol: 0mg


