Apple Pie Bars: A Taste of Home in Every Bite
Apple pie bars are a delightful invention, a way to capture the soul-warming essence of a classic apple pie in a more portable, less fussy form. Imagine the comforting aroma of baked apples mingling with warm spices, all nestled within a tender, buttery crust that gives way to a sweet, crumbly topping. These aren’t just desserts; they’re edible hugs, little pockets of memory that evoke cozy kitchens and shared moments. It’s this very magic that draws us to creating apple pie bars time and time again.
The beauty of apple pie bars lies in their approachable nature. They offer all the beloved flavors of their pie counterpart without the intimidation of crimping crusts or wrestling with delicate pastry. This recipe invites you into a space of simple joy, where wholesome ingredients transform into something truly special. We’ve found that making these apple pie bars is often as comforting as eating them, a gentle reminder of the simple pleasures life offers.
What is Apple Pie Bars?
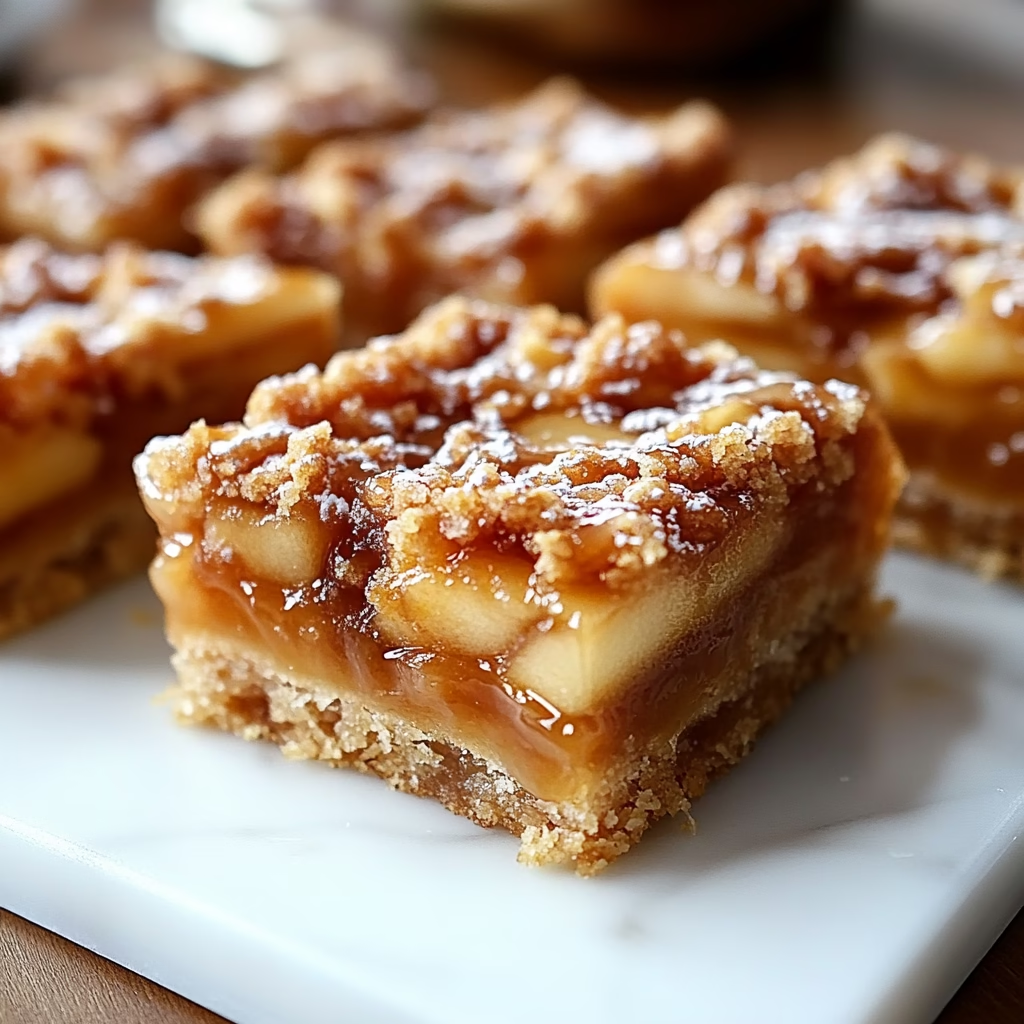
Apple pie bars are essentially a deconstructed apple pie, baked in a rectangular pan and cut into convenient bars. They typically feature a buttery, shortbread-like base that can extend up the sides, a sweet and spiced apple filling, and often a streusel or crumble topping that echoes the base. This format makes them incredibly easy to serve and share, perfect for picnics, potlucks, or simply enjoying with a cup of tea on a quiet afternoon.
The origin of apple pie itself is steeped in history, with early versions appearing in medieval Europe. However, the American apple pie, with its characteristic double crust and sweet filling, became a cultural icon. Apple pie bars are a modern adaptation, born from a desire to enjoy those beloved flavors with less fuss. They capture the heart of traditional apple pie—the tender fruit, the warm spices, the comforting crust—in a format that’s wonderfully accessible for every home cook, a true testament to culinary evolution.
Reasons to Try Apple Pie Bars
There are so many reasons why apple pie bars have become a beloved treat for home bakers. Their ease of preparation is a major draw; you can achieve that quintessential apple pie flavor with significantly less effort than making a traditional pie. The crumbly crust and topping are forgiving, and the simple assembly means that even beginners can create a stunning dessert that tastes like it came from a cherished family recipe.
Beyond the simplicity, the flavor profile is universally adored. The combination of sweet, slightly tart apples, warm cinnamon, and nutmeg, all enveloped in buttery goodness, is pure comfort. These bars are perfect for busy weeknights when you crave something sweet and homemade but don’t have hours to spare. They’re also fantastic for gatherings, as they’re easy to transport, slice, and serve, making them a foolproof crowd-pleaser that always elicits smiles and requests for seconds.
Ingredients Needed to Make Apple Pie Bars
2 1/2 cups all-purpose flour
1/2 cup granulated sugar
1/2 teaspoon salt
1 cup cold unsalted butter, cut into cubes
4 cups thinly sliced apples (about 4-5 medium apples, a mix of varieties like Honeycrisp and Granny Smith works wonderfully)
1/2 cup packed light brown sugar
1 1/2 teaspoons ground cinnamon
1/4 teaspoon ground nutmeg
1 tablespoon cornstarch
1 tablespoon fresh lemon juice
1 teaspoon pure vanilla extract
Optional: Caramel sauce for drizzling
Instructions to Make Apple Pie Bars – Step by Step
Step 1: Begin by preparing your pan and preheating your oven. This is where the magic truly starts to unfold in your kitchen. Take a 9×13 inch baking pan and line it with parchment paper, leaving some overhang on the sides. This simple step will make lifting the cooled bars out of the pan a breeze, ensuring they emerge beautifully. Then, preheat your oven to 350°F (175°C). This gentle warmth is perfect for creating that tender crust and perfectly cooked apple filling.
Step 2: Next, let’s create the foundation of our delightful bars—the crumbly crust and topping. In a medium mixing bowl, whisk together the all-purpose flour, granulated sugar, and salt. This dry mix will form the backbone of our treat. Now, add the cold, cubed butter to this mixture. Using a pastry blender, your fingertips, or a food processor, cut the butter into the flour mixture until it resembles coarse crumbs. You want some pea-sized pieces of butter remaining; these will create a tender, flaky texture as they melt in the oven.
Step 3: Press about two-thirds of this crumbly mixture evenly into the bottom of your prepared baking pan. Use the bottom of a measuring cup or your fingers to create a firm, compact layer. This layer will bake into the delicious crust. Once pressed, place the pan in your preheated oven and bake for about 15 minutes, or until the edges are just beginning to turn lightly golden. This par-baking helps ensure the crust is fully cooked and won’t be soggy beneath the apples.
Step 4: While the crust is baking, it’s time to prepare the star of the show: the apple filling. In a separate, larger bowl, combine the thinly sliced apples with the packed light brown sugar, ground cinnamon, ground nutmeg, cornstarch, fresh lemon juice, and pure vanilla extract. Gently toss everything together until the apple slices are well coated with the spices and other flavorings. The lemon juice not only adds a subtle brightness but also helps prevent the apples from browning. The cornstarch is key to thickening the apple juices as they bake, creating a luscious, jammy filling.
Step 5: Once the crust has finished its initial bake, carefully remove the pan from the oven. Spoon the prepared apple mixture evenly over the warm crust, spreading it out to cover the entire surface. Now, take the remaining one-third of the crumbly mixture you set aside earlier and sprinkle it evenly over the top of the apple layer. This creates that wonderful, streusel-like topping that adds a delightful texture contrast and extra flavor.
Step 6: Return the pan to the oven and bake for another 35 to 40 minutes. You’ll know they’re ready when the topping is golden brown and the apple filling is bubbling around the edges. The aroma filling your kitchen at this stage is truly intoxicating—a sweet, spicy perfume that signals pure comfort is almost ready. Watching those bubbly juices emerge is always such a satisfying moment.
Step 7: This is perhaps the hardest step, but it is crucial for perfectly formed bars: you must let them cool completely. Resist the urge to slice into them while they’re warm! Allow the apple pie bars to cool in the pan on a wire rack for at least 2 to 3 hours, or until they have reached room temperature. This cooling period allows the filling to set properly, preventing the bars from crumbling apart when you cut them. Once fully cooled, use the parchment paper overhang to lift the entire slab out of the pan, then slice into your desired bar shapes. For an extra touch of indulgence, you can drizzle with caramel sauce before serving.
Chef’s Tips for a Perfect Result
- Use a mix of apple varieties; a balance of sweet apples like Honeycrisp or Fuji and tart apples like Granny Smith provides the most complex and delicious flavor.
- Ensure your butter is very cold when making the crust and topping. This creates steam pockets during baking, resulting in a more tender and flaky texture.
- Don’t skip the lemon juice; it enhances the apple flavor and balances the sweetness, preventing the filling from becoming cloyingly sweet.
- Allowing the bars to cool completely is non-negotiable for clean slicing. Patience here yields beautiful, intact bars.
- For an extra layer of flavor, consider adding a pinch of cardamom or ginger along with the cinnamon and nutmeg in the apple filling.
- If you prefer a softer topping, gently press the crumble mixture onto the apples instead of just sprinkling it.
Variations and Substitutions
- Gluten-Free Alternative: Replace the all-purpose flour with a good quality gluten-free baking blend (one that contains xanthan gum). The texture might be slightly different, but the flavor will hold beautifully.
- Nutty Crumble: For added texture and flavor, incorporate 1/2 cup of chopped pecans or walnuts into the crumb topping mixture before sprinkling it over the apples.
- Spiced Apples Swap: If you don’t have all the spices, a good quality apple pie spice blend can be used instead of cinnamon and nutmeg. Use about 2 teaspoons of apple pie spice.
- Added Sweetness: If your apples are particularly tart, you might want to increase the brown sugar in the filling by 1-2 tablespoons, but taste a raw apple slice first to gauge its sweetness.
- Vegan Option: Substitute the butter with a vegan butter stick or coconut oil (solidified) for both the crust and topping. Ensure your apples are naturally vegan and any optional caramel sauce is dairy-free.
How to Serve and Pair
These delightful apple pie bars are wonderfully versatile. For a classic and comforting experience, serve them slightly warmed with a scoop of vanilla bean ice cream. The contrast of the warm bar and cold ice cream is a timeless pairing that never disappoints. A dollop of freshly whipped cream, perhaps lightly sweetened with a hint of vanilla, is another elegant choice. For those who love extra sweetness, a drizzle of warm caramel sauce or a dusting of powdered sugar adds a beautiful finishing touch.
These bars are perfect for any occasion that calls for a touch of homemade warmth. They’re ideal for autumn gatherings, holiday dessert tables, bake sales, or simply as an after-school treat. They also make a thoughtful gift, beautifully presented in a tin or a nice box. Consider pairing them with a steaming mug of spiced apple cider or a mild herbal tea for a truly cozy experience.
Storage and Reheating
Refrigerator
Apple pie bars can be stored in an airtight container in the refrigerator for up to 4-5 days. Ensure they are completely cooled before sealing the container to prevent excess moisture. Storing them this way helps maintain their freshness and prevents them from drying out too quickly.
Freezer
For longer storage, apple pie bars freeze beautifully. Once completely cooled, cut them into bars if they aren’t already. Wrap each bar individually in plastic wrap, then place them in a heavy-duty freezer bag or an airtight container. They can be stored in the freezer for up to 2-3 months. It’s a good idea to place parchment paper between layers if stacking them to prevent sticking.
Room Temperature
If you plan to serve the bars within a day or two, they can be stored at room temperature in an airtight container. This is a good option if they are a small batch you know will be enjoyed quickly. Keep them away from direct sunlight or heat sources, which can affect their texture.
Reheating
To reheat, place individual bars on a baking sheet and warm them in a preheated oven at 300°F (150°C) for about 8-10 minutes, or until heated through and slightly softened. This method helps to restore their original crispness. You can also gently reheat them in a toaster oven. If reheating from frozen, allow extra time for them to warm through.
Frequently Asked Questions (FAQ)
Can I use a different type of apple?
Yes, you can use a variety of apples, but a mix of sweet and tart apples offers the best flavor balance. Avoid apples that break down too much, like Red Delicious, as they can result in a mushy filling.
How do I know when the apple pie bars are fully baked?
The bars are done when the topping is golden brown and the apple filling is visibly bubbling around the edges. A gentle poke in the center might feel slightly firm, indicating the filling has set.
My topping is browning too quickly, what should I do?
If the topping starts to brown too much before the filling is bubbly, loosely tent the pan with aluminum foil. This will shield the topping from direct heat while allowing the center to continue cooking.
Can I make the crust and filling ahead of time?
Yes, you can prepare the crumb mixture for the crust and topping up to 2 days in advance and store it in the refrigerator. The apple filling can also be prepared a few hours ahead and kept chilled, but it’s best assembled and baked fresh.
What’s the best way to customize my apple pie bars?
You can customize them by adding a handful of dried cranberries or raisins to the apple filling for extra chewiness and flavor, or by swirling in a tablespoon of seedless raspberry jam before adding the topping for a fruity twist.
CONCLUSION
These apple pie bars are more than just a dessert; they are a warm embrace, a handheld piece of comfort that sings with the flavors of home. With their tender, buttery crust, perfectly spiced apple filling, and delightful crumbly topping, they offer a simple yet profound joy. I encourage you to gather your ingredients and create these for yourself, allowing the sweet, familiar scent of baking apples to fill your space and bring a smile to your face. The irresistible taste of homemade apple pie, made effortlessly, is waiting for you.
Print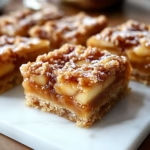
Apple Pie Bars: A Taste of Home in Every Bite
- Prep Time: 20 minutes
- Cook Time: 55 minutes
- Total Time: 1 hour 15 minutes
- Yield: 16 bars 1x
- Category: Dessert
- Method: Baking
- Cuisine: American
- Diet: Vegetarian
Description
These easy Apple Pie Bars feature a buttery crumb crust layered with warmly spiced apples and topped with a golden crumble for the perfect cozy dessert.
Ingredients
- 2 1/2 cups all-purpose flour
- 1/2 cup granulated sugar
- 1/2 teaspoon salt
- 1 cup cold butter, cubed
- 4 cups thinly sliced apples
- 1/2 cup brown sugar
- 1 1/2 teaspoons cinnamon
- 1/4 teaspoon nutmeg
- 1 tablespoon cornstarch
- 1 tablespoon lemon juice
- 1 teaspoon vanilla extract
- Optional caramel sauce for drizzling
Instructions
1. Preheat the oven to 350°F and line a 9×13-inch baking pan with parchment paper.
2. In a large bowl, combine the flour, granulated sugar, and salt.
3. Cut in the cold butter until the mixture becomes crumbly.
4. Press two-thirds of the crumb mixture evenly into the bottom of the prepared pan.
5. Bake the crust for 15 minutes until lightly set.
6. In another bowl, toss the sliced apples with brown sugar, cinnamon, nutmeg, cornstarch, lemon juice, and vanilla extract.
7. Spread the apple mixture evenly over the baked crust.
8. Sprinkle the remaining crumb mixture over the apple filling.
9. Bake for 35 to 40 minutes until golden brown and bubbly.
10. Allow the bars to cool completely before slicing.
11. Drizzle with caramel sauce before serving if desired.
Notes
Use a combination of apple varieties for the best flavor and texture.
Keep the butter cold for a crisp and crumbly topping.
Allow the bars to cool fully before cutting to help them hold their shape.
These bars freeze well when layered with parchment paper between slices.
Nutrition
- Serving Size: 1 bar
- Calories: 250
- Sugar: 18g
- Sodium: 90mg
- Fat: 12g
- Saturated Fat: 7g
- Unsaturated Fat: 4g
- Trans Fat: 0g
- Carbohydrates: 34g
- Fiber: 2g
- Protein: 2g
- Cholesterol: 30mg