No Bake Peanut Butter Pie: A Dreamy, Creamy Delight
No Bake Peanut Butter Pie is more than just a simple dessert; it’s a whispered memory of quiet afternoons and shared laughter. It’s the magic of transforming humble ingredients into something truly special, a comforting embrace on a busy day. This recipe holds a special place, a testament to how the simplest things can bring the most profound joy. It reminds me of my grandmother’s kitchen, filled with the warm, inviting scent of peanut butter, where every creation was a labor of love meant to be shared with a full heart.
This cherished No Bake Peanut Butter Pie, with its perfectly balanced creamy filling and a buttery graham cracker crust, offers pure dessert bliss without the fuss of turning on the oven. It’s an ode to uncomplicated deliciousness, a crowd-pleaser that requires minimal effort but delivers maximum satisfaction. Let its rich, velvety texture and the irresistible nutty sweetness envelop your senses, creating a moment of pure, unadulterated happiness.
What is No Bake Peanut Butter Pie?
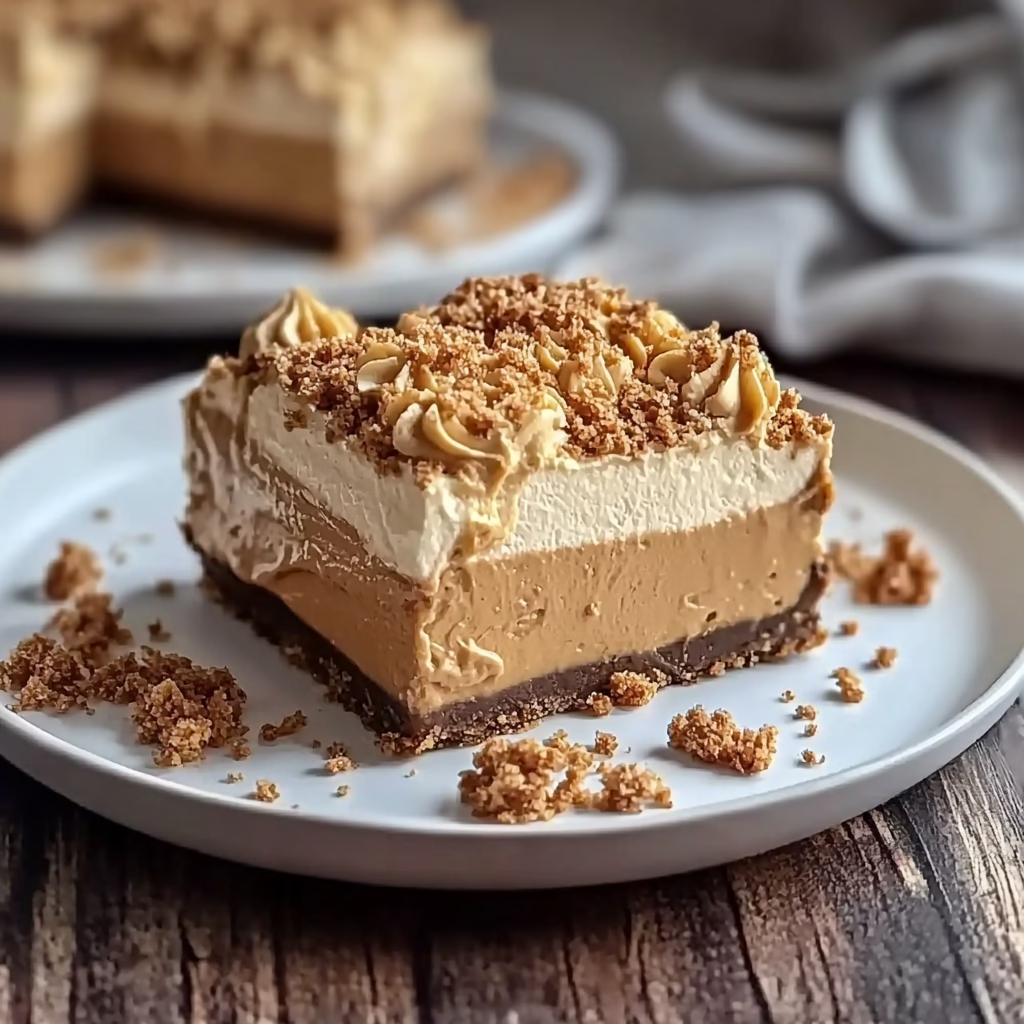
At its heart, a No Bake Peanut Butter Pie is a charmingly simple dessert that captures the beloved flavors of peanut butter in a smooth, luscious filling nestled within a sweet, crumbly crust. Unlike traditional pies that demand oven time and precision, this creation relies on the magic of refrigeration to set its delightful texture. It’s a dessert that speaks of comfort and ease, perfect for those moments when you crave something sweet and satisfying without the usual commitment of baking.
The beauty of this pie lies in its approachable ingredients and straightforward technique. A base of crushed graham crackers, bound together with melted butter, provides a classic foundation. The star, of course, is the filling: a dreamy blend of creamy peanut butter, softened by luscious cream and sweetened with powdered sugar, enhanced by a touch of pure vanilla extract. It’s a combination that sings with nostalgic flavor, bringing a smile to many faces, young and old, and echoing the simple joys of American home baking.
Reasons to Try No Bake Peanut Butter Pie
There are so many beautiful reasons to welcome this No Bake Peanut Butter Pie into your dessert repertoire. For starters, its sheer simplicity is a welcome balm in our often hurried lives. Imagine: a stunning dessert that comes together in mere minutes, requiring no oven mastery, just a bit of gentle mixing and chilling. This makes it an absolute lifesaver for last-minute gatherings or when a sweet craving strikes with urgency. It’s a recipe that truly empowers anyone, from the most novice cook to the seasoned baker looking for a shortcut to deliciousness.
But the ease is just the beginning. The taste and texture are utterly divine, offering a luscious, creamy peanut butter filling that’s both rich and light, complemented by that delightful, buttery graham cracker crust. It’s a testament to how minimal ingredients, handled with care, can create something truly spectacular. This pie is perfect for family dinners, potlucks, movie nights, or simply as a comforting treat to enjoy after a long day. It’s a versatile dessert that brings smiles and togetherness, a true cornerstone of happy kitchen memories.
Ingredients Needed to Make No Bake Peanut Butter Pie
Gather these simple treasures from your pantry and kitchen to bring this delightful pie to life:
- 1.5 cups graham cracker crumbs (about 10-12 full graham crackers, finely crushed)
- 0.5 cups unsalted butter, melted (a comforting warmth for the crust)
- 1 cup creamy peanut butter (your favorite smooth variety will work beautifully)
- 1 cup powdered sugar (for that air-light sweetness)
- 1 cup heavy whipping cream (to create that luscious, cloud-like texture)
- 1 teaspoon vanilla extract (a subtle whisper of fragrant warmth)
Instructions to Make No Bake Peanut Butter Pie – Step by Step
Let’s begin this journey of creating pure comfort, one simple step at a time.
Step 1: First, prepare the foundation of our pie. In a medium bowl, combine the graham cracker crumbs with the melted unsalted butter. Stir them together until the crumbs are evenly moistened, resembling wet sand. This gentle mixing ensures the crust will hold its shape beautifully. Next, take your 9-inch pie pan and press this mixture firmly and evenly onto the bottom and up the sides of the pan. Using the back of a spoon or a flat-bottomed glass helps create a neat, compact crust. This crust is the quiet stage for the creamy symphony to come.
Step 2: Now, let’s craft the heart of our pie – the peanut butter filling. In a separate, spacious bowl, add your creamy peanut butter and the powdered sugar. Use a sturdy spoon or a hand mixer on a low speed to combine these two ingredients. Continue mixing until the mixture is smooth and well incorporated, with no pockets of dry sugar remaining. It should have a rich, thick consistency, holding the promise of true peanut butter goodness.
Step 3: In yet another clean bowl, it’s time to aerate the cream. Pour in the cold heavy whipping cream and add the teaspoon of vanilla extract. Using a hand mixer or a stand mixer fitted with the whisk attachment, begin whipping the cream on medium speed. Gradually increase the speed to high. Watch as the cream transforms, thickening and developing stiff peaks that hold their shape when the beaters are lifted. This is where the lightness and dreamy texture are born.
Step 4: Now, we gently combine the elements. Take your beautifully whipped cream and carefully fold it into the peanut butter and powdered sugar mixture. Use a rubber spatula and a light hand, folding in a motion that lifts from the bottom and folds over the top. Continue this until the cream is just incorporated, leaving you with a uniform, airy, and lusciously smooth filling. Be careful not to overmix; we want to preserve that lovely lightness.
Step 5: The moment of truth arrives as we assemble our masterpiece. Pour the creamy peanut butter filling into the prepared graham cracker crust. Gently spread the filling evenly, using your spatula to create a smooth, inviting surface. Take a moment to admire your work; this pie is a testament to simple ingredients transformed into pure delight. It’s ready for its transformation.
Step 6: Finally, let the magic of stillness work its wonder. Cover the pie loosely with plastic wrap and place it in the refrigerator. Allow it to chill for at least 4 hours, or ideally, until the filling is completely set and firm to the touch. This patient chilling is crucial for achieving that perfect, sliceable texture. Once set, your No Bake Peanut Butter Pie is ready to be shared and savored.
Chef’s Tips for a Perfect Result
- Ensure your heavy whipping cream is very cold; this is key to achieving stiff peaks and a lighter filling.
- When pressing the crust, use the bottom of a measuring cup or a flat glass to create an even, compact layer that won’t crumble.
- For an even richer peanut butter flavor, use natural peanut butter that has been stirred well, but avoid oily ones for a better texture.
- Gently fold the whipped cream into the peanut butter mixture to maintain the airiness of the filling.
- Chill the pie adequately; patience here is rewarded with a perfectly set, sliceable dessert.
- Taste the peanut butter filling before chilling and adjust sweetness or peanut butter intensity if needed.
Variations and Substitutions
Every kitchen has its own unique rhythm, and this pie is wonderfully adaptable to suit your needs and preferences.
- Chocolate Lover’s Dream: Swirl in a few tablespoons of melted, cooled chocolate into the peanut butter mixture before folding in the whipped cream for a delightful chocolate-peanut butter embrace.
- Crunchy Crust Alternative: Instead of graham crackers, try using crushed chocolate cookies or even finely chopped pretzels for a sweet and salty contrast.
- Peanut Butter Cup Delight: Gently fold in chopped peanut butter cups into the filling just before assembling the pie for bursts of chocolatey, peanut buttery goodness in every bite.
- Dairy-Free Option: Use a dairy-free creamy peanut butter and substitute the heavy whipping cream with a chilled can of full-fat coconut cream (scoop out only the solid part), whipped until stiff.
- Nutty Crust Upgrade: Mix in a quarter cup of finely chopped peanuts or pecans into the graham cracker crust mixture for added texture and flavor complexity.
How to Serve and Pair
Serving this No Bake Peanut Butter Pie is a joy, as it’s naturally inviting and universally loved. Present it chilled, directly from the refrigerator, allowing its creamy texture to truly shine. A simple dollop of freshly whipped cream or a sprinkle of chopped roasted peanuts can add a lovely finishing touch, enhancing both its visual appeal and flavor profile. For an extra touch of indulgence, consider a drizzle of chocolate sauce or a scattering of miniature peanut butter cups over the top.
This pie pairs beautifully with a cold glass of milk, a warm cup of coffee, or even a robust herbal tea. It’s a perfect centerpiece for any casual gathering, family dinner, birthday celebration, or simply as a comforting dessert to brighten any day. Its timeless appeal makes it a dependable choice for both weeknight treats and more special occasions, always bringing a sense of warmth and satisfaction.
Storage and Reheating
Refrigerator
Leftover No Bake Peanut Butter Pie should be stored in an airtight container in the refrigerator to maintain its freshness and texture. It will keep well for up to 3 to 4 days. Cover it loosely if using the original pie dish to prevent it from drying out.
Freezer
While this pie is best enjoyed fresh, it can be frozen for longer storage. Wrap individual slices or the whole pie tightly in plastic wrap, then in a layer of aluminum foil. Freeze for up to 1 month. Thaw completely in the refrigerator before serving.
Room Temperature
Due to its creamy, dairy-based filling, this pie is not meant to be stored at room temperature for extended periods. It should be kept chilled to prevent spoilage and maintain its optimal texture.
Reheating
This No Bake Peanut Butter Pie is designed to be served cold and does not require reheating. Reheating would alter its intended creamy, chilled texture. If serving from frozen, ensure it thaws fully in the refrigerator beforehand.
Frequently Asked Questions (FAQ)
Can I substitute the peanut butter in this recipe?
Yes, you can substitute creamy peanut butter with almond butter or cashew butter for a slightly different nutty flavor profile. The texture might vary subtly based on the nut butter’s natural oil content.
How do I know when my No Bake Peanut Butter Pie is ready?
Your pie is ready when the filling is firm and set. When gently pressed, it should feel solid, not soft or jiggly, indicating it has chilled sufficiently.
My pie filling is too soft, what went wrong?
A soft filling often means it hasn’t chilled long enough, or the cream wasn’t whipped to stiff peaks. Ensure adequate chilling time and properly whipped cream for a firm set.
Can I make this No Bake Peanut Butter Pie the day before serving?
Absolutely, making this pie the day before is highly recommended. It allows ample time for the filling to set perfectly, ensuring the best texture and flavor.
What are the best toppings or ways to customize my No Bake Peanut Butter Pie?
Classic toppings include whipped cream, chocolate shavings, or chopped peanuts. For a gourmet touch, consider a salted caramel drizzle or fresh berries.
CONCLUSION
This No Bake Peanut Butter Pie is a heartwarming invitation to simple, pure joy. Its dreamy, creamy texture and rich peanut butter flavor offer unparalleled comfort and satisfaction. Embrace the ease and delight of creating this unforgettable dessert in your own kitchen. The irresistible signature flavor promises a moment of pure bliss that will linger on your palate and in your heart.
Print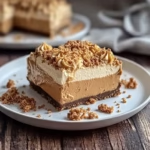
No Bake Peanut Butter Pie: A Dreamy, Creamy Delight
- Prep Time: 15 minutes
- Cook Time: 0 minutes
- Total Time: 4 hours
- Yield: 8 servings 1x
- Category: Dessert
- Method: No-Bake
- Cuisine: American
- Diet: Vegetarian
Description
A delightful and easy no-bake dessert combining creamy peanut butter filling with a crunchy graham cracker crust, perfect for warm days or any occasion.
Ingredients
For the Crust
- 1.5 cups graham cracker crumbs
- 0.5 cups unsalted butter, melted
For the Filling
- 1 cup creamy peanut butter
- 1 cup powdered sugar
- 1 cup heavy whipping cream
- 1 teaspoon vanilla extract
Instructions
1. In a bowl, combine graham cracker crumbs and melted butter. Press the mixture into the bottom of a pie pan to form the crust.
2. In a separate bowl, mix peanut butter and powdered sugar until well combined.
3. In another bowl, whip heavy cream and vanilla extract until stiff peaks form.
4. Gently fold the whipped cream into the peanut butter mixture until fully combined.
5. Pour the filling into the prepared crust and smooth out the top.
6. Refrigerate for at least 4 hours or until set.
Notes
Serve cold from the refrigerator for the best taste.
Top slices with a dollop of whipped cream or crushed peanuts if desired.
Store leftovers covered in the refrigerator for up to 1 week.
Nutrition
- Serving Size: 1 slice
- Calories: 400
- Sugar: 18g
- Sodium: 200mg
- Fat: 28g
- Saturated Fat: 15g
- Unsaturated Fat: 13g
- Trans Fat: 0g
- Carbohydrates: 35g
- Fiber: 2g
- Protein: 8g